Hey, welcome. Consider following MSV on Twitter and subscribing to the RSS feed, or sign up for email updates right over here.

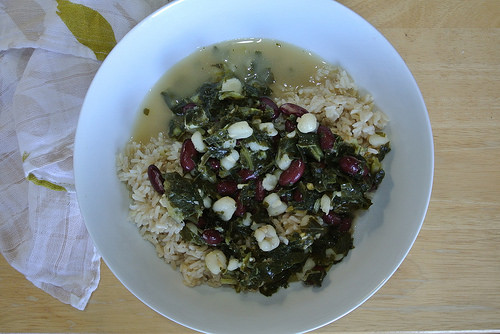
Let your spice rack do the heavy lifting in this hearty bean dish, and you have a dead-simple, highly flavorful plate of comfort and nutrition. Add to that the unbeatable ease of frozen cooked potatoes, and all you need is the energy to stir, chop a little pepper, and slice a couple scallions. Easy brunch, hello.

This recipe alone feeds two generously, but you can stretch it into a meal for more by tucking this mixture into warm corn tortillas and adding a green side salad.
You may notice the recipe doesn't go easy on the seasoning, but it'll all make sense once you spoon on the cool, creamy, and gently zippy yogurt. It's not the kind of condiment you'll want to eat off the spoon, but the good news is, that's not what condiments are for. And this one is a golden potato's best friend.
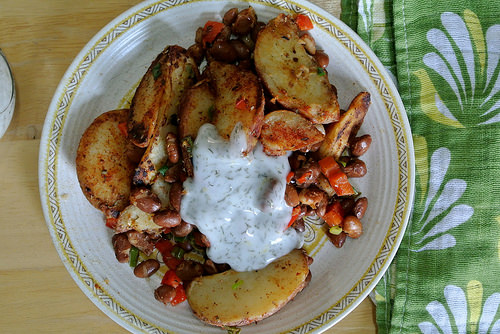
Spiced Potato-Pinto Hash with Lemon-Dill Yogurt
serves 2 generously
1 TBSP oil
1 lb frozen red potato skin-on wedges (or other variety—look for a brand that contains nothing more than potatoes, oil, and salt; if you can find plain frozen potato wedges or dice, go for that)
1 small red pepper (or half of a large)
2 scallions
1 15-oz can pinto beans (preferably reduced-sodium)
1/2 tsp smoked paprika
1/2 tsp dried oregano
1/4 tsp fine sea or kosher salt
1/4 tsp dried thyme
1/4 tsp ground cumin
1/4 tsp ground coriander
1/4 tsp garlic powder
1/8 tsp ground cayenne
small pinch ground cloves
small pinch ground cinnamon
Lemon-Dill Yogurt, to serve, recipe follows
Heat oil in a large nonstick skillet over medium heat. Add potato wedges in one layer (as much as possible). Let cook, undisturbed, five minutes (but let your nose be your guide—if you have smaller bits, it may not need the full five). Flip wedges. Let cook another 4-5 minutes, and flip again. Repeat until all wedges are golden, about 15 minutes total, or longer, if needed.
While the potatoes cook, measure out the spices into a small bowl and set aside. Trim pepper and chop into small dice. Slice the white and green parts of the scallions.
When the potatoes are golden, add pepper and scallions to the skillet. Stir to combine and let cook while you open the beans. Rinse them in a sieve, shake off excess water, and add to skillet. Add spices. Stir to coat and let cook, stirring frequently, until peppers are beginning to soften and the beans have warmed through, about 3 minutes. Serve warm with lemon-dill yogurt at the table.
Lemon-Dill Yogurt
yields 1/2 cup
1/2 cup plain nondairy yogurt(*)
1 tsp dried dill
1/2 tsp lemon zest
1/2 tsp lemon juice
1/4 tsp fine sea or kosher salt
Stir all ingredients until well combined. Chill until ready to use.
(*Whole Soy Co. brand yogurt is strongly recommended. If you can't find that, So Delicious is a good substitute. For both brands, either the plain or unsweetened varieties should work.)