Comment

Party Animals No. 33: Roasted Veg Dinner for Four

Hey, welcome. Consider following us on Twitter and subscribing to our RSS feed, or sign up for email updates right over here.

Hopes of posting a new recipe this week were dashed when a bit of equipment failure in the MSV kitchen (which occurred right in the middle of preparing last week's feast, no less) meant mostly not touching anything in there for a few days until it got sorted out.

So, instead, a recap of a dinner for six that became a dinner for four when a couple of friends came over to chow down on a bunch of vegetables a couple week back. To start, sparkling wine with sage-ginger syrup. The instructions suggest adding an ounce or two of syrup, which makes for a decidedly, well, syrupy drink if you're going with a standard six-ounce pour. Even an ounce was a bit much, which could possibly be overcome with a simple squeeze of citrus, but why bother when half an ounce makes for a really lovely, subtle drink while still highlighting the wine? Remember this one for every fall and winter entertaining opportunity ever.

Then onto nibbles, both from Pure Vegan. The orange salad in the large bowl is more or less the most expensive fruit salad ever: oranges, dates, pistachios, and on. Nice, if you can afford it. Great textures, lovely seasonings. In the smaller bowl is a mix of olives and almonds warmed with garlic and thyme. Very good, naturally.

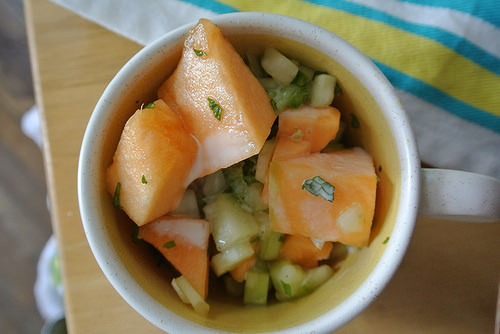
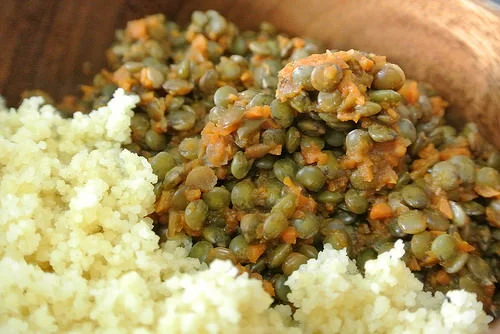
The roasted vegetables come also from Pure Vegan. Each is roasted separately with an herb: carrots with parsley, green beans with thyme, potatoes with rosemary, and pearl onions and garlic with sage, the last of which come out particularly stunning. The book suggests serving these as handheld items with a vegan aioli for dipping. For a more sit-down version here, black beans were roasted with cumin and smoked salt along with everything else, paired with rice, and everyone had a bowl to pile all the eats into, over which they could drizzle a vibrant dressing of lemon, parsley, and pine nuts.

And for something sweet to finish, poached pears and bourbon-masala chai ganache served with store-bought lemon sorbet.

Back next week with a new recipe, at last.

Comment

Comment

Party Animals No. 32: Not-Thanksgiving 2014

Hey, welcome. Consider following us on Twitter and subscribing to our RSS feed, or sign up for email updates right over here.

Long story short, the MSV house didn't see the same Thanksgiving crowd it has for the last half-dozen years. But that didn't get in the way of breaking out the bubbly, lighting candles, tying on some festive ribbons, and cooking up a heap of food a day after most of the folks we know. And it went a little something like this:

(That's tofu-pecan meatloaf, wild mushroom-chickpea gravy, biscuits, smashed potatoes.)

(Cranberry relish, cornbread-spiced walnut-fig dressing, and a green salad with lots grapefruit and oranges and a black cherry dressing.)

Hope you've all had a generous week, whether you celebrate fall harvest or not. Below is an apple strudel waiting to be dusted with powdered sugar and served with vegan vanilla ice cream, so until next week, thanks for reading.

Comment

Comment

Sweet Tea-Marinated Cornmeal-Crusted Tofu Tortilla Stack (or Taco)

Hey, welcome. Consider following us on Twitter and subscribing to our RSS feed, or sign up for email updates right over here.

Sweet, tender, golden slices of tofu, creamy chunks of avocado, and a tart relish made from brilliant carrots and perky poblano: just add tortillas (preferably fresh), and dig in.

There are a few steps here, mostly due to pressing the tofu, then marinating the tofu, and of course, making the tortillas. Nothing's difficult (and the firmer your tofu, the easier it is to throw together), but it all takes time, so save this one for a day you're in the mood to cook, or when you have a friend on hand to sip wine with you to pass the time effortlessly. In a pinch, use store-bought tortillas.

Finally, these make great little stacks with the thicker tortillas that come out of the MSV kitchen but you could easily wrap this into a taco with commercial tortillas. Or if you're feeling froggy, make sopes, and spread on a generous layer of refried beans before putting down the tofu for a dinner dreams are made of.

Sweet Tea-Marinated Cornmeal-Crusted Tofu Tortilla Stack (or Taco)

Print the recipe

yields 8 stacks/tacos

For the tofu:

14 oz extra or super firm tofu, drained

1 1/2 cups water

1 family-size black tea bag

1/4 cup natural cane sugar (evaporated cane juice)

pinch salt

juice of half a lime

1/2 cup cornmeal

3/4 tsp fine sea or kosher salt

freshly cracked black pepper

For the slaw:

1 large poblano

1 very large or 2 small carrots (about 4 oz total weight)

juice of half a lime

1 TBSP olive oil

1/4 tsp ground cumin

1/4 tsp ground coriander

1/4 tsp smoked paprika

pinch salt

To serve:

8 corn tortillas

flesh of 1 avocado, sliced into eighths

hot sauce (optional)

Wrap the tofu in a folded, clean (non-terry) kitchen towel and place a heavy object on top. Let press 20 minutes.

Meanwhile, make tortillas or heat prepared tortillas, if using. Hold in a warm oven.

When tofu is almost done pressing, heat 1 1/2 cups water and place tea bag in a wide, shallow, heatproof dish. Pour hot water over bag and let steep 3 minutes. Meanwhile, slice tofu into 8 rectangles. Remove tea bag, and add sugar, salt, and lime. Whisk until sugar is dissolved. Add tofu in a single layer and let marinate 30 minutes.

Meanwhile, shred/julienne the carrot and poblano (feel free to use a julienne or vegetable peeler, or a good knife if you're comfortable with one). Whisk together lime, oil, cumin, coriander, and pinch salt. Pour over vegetables and toss well. It will be quite tart, but will mellow a bit as it sits.

Heat a large nonstick skillet or griddle over medium heat. Whisk together cornmeal, salt, and a crack of black pepper. When cooking surface is hot, gently remove a slice of tofu from the marinade, let excess drip off, dredge in cornmeal, and cook about 4 minutes on each side, until crisp and browned in spots. Repeat with all slices, working in batches (in a large skillet, four slices should fit comfortably at one time).

Give the slaw one last toss and drain off excess dressing. To serve as stacks, layer tortilla, tofu, and avocado, then top with slaw. Serve with hot sauce, if desired.

Comment

Comment

Savory Barley, Polenta, and Mushroom Breakfast Porridge (from the Slow Cooker)

Hey, welcome. Consider following us on Twitter and subscribing to our RSS feed, or sign up for email updates from the Home Page.

A little chopping in the evening gets you a savory, hot breakfast upon waking. The barley becomes very creamy, cubes of convenient prepared polenta grow tender and take on flavor during the long cook without losing their shape, and simple marinated mushrooms provide contrasting color and a bit of texture. Scallions and bell pepper add a shot of green and their mildly bitter touch, cutting through the starch to help balance the bowl.

Savory Barley, Polenta, and Mushroom Breakfast Porridge (from the Slow Cooker)

Print the recipe

serves 6-8

8 oz button mushrooms

4 scallions

2 TBSP reduced-sodium tamari

2 no-salt-added vegetable bouillon cubes

5 cups water

1 green bell pepper

1 18-oz tube prepared polenta

1 cup dried pearled barley (not quick-cooking)

1 tsp rubbed sage

1/2 tsp dried marjoram

1/2 tsp fine sea or kosher salt

1/4 tsp celery seed

1/4 tsp crushed red pepper

freshly cracked black pepper, to taste

With a damp kitchen towel, wipe mushrooms clean, discard tough stems, and quarter caps. Chop the white and tender green parts of scallions. Toss both with tamari and let sit 1 hour.

Meanwhile, dissolve bouillon in water, cover with clean kitchen towel, and set aside until ready to assemble. Trim and chop pepper into small dice and add to slow cooker. Chop polenta into bite-size cubes (about 3/4-inch) and set aside.

Before bed, add barley, all spices except pepper, prepared broth, and marinated mushrooms (include any unabsorbed tamari) to the slow cooker. Stir to combine. Add polenta, cover, and cook on low 8-9 hours, then remove crock from heating base, if possible. At this point, there will be some standing liquid in the bottom of the crock, but this will thicken as it stands. Remove lid and crack black pepper, to taste, over the top. Stir well. Let stand, uncovered, about 15 minutes before serving. Garnish with chopped scallion tops, if desired.

Leftovers can be reheated on the stove with broth (or possibly nondairy milk) to thin.

Comment

Comment

Hitting the Books No. 2: Easy Dinner Pies from The Vegan Stoner and Colleen Patrick-Goudreau

Hey, welcome. Consider following us on Twitter and subscribing to our RSS feed, or sign up for email updates from the Home Page.

Welcome back to Hitting the Books. It's another two-fer, featuring two low-stress meals. First up, a dish from Colleen Patrick-Goudrau's The Vegan Table (available at Lawson-McGhee under 641.5636 PATR).

Sweet browned onions and wilted greens (here spinach, though the recipe calls for chard) are combined with intense Kalamata olives and briny little capers to create one tasty pile of eats. Even better, it's gives great depth of flavor while being friendly to even the newest of cooks. If you can slice an onion and stir, you're in.

The book presents this melange as a side dish, but for you bowl-of-food lovers, it seems just the thing to heap over any creamy starch, like polenta/grits or mashed potatoes. But a note on the recipe says it makes a fabulous pizza topping, so here we are. Definitely recommended.

And just imagine what a little crispy tempeh might do for the whole thing.

Next, another dip into The Vegan Stoner Cookbook. This falafel pie--complete with yogurt-cucumber sauce--was slightly less fun than expected, but it did turn what would've been a dinner of hummus and crudite into something more satisfying, with very little effort. Just add water to falafel mix for the crust, chop your veg and puree the sauce while that bakes, and done.

A note on the recipe suggests tucking pieces of the pie into pita, which is probably how this eats best. Maybe next time. In any event, it's dead simple, and still pretty fun. If you have kids, this would be a great one to get them cooking with. If you're comfortable explaining to them the tomato with the drugs on the cover, anyway.

As always, thanks for reading, and see you next week with a new recipe.

About Hitting the Books: You know that shelf in your house with all the great cookbooks you don't get to nearly as often as you'd like? Yeah, there's one of those over here, too. The Hitting the Books series allows for occasional opportunities to dig into that shelf and highlight some handy cookbooks.

Comment

Comment

Potato and Garlic Phyllo Pie

Hey, welcome. Consider following us on Twitter and subscribing to our RSS feed, or sign up for email updates from the Home Page.

This one's a little love note to garlic and potatoes, accented with parsley. It's easy to approach potatoes as a delivery system for fat and salt, but they're treated a little more gently here to let their earthy charm shine through.

And because it's flaky and golden and lovely, wrap up this natural pair in a little phyllo for a pretty presentation. Or for a shortcut, skip the phyllo, bake everything in a small dish with a good drizzle of olive oil or melted butter over the top (as a bonus, maybe add MSV's irresistible savory nut crumble), and you've still got a totally tasty side on your hands. Note that if you use butter instead of oil, you may want to reduce the salt a touch.

The pie is probably best warm or at room temperature, but you can dig into it when hot or cold, too. It's ready for breakfast, lunch, or dinner, as you please. Plus, naturally, brunch. Serve with soup--maybe one made creamy with pureed beans--for a satisfying meal.

Potato and Garlic Phyllo Pie

Print the recipe

serves 4

1 lb russet potato, sliced very thinly (app. 1/16 inch)

3 cloves garlic, minced

1/4 cup loosely packed flat-leaf parsley, finely chopped

3/4 tsp fine sea or kosher salt

1/4 tsp freshly grated nutmeg

freshly cracked black pepper, to taste

8 sheets frozen phyllo, thawed

1/4 cup olive oil, for brushing

1/3 cup plain soymilk

2 TBSP nutritional yeast

2 tsp corn starch

Heat oven to 350. Wet and ring out a clean kitchen towel and set aside.

In a mixing bowl, combine potatoes, garlic, parsley, salt, nutmeg, and pepper. Stir to combine well.

Place one sheet of phyllo in the bottom of a 9-inch round nonstick springform pan so that half the sheet covers the bottom and the rest of the sheet runs up and over the side. Working quickly, brush the bottom with oil, turn the pan a quarter-turn and lay another sheet in the same way. Repeat with all 8 sheets, with the brushed oil and quarter-turn between each sheet (this will leave you with sheets hanging all around the pan). Pour the potatoes in, spread into an even layer, and cover with the damp towel to help keep the phyllo from drying out.

Still working quickly, whisk together the milk, nutritional yeast, and corn starch. Remove the towel and pour the mixture evenly over potatoes.

Fold in each of the overhanging portions of the sheets of phyllo, brushing with oil between each layer (if they crack here and there, no big deal, just brush with oil and keep on). When all sheets have been folded in, brush the top layer thoroughly with oil.

Bake until the potatoes are tender and the phyllo is golden, 55-60 minutes.

Comment

Comment

Dead Simple Apple Skillet with Lemon and Sugar

Hey, welcome. Consider following us on Twitter and subscribing to our RSS feed, or sign up for email updates from the Home Page.

This satisfying apple dessert combines the clean presentation of pie with the ease and comfort of clafoutis. Perfect for really easy fall entertaining, or any lazy morning around the house.

All this one takes is a brief saute and a quick spin with the immersion blender to produce a silky batter that's poured over the simply spiced apples. It quickly bakes up moist and gently chewy, something like a dumpling. The apples are cooked quickly so they keep some bite to contrast with the soft dough. A squeeze of lemon and a dusting of sugar provide an elegant finish.

Dead Simple Apple Skillet with Lemon and Sugar

Print the recipe

serves 4-6

For the apples:

2 TBSP veg oil or nondairy butter

1 sweet apple of choice (we used Honeycrisp), cored, peeled and cut into 1/4-inch slices

1/4 cup turbinado (or brown sugar)

1/2 tsp ground cinnamon

For the batter:

1/2 cup apple sauce

2 TBSP canola oil

1/2 cup plain soy milk

1/4 tsp vanilla extract

1/2 cup all-purpose flour

1/4 tsp fine sea or kosher salt

1/2 tsp baking powder

To serve:

1 lemon, cut into wedges

powdered sugar, to taste

Heat oven to 425.

In an ovenproof 8-inch skillet, heat 2 TBSP oil or butter over medium heat. Add apples, brown sugar, and cinnamon. Carefully stir--the skillet will be crowded at first until the apples begin to soften--to combine the ingredients. Cook, stirring often, until apples have softened, but are still firm, about 5 minutes. Remove from heat and spread the apples into an even layer.

Combine all batter ingredients in a quart jar and puree with an immersion blender (alternately, a small blender should work) just until smooth. The batter should be silky and thick, but pourable. Pour the batter over apples in the skillet, smooth, and bake until bubbly and golden at the edges, 18-20 minutes.

Let cool before cutting. Sprinkle individual slices with lemon juice and powdered sugar.

Comment

Comment

Roasted Acorn Squash and Poblano-Cilantro Pesto over Black Beans

Hey, welcome. Consider following us on Twitter and subscribing to our RSS feed, or sign up for email updates from the Home Page.

This one screams fall: sweet, tender acorn squash, earthy and robust black beans, all topped off with a squeeze of lime and a decidedly perky pesto made from crisp poblanos and fragrant cilantro.

The beans cook in about the same amount of time it takes to roast the squash, so all you have to do is blend up the pesto while those two cook away. Not quick, but easy. Or, since dried beans can be unpredictable in their cooking time, feel free to cook the beans in advance on a day you're doing other things around the house. Having beans ready to go is always a good move, anyway.

Roasted Acorn Squash and Poblano-Cilantro Pesto over Black Beans

Print the recipe

serves 4-6

For the black beans:

1 lb dried black beans, soaked 8 hours, drained and rinsed well

1 tsp chili powder

1 tsp dried oregano

1 dried bay leaf

4 cups water, divided

1 TBSP ground dark roast coffee

3/4 tsp fine sea or kosher salt

1/4 cup chickpea flour

For the acorn squash:

1 small acorn squash, halved and seeded

1 tsp oil

salt and pepper

For the pesto:

2 small poblanos (or 1 large), seeded, veined, and roughly chopped

1/2 cup loosely packed cilantro

2 tsp red miso

1/4 cup raw pepitas

1 clove garlic, peeled

1/4 cup olive oil, plus more, if needed

To serve:

1 lime, cut into wedges

Heat oven to 400.

To prepare the beans, heat over high heat in a covered pot the drained, soaked beans, chili powder, oregano, and bay leaf with 3 cups water. Meanwhile, heat the remaining 1 cup water in a kettle and add ground coffee to a french press. Steep 5 minutes and add coffee to bean pot (discard grounds). (Alternately, brew 1 cup weak coffee in a drip machine and add to pot.) Reduce heat to the low end of medium-low, cock lid, and cook until tender, about an hour, or as needed, stirring occasionally. Discard bay leaf.

Add squash cut-side up to a small pan and roast until just tender, 30-40 minutes.

While the squash and beans cook, puree all pesto ingredients until smooth. Thin with additional oil, if desired.

Remove squash from oven, carefully cut into 3/4-inch slices. Heat the broiler, sprinkle salt and pepper over the squash slices, and return to the oven 8 inches from the heat source. Cook until tender and browned at the edges, about 10 minutes.

When the beans are tender, add 3/4 tsp salt. Spoon out 1/2 cup of cooking liquid and whisk in chickpea flour. Increase pot heat to medium-low. Once simmering strongly, stir the chickpea slurry into the pot and let cook until slightly thickened, about 5 minutes.

Spoon beans into a wide, shallow bowl, place a squash ring over them, squeeze the juice of a lime wedge over it all, and top with pesto.

Comment

Comment

Hitting the Books No. 1: Tempeh from Isa Does It and The Vegan Stoner

Hey, welcome. Consider following us on Twitter and subscribing to our RSS feed, or sign up for email updates from the Home Page.

New series! You know that shelf in your house with all the great cookbooks you don't get to nearly as often as you like? Yeah, there's one of those over here, too. The Hitting the Books series will allow for occasional opportunities to dig into that shelf and highlight some handy cookbooks.

This first HtB post is all about comfort food. First up: Red-Hot BLTs from Isa Does It (available at Lawson-McGhee Library: 641.5636 MOSK) by Isa Chandra Moskowitz.

A total win for hot sauce lovers, this one features a generous amount of Frank's and was just the thing to perk up a chilled day when it seemed like it might never stop raining. Nothing combats a rainy day like vinegar and cayenne. This is among the simplest recipes in the book, but the timing was right. Isa's book will definitely pop up here again, because there's a long list of recipes to jump on, sooner rather than later.

Since tomato season is done for, above is a Bell pepper (roasted red), Lettuce, and Tempeh sandwich on whole grain. The sweetness of the pepper is a nice foil for the spicy tempeh, and a great autumn alternative to the traditional BLT. The mayo is homemade from the next book, The Vegan Stoner Cookbook by the Vegan Stoner team (pictured up top).

The mayo is blissfully straightforward, like traditional mayonnaise is: oil, liquid protein (here, soy milk), and vinegar. Plus, seasonings you can easily adjust to get your preferred blend. Whiz with an immersion blender, and you have fresh mayo in a snap. The no-fuss style of the Vegan Stoner folks is completely genius. Come for the great illustrations, stay for the food.

With vegan mayonnaise already made, tartar sauce couldn't be far behind. Because it contains not only capers, but also cornichons (we used this recipe). So Vegan Stoner's tempeh and chips was the next recipe on deck. Crispy, and hearty, and totally fried, this one made a confirmed tempeh-hater pal totally happy. Again, totally fried.

The thick slabs of tempeh get nice and tender (and not at all bitter, without pre-steaming), surrounded by a golden blend of flour, cornmeal, breadcrumbs, and in this version, a healthy sprinkle of Old Bay. Roast up a pile of potatoes (mixed is lovely, or use frozen fries, as the book directs), and tuck into some serious comfort, which is what this book is all about.

See you next week with a new recipe. In the meantime, happy reading.

Comment

2 Comments

Phyllo Flodni (and Authenticity) for MSV's Second Anniversary

Hey, welcome. Consider following us on Twitter and subscribing to our RSS feed, or sign up for email updates from the Home Page.

MSV turns two! Thanks a heap for being here for it. Like last year, the format of today's celebratory post is different than normal, in that you'll get a story about the recipe. Plus, an identity. I'm Amanda. Right now, I do all the stuff around MSV, and today's recipe is several years in the making for me.

When my friend Julie fed her version of flodni to me nearly a decade ago, I was a minor mess of a person. Some of that is common to folks who are, as I was, in their early twenties—questionable laundry practices, being stuck in a serious relationship I didn’t know how to take seriously. Some of it was less common, like grappling with what I hadn’t yet recognized as chronic anxiety, including social anxiety, which contributed to my habits of working 60-hour weeks, indulging in very regular drinking binges, and being terrified of most food.

I first thought of Julie as a smartass, a really smart one, but in contrast to my inability to treat anything at all seriously back then, I discovered Julie had (and still has) an enviable intellectual curiosity and a deep capacity for sincerity in between cracking wise. She was older than I, had it together, and one year, invited me over to witness the annual tradition of her and her friend making a giant holiday pastry (you can read her writing about that here). I agreed, but, as ever, had to work late. By the time I showed up, exhausted, more than a little intimated, and probably wearing dirty jeans, Julie met me at the door, saying her friend was under the weather and had taken off as soon as the pan was in the oven.

I was embarrassed about having missed the whole thing, and my instinct was to run back to my unhappy home, but Julie was a peach about it. She asked me in, poured me a glass of wine, kept the conversation going (to this day, not my forte), and when the flodni had cooled sufficiently, cut me a slice. Still just warm, fruity, and earthy, it was a generous thing, and I was grateful. Despite a deep conviction that I didn’t deserve it, in clumsy circumstances, I felt welcomed--maybe even a little fussed over--by someone I thought a lot of, and at a time in my life when I probably hadn’t dared to eat a dessert for some time.

So flodni stuck with me. I asked Julie for the recipe two years after that first taste. She sent it to me, and I still didn’t get around to making it. It involves hand-grinding a pound of poppy seeds, after all. But a couple months ago, I realized it might be the perfect labor of love for MSV’s second anniversary. And still I didn’t get around to it. Not the way I meant to, anyway.

Really, it’s a small miracle this thing got made at all. I wasn’t sure MSV would get an anniversary post. A home project is eating up all my discretionary income, and I’ve been spending the last few months cooking large batches of inexpensive ingredients, and taking fewer chances with the fresh ingredients I do splurge on. It doesn’t make for the most interesting blogging and, for someone neither Hungarian nor Jewish, takes all the urgency out of veganizing Hungarian Jewish egg pastry.

But Julie unwittingly helped me to loosen up again. One of her funny notes from six years ago:

“For God's sake, do NOT buy the prepared stuff [poppy seed filling]. It only counts if you sweated and ground poppyseeds [sic].”

I swore she had a line about grunting being a necessary ingredient, but I wasn’t able to track that down in writing.

When I got in touch to let her know I might want to blog a version of her recipe, she offered encouragement and again provided some tips, including this note about the poppy paste:

“I use the canned shit every time now, grinding just enough of my own seeds to stave off the judgmental glare of my dead grandmother.”

[Update: So, hey, it’s 2018 now—Christmas Eve 2018, in fact—and Julie got in touch to update me on the poppy grinding process she uses now. But I want to let this story be told as it was at the time for me in 2014. Update appears at the end, just before the recipe. —A]

Priorities change all the time. I wanted to do justice to this beast, but I admitted to myself that the labor—a big part of Julie’s story about making this huge dessert every year—didn’t have to be part of mine. In fact, missing out on the labor was my story, and what was important to me about flodni was a memory of warmth in a chaotic, tiring, deeply insecure time. That memory can be celebrated—at long last—without spending tons of money and energy developing relatively niche vegan pastry. Because, hey, baking isn’t even my thing.

There’s another part of Julie’s story, a moral to the dessert: you take the bitter with the sweet. Each filling ingredient—the decidedly un-sweet walnuts, poppy seeds, and tart apple—is mixed with sugar and sprinkled with lemon before being layered between rich pastry. And when she originally sent me the recipe, she started her email with this line:

“OK, I have the wrinkled, discolored note paper before me, withdrawn from its secure place (stuck in the pages of a grease-stained Greek cookbook).”

No way using processed, pre-sweetened poppy paste diminishes any of that.

Make no mistake, history matters, and our stories matter. Knowing where a dish comes from can make us think about the circumstances it came from. It can make us feel like we’re participating in something bigger than our own small lives. But recording history is messy, and I think it’s also important to acknowledge that we’re likely viewing only part of the dish’s story. Choosing any one version to the exclusion of all other considerations shouldn’t be done unquestioningly, at the very least. I don’t believe authenticity should be pursued to the detriment of creatures weaker than I am, who rely on me to define their roles in the world, to decide how and when they live and die.

So here I present an entirely unfaithful reproduction of flodni. Changes abound, one from Julie, most from me. First, I’m cutting this recipe down to a quarter of what Julie makes. Second, Julie’s version strays from the common construction. I found most recipes include three thick layers of filling, whereas hers, which I’m using, breaks it up into six. And as the title of the recipe announces, I skipped making my own pastry altogether and enlisted convenient frozen phyllo.

Then there are the poppy seeds. There’s a specialty grinder for just this thing, but I didn’t want to insist on an appliance of that sort here. I ultimately took a cue from modern Indian cooking, grinding poppy seeds well in a coffee grinder and mixing the powder with apple juice to make a paste before finishing them off in the food processor. Julie’s grandmother gets no deference this way, and it can’t be as smooth as the canned shit, but it gets it done.

Finally, I found online a version from a bakery that included a layer of plum jam, which I found knee-bucklingly enticing, so I swapped pureed prunes for the second apple layer. I consider this the most transgressive, since it disrupts the concept of the cake, but prunes are good. For a more traditional pastry, feel free to double the apple layer to replace the plum puree. Next time, I’ll likely do just that, because apples are good, too. It’s an earthy, fruity, generous dish either way, tasting thoroughly of winter celebration.

And for what it’s worth, I managed to splash lemon juice and oil on my copy of the recipe.

WINTER 2018 UPDATE: Julie says:

I abandoned the canned stuff almost as soon as I started using it when I discovered, thanks the miracle of the internet, that my family had made the poppyseed prep unnecessarily difficult. Long epic short, I learned to bring the poppyseeds in about 3 c water per 8 oz to a simmer, turn off the stove, cover the pot, set for 30 minutes, and then repeat the same process once. Then drain through a fine sieve or cheesecloth. They're a lot easier to pulverize that way. (Also, I mix them with condensed milk, but I am sure coconut milk would work as well.)

So there you have it. Still a bit of a process, but less grunting required than her original method, and the result is smoother than my stuff, I’m sure. I’m a little embarrassed at having to be given this method by someone else. After all, if anyone knows about soaking nuts and seeds to make creamy spreads, it’s the vegans, right? But that’s why we’re all in this together. Big thanks to Julie for getting in touch to keep this recipe as generous and user-friendly as possible. Happy counterfeit-flodni making, everyone. —A

Phyllo Flodni

Print the recipe

serves 6, adapted from my pal Julie's grandmother

1/2 cup (about 10) pitted prunes

1/2 cup apple juice, divided, plus another 3 TBSP

1 large lemon, cut into 8 wedges

4 oz poppy seeds

8 oz shelled, unsalted walnuts

4 TBSP natural cane sugar (evaporated cane juice), divided

1 Granny Smith apple

8 oz frozen phyllo sheets, thawed

1/4 cup melted nondairy butter or olive oil

Add the prunes and 1/4 cup apple juice to a small pot. Bring to a simmer over medium-high heat, reduce heat to medium-low, and keep at a steady simmer for 10 minutes, or until the prunes are very soft and the juice has reduced to a thin syrup. Carefully transfer pot contents to a quart jar, add 3 TBSP apple juice and the juice of 2 of the lemon wedges. Puree with an immersion blender. Set aside.

Grind the poppy seeds thoroughly in a coffee grinder (it's easiest to do it in two batches). Grind well, making sure you get a little clumping action to be sure you're releasing the oils. Transfer to a mixing bowl, stir in 1/4 cup apple juice, transfer to a food processor with 1 TBSP sugar and process for a total of 5 minutes, scraping the bowl as needed (every minute or so). Transfer back to the mixing bowl and set aside.

UPDATE: Julie now recommends the following process to make the poppy paste. I haven’t tried it, but I trust her experience, and I’m sure it creates a smoother paste than the textured mix I let ride when I posted this recipe. To make the poppy paste, bring the poppy seeds to a simmer in 1 1/2 cups water. Turn off the heat, and let sit, covered, 30 minutes. Repeat the process once. Drain through a fine sieve or cheesecloth before processing to a paste. /UPDATE

Wipe out processor bowl and grind the walnuts and 2 TBSP sugar finely. Set aside.

Peel and grate the apple into a bowl. Stir in 1 TBSP sugar.

Grease a 6-inch cake pan and preheat the oven to 350. Wet and wring out a clean kitchen towel to place over the phyllo to keep it from drying while it's not in use (i.e. while you're adding the filling layers to the pan).

Open the phyllo and use a pizza cutter to cut it into 6x6-inch squares (the rectangular stack is long enough so that you can cut two stacks of 6x6 squares--you should have no problem just cutting through the whole stack with the pizza cutter.) Have your liquid fat in a small bowl along with a brush.

Place one square in the bottom of the cake pan, brush it well with oil, and, working quickly, add another square. Repeat until you have laid five squares in the bottom (don't oil the top square), and cover your unused phyllo with the damp towel. Add half the walnut mixture to the pan, pressing it in evenly with your hands, squeeze the juice of a lemon wedge over the top, and add 3 squares of phyllo, brushing oil in between each layer. Press in half of the poppy mixture, squeeze a lemon wedge over it, repeat 3 phyllo squares, spread on all of the grated apple, squeeze on the lemon juice, and again with the 3 phyllo squares.

Repeat with the remaining nut and poppy layers, end with the pureed prunes, and top with 4 sheets of phyllo. Brush the top sheet thoroughly with oil.

Bake until golden and fragrant, 55-60 minutes. Allow to cool completely before cutting to allow the structure to solidify.

Traditional variation: omit the prune puree and double the apple mixture to use in its place.


Thank you all so much for reading. For those of you who prefer MSV's usual brevity and anonymity, next week will be back to normal style, with a feature to give me more time in the kitchen this fall with less stress.

2 Comments

Comment

Tempeh-Edamame Salad with Sriracha-Avocado Dressing on Toast Points

Hey, welcome. Consider following us on Twitter and subscribing to our RSS feed, or sign up for email updates from the Home Page.

Condiment attack! Zippy, satisfying, and perfect for making in advance and grabbing for deadly simple easy meals for a couple of days, you're gonna want to cuddle up with this creamy protein salad. The combination of tempeh and edamame provide tons of nourishment and a variety of texture.

The cucumber garnish provides freshness, crunch, and makes a necessary foil to the heat of sriracha sauce. This salad makes a great toast topper--if you need something fast and portable, grab any variety of store-bought melba toast from your grocer and dig in.

And if you happen to have some black sesame seeds hanging around, feel free to toss some in for a nice visual effect.

Tempeh-Edamame Salad with Sriracha-Avocado Dressing on Toast Points

Print the recipe

serves 4

8 oz tempeh

4 oz frozen edamame (about 2/3 cup)

flesh of 1 ripe avocado

2 TBSP sriracha sauce

2 TBSP rice vinegar

2 TBSP sesame seeds, (toasted, if you have time/energy)

1/2 tsp fine sea or kosher salt

1 medium cucumber, peeled and trimmed

toast, to serve

Steam the tempeh and edamame for 10 minutes.

Meanwhile, mash together avocado, sriracha, vinegar, sesame seeds, and salt until smooth (a few chunks are all right).

When the tempeh is done, toast your bread (if making toast) while the tempeh cools a bit. Halve the cucumber lengthwise, remove seeds with a spoon, and chop into 2-inch baton. When cool enough to handle, cut tempeh into 1/2 - 3/4-inch cubes and add to a mixing bowl with edamame. Mash roughly with a fork until no large cubes of tempeh are left. Stir in dressing and serve with toast garnished with cucumber.

Comment

Comment

Mushroom-Black Bean Burger with Onion Rings and Mustard Beer Sauce

Hey, welcome. Consider following us on Twitter and subscribing to our RSS feed, or sign up for email updates from the Home Page.

This week involves giving a bunch of credit where credit is due. For starters, this whole idea and the mustard comes from here. To follow that, a pair of store-bought items make this complex-looking enterprise relatively breezy:

If that photograph appeals to you, skip right on down to the recipe and get started. But don't overlook the considerable charms of this robust veggie burger (and honestly, the final product is greater than the sum of its parts). To put together a burger serious enough to hold up to onion rings, hoppy beer, and potent dijon mustard, start with a heap of mushrooms. Thinly sliced mushrooms, once sauteed, give incredible texture, and here we cram as many into these burgers as possible while still making sure they hold together. Round the patties out with earthy black beans, slap them on the (indoor electric) grill, and you have a really fun meal on your hands.

Multitasking makes this dish come together fairly smoothly, so read through the recipe before getting started. The mustard beer sauce can be made first thing, or even the day before.

Note that this recipe yields roughly twice as much beer mustard as you'll need for this quantity of burgers (and we suggest you be generous with the sauce on these guys), but have no fear. It's great on everything. Toss it with a grain salad, or a green salad, or dip the rest of your onion rings in it. It's zippy, spicy, sweet, and even a little floral from the hops. Dead simple to put together, and a total win for mustard lovers, it's a recipe we're keeping close by.

Mushroom-Black Bean Burger with Onion Rings and Mustard Beer Sauce

Print the recipe

serves 4, adapted from Climbing Grier Mountain

1 lb button mushrooms, wiped clean with a damp cloth

1 15-oz can black beans

frozen onion rings (at least 8, more if you like)

2 TBSP olive oil

2 cloves garlic, minced

2 TBSP reduced-sodium tamari

2 tsp red wine vinegar

1/2 tsp liquid smoke

1/2 tsp smoked paprika

1/2 tsp dried thyme

1/4 cup unsalted chopped pecans

1/4 cup rolled oats

1/2 tsp fine sea or kosher salt

4 whole wheat burger buns

4-6 TBSP Mustard Beer Sauce, recipe follows

Preheat oven to 400. Meanwhile, remove and discard tough stems from mushrooms and very thinly slice the caps (cut in half any mushrooms larger than 2 inches in diameter before slicing). Drain and rinse the beans in a sieve and set aside to let drain.

Place onion rings on a baking sheet on a rack in the middle of the oven and bake for 10 minutes. Flip carefully and cook until golden, another 3-5 minutes. Set aside.

Meanwhile, heat oil in a skillet. Add mushrooms and garlic. Cook until mushrooms have released their liquid, 3-5 minutes. Add tamari, vinegar, liquid smoke, paprika, and thyme. Cook another 3 minutes, or until all liquid has evaporated (the mushrooms will remain moist). Set aside.

Heat a countertop electric grill(*). Meanwhile, use a coffee grinder to process the pecans and oats--in separate batches--into a fine meal. Add to a mixing bowl and stir in the 1/2 tsp salt. Add drained black beans. Mash roughly with a fork until you get a thoroughly mixed dough with some whole beans remaining. Stir in mushrooms. Form four large patties (dampen your hands in between as needed to prevent sticking). Cook with the grill closed until golden and cooked through, 8-10 minutes. Carefully use a thin, wide spatula to transfer them to a plate--they will be delicate at this point--and let cool 5 minutes. During this time, they'll firm up and become much easier to handle.

Preheat oven broiler, cut buns in half, and toast cut sides. Serve burgers topped with onion rings (two per burger, or to taste) and a tablespoon or so of mustard beer sauce.

Mustard Beer Sauce

1/4 cup pale ale, such as Sierra Nevada

1/2 cup dijon mustard

2 TBSP natural cane sugar (evaporated cane juice)

Let ale sit at room temperature for about an hour to allow the beer to lose some of its carbonation. Whisk beer together with mustard and sugar. Adjust seasoning, if needed. (Commercially prepared dijon mustards typically contain enough salt that you won't need to add any, but your mileage may vary.)

(*These should also work reasonable well in a skillet, browning on both sides, but be very careful when you flip them to keep the burgers intact. If you have success baking them, let us know.)

Comment

Comment

Fiery Cantaloupe-Cucumber Salad

Hey, welcome. Consider following us on Twitter and subscribing to our RSS feed, or sign up for email updates from the Home Page.

What you see is pretty much what you get here. Not the first thing you imagine when someone says "fruit salad," here sweet cantaloupe is paired with fresh jalapeno, which is tempered a bit by cucumber, mint, and a drizzle of chilled coconut milk. Entirely refreshing and a fine showcase for a good melon, this salad makes a wonderful late-summer side dish or even light breakfast (if you don't mind early-morning heat).

This is a simple one to throw together, but does require a fair amount of chopping, which we embrace as a real joy with a dish like this. Cooking involves all the senses, and chopping a variety of fresh foods provides scents and textures that can be a terrific pick-me-up after a long day. Go slow, soak in the colors and fragrances, but remember to toss on some gloves when handling hot peppers. And, naturally, if you're sensitive to spicy foods, make sure you remove all bits of vein from the jalapeno, and feel free to use a smaller quantity of minced pepper.

Fiery Cantaloupe-Cucumber Salad

Print the recipe

serves 6-8

1 medium cantaloupe, halved and seeded

2 medium cucumbers, peeled, halved lengthwise, and seeded

1 medium jalapeno pepper, halved lengthwise, seeded and de-veined

10 fresh mint leaves, finely chopped (from a couple sprigs, about 1 TBSP chopped)

juice of half a lime (about 1 TBSP)

1/2 cup full-fat canned coconut milk, chilled

pinch salt

Cut each cantaloupe half into quarters, place each chunk on its flat cut end, and carefully cut the rind away. Chop flesh into bite-size dice (about 1 inch) and transfer to a serving bowl.

Chop the cucumber into small dice (about 1/4 inch) and add to the serving bowl. Mince the jalapeno, finely chop the mint, add to the serving bowl, and toss well to combine. The jalapeno will be assertive at this point, but mellows a bit with the addition of dressing.

In a small bowl, stir together lime juice, coconut milk, and salt. It will taste fairly tart, but the lime juice will mellow once diffused through the salad.

Spoon salad into individual dishes, serve with coconut-lime mixture at the table, drizzled on individually, to taste. The salad can be served immediately or held for a couple of hours to allow the flavors to mingle. It keeps, refrigerated in an airtight container, for a day or two.

Comment

Comment

Puy Lentils Simmered in Carrot Sauce

Hey, welcome. Consider following us on Twitter and subscribing to our RSS feed, or sign up for email updates from the Home Page.

Earthy, meaty, olive-hued Puy lentils pair beautifully with the sweetness of carrots (plus, they add extra fiber). Fire up the broiler, blister a little onion and a pile of bright orange carrots, blend them into a chunky puree, then throw it all in a pot with your best lentils and let the stove take care of the rest. The result is  a simple, satisfying dish bursting with autumnal shades. Come the cooler months, feel free to throw in a little dried thyme and sage, and if you like, try roasting a small, seeded jalapeno along with the carrots and onion for a little extra warming.

Serve these lentils with any grain, or as a stand-alone salad with any flatbread or a chunk of crusty white bread. Or, if you're feeling ambitious, use these lentils as a filling for hand pies, pot pies, phyllo cigars, or anything that pleases you and yours.

Puy Lentils Simmered in Carrot Sauce

Print the recipe

serves about 6

1 pound carrots, peeled and trimmed

1 medium yellow onion, peeled and trimmed

1 tsp ground coriander

2 tsp smoked paprika

1/2 vegetable bouillon cube

4 cups water, divided

1 pound Puy lentils

1 lime, plus another, to serve, optional

hot sauce, to serve, optional

Heat oven broiler.

Meanwhile, halve carrots lengthwise and cut onion into slices. Arrange in a single layer on a baking sheet (carrots cut-side down) six inches from the heat source and broil until tender and beginning to blister in spots, about 20 minutes. Occasionally open the oven door to prevent the broiler from turning off.

Carefully add vegetables to a food processor with coriander, paprika, bouillon cube, and 1 cup of water. Blend into a chunky puree. Transfer to a pot, stir in three cups of water, and add lentils. Cover, bring to a boil over high heat, reduce heat to medium-low and let simmer, covered, until lentils are tender and most of the water is absorbed, 20-25 minutes. Reduce heat as needed to keep liquid from evaporating too quickly. If needed, uncover and simmer for a few additional minutes if the mixture is too watery (note that it will thicken as it cools).

Remove from heat, squeeze in the juice from half the lime. Taste and adjust salt and lime. Serve immediately with hot sauce or with extra small lime wedges at the table, if desired.

Comment

Comment

Dead Simple Hominy-Black Bean-Sweet Corn Salad with Arugula, Basil, and Mint

Hey, welcome. Consider following us on Twitter and subscribing to our RSS feed, or sign up for email updates from the Home Page.

Gather up a couple cans for convenience, add perky, crispy greens tossed in a quick fresh-herb and lime vinaigrette, and chow down. Totally hearty while still tasting of summer, this mix of nourishing beans, fluffy hominy, and sweet corn--flecked with bits of peppery arugula--makes a lovely lunch or dinner on even the busiest of days.

Plus, hominy: you get a dose of the flavor and chewy comfort of thick tortillas without having to make them yourself. What's not to love? (Except that they're not actual hot-from-the-griddle thick tortillas. That's one-of-a-kind magic, for sure.)

Dead Simple Hominy-Black Bean-Sweet Corn Salad with Arugula, Basil, and Mint

Print the recipe

serves 2

1 15-oz can black beans

1 15-oz can white hominy

1 cup loosely packed baby arugula

2 TBSP olive oil

1 TBSP lime juice (from about half a lime)

1/4 tsp fine sea or kosher salt

6 basil leaves, cut into chiffonade (about 1 generous TBSP chopped)

4 mint leaves, finely chopped (about 1 tsp chopped)

1 cup corn kernels (fresh or frozen, thawed)

freshly cracked black pepper

Drain and rinse the beans and hominy in a sieve. Set aside to let drain thoroughly.

Roughly chop arugula and add to a serving bowl. In a small bowl, whisk together oil, lime juice, salt, basil, and mint. Add dressing to arugula and stir until arugula is thoroughly dressed.

Once well drained, add beans, hominy, and corn kernels to the bowl. Add freshly cracked black pepper to taste. Toss well, adjust seasoning, if needed, and serve.

Comment

Comment

Southern Summer Grilled Romaine Salad

Hey, welcome. Consider following us on Twitter and subscribing to our RSS feed, or sign up for email updates from the Home Page.

As much as bowls of food are seriously beloved around the MSV kitchen, from time to time it's fun and rewarding to put together something a little more composed. So here you go: grilled romaine, black-eyed peas, salty smoked almonds, plump roma tomatoes stuffed with avocado and chives, all finished off with a light tomato vinaigrette. Pretty and tasty.

Even with all the moving parts, this salad is easy to put together, in large part because we rely on the convenience of canned beans and smoked almonds to add flavor and nutrition. Which means all you have to do is prep the tomatoes, puree the dressing, and grill the romaine. Eat up. Plus, notice how little chopping there is to do here.

Alternately, since homemade beans will always have better texture than canned, make your own black-eyed peas from dried beans a day or three in advance. Let them come to room temperature before adding them to the salad.

Southern Summer Grilled Romaine Salad

Print the recipe

serves 2

1 15-oz can black-eyed peas

4 medium roma tomatoes

salt and freshly cracked black pepper

1 TBSP olive oil

1 1/4 tsp red wine vinegar, divided

1/4 tsp dried oregano

1/4 tsp fine sea or kosher salt

flesh of 1 ripe avocado

1 TBSP finely chopped chives

1 head romaine lettuce, washed and thoroughly dried

1/4 cup salted smoked almonds, roughly chopped

Drain and rinse the beans in a sieve. Set aside to let drain thoroughly.

Meanwhile, cut the tomatoes in half lengthwise and scoop out the center flesh (discard seeds), reserving. Sprinkle the tomato shells with a pinch of salt and a bit of freshly cracked black pepper.

To the reserved tomato innards, add oil, 1 tsp red wine vinegar, oregano, and 1/4 tsp salt. Blend with an immersion blender. Taste and adjust seasoning.

Use a fork to mash avocado, remaining 1/4 tsp red wine vinegar, and chives. Spoon into tomato halves.

Heat a countertop electric grill or stovetop griddle. Cut romaine head in half lengthwise and grill for just a few minutes, until wilted up top and seared below. Place each half cut-side up on serving plates and top each with half the beans. Arrange 4 tomato halves around the lettuce on each plate, top each with half the chopped smoked almonds, and add dressing to taste.


Comment

Comment

Tempeh-Cantaloupe Skewers

Hey, welcome. Consider following us on Twitter and subscribing to our RSS feed, or sign up for email updates from the Home Page.

tempeh-cantaloupe skewers table.jpg

Earthy, nutty tempeh and tender, sweet cantaloupe are lightly coated in a blend of salty, robust red miso mixed with sesame and mirin, then seared and served atop a bed of simple, fluffy couscous tossed with fresh parsley. Dinner is colorful, fun, and on the table in under half an hour. And mirin pairs wonderfully with cantaloupe, by the way. For the best flavor and texture, be sure to choose a melon that's ripe, but not too ripe. Its flesh needs to still be firm enough to handle direct heat without falling apart.

The recipe below provides a gentle seasoning, but if you're feeling a little indulgent, no one could blame you for doubling the miso mix and brushing on a little extra after grilling. It's really good stuff. Really.

tempeh-cantaloupe skewers detail.jpg

Tempeh-Cantaloupe Skewers

Print the recipe

serves 2

1 TBSP sesame oil

2 tsp red miso

1 tsp mirin

1 tsp rice vinegar

8-oz block tempeh, steamed 10 minutes

12 generous 1-inch cubes cantaloupe (from about half a small melon)

1/2 cup water

1/2 cup couscous

generous pinch salt

1 TBSP minced parsley

Whisk together sesame oil, miso, mirin, and vinegar. When the tempeh is cool enough to handle, cut it into 12 cubes. Toss tempeh and melon in miso mixture. Set aside and heat a countertop electric grill (or stovetop griddle).

Meanwhile, bring 1/2 cup water in a small pot to a boil. Stir in couscous, salt, and parsley, remove from heat, cover, and let stand 10 minutes.

Thread the tempeh and melon onto skewers (or not) and grill in a closed grill for 3-4 minutes (per side, if using stovetop griddle), until tempeh is fragrant, warmed through, and has golden sear marks. Fluff couscous with a fork before serving.

Comment

2 Comments

Apple Juice-Braised Chickpeas with Tomatoes and Turmeric

Hey, welcome. Consider following us on Twitter and subscribing to our RSS feed, or sign up for email updates from the Home Page.

Let the slow cooker make full-on comfort food appetizing--and effortless--even in summer. Easy to love and dead simple, this chickpea dish can please a crowd on any given weeknight. The recipe below serves two but should multiply like a dream.

The important bit here is to use an unfiltered apple juice that contains nothing but pressed apples. We grabbed ours at Three Rivers, but the natural foods section of any large grocer should be able to help you out. The sweet-tart apple juice and the acid from the tomatoes combine beautifully with golden turmeric and a touch of ginger and allspice. The result goes down way easy.

To really drive home the comfort, we piled our chickpeas atop a mound of fluffy mashed potatoes, but any grain--rice, couscous, polenta/grits, what have you--will work. And note that the chickpeas hold up well to the long cooking. Other beans may get mushy, but feel free to experiment (and we can't wait to try this with diced tempeh).

Apple Juice-Braised Chickpeas with Tomatoes and Turmeric

Print the recipe

serves 2, adapted from The Apple Cookbook

1 15-oz can chickpeas, drained and rinsed

1 tsp ground turmeric

1/4 tsp ground ginger

pinch ground allspice

1 medium tomato, cut into large dice

1 TBSP olive oil

1/2 cup unsweetened apple juice (look for an unfiltered brand that contains nothing but pressed apples)

salt, to taste

1 tsp cornstarch

1 TBSP water

Combine chickpeas, turmeric, ginger, allspice, tomato, oil, and apple juice in a slow cooker. Cook on low for 8 hours. Salt to taste. Whisk together cornstarch and water. Increase heat to high, stir in cornstarch slurry, cover, and let sit 5 minutes. Turn off heat, uncover, and let sit another 5 minutes before serving over cooked grain (such as rice, couscous, or grits/polenta) or mashed potatoes.

2 Comments

Comment

Beyond Toast: Bread-Based Breakfast--Sweet or Savory

Hey, welcome. Consider following us on Twitter and subscribing to our RSS feed, or sign up for email updates from the Home Page.

Grab a good loaf of sourdough(*), because we've got business. Breakfast business. Perfect for a weekend morning or brunch, in just about half an hour, you can start your day with a hot, deeply satisfying meal. First up, our savory concoction that layers sourdough, simple seared tofu, beans and onions simmered with molasses (like Boston baked beans for your stovetop), plus a healthy dose of pickled jalapenos.

(*We used Flour Head Knoxville Sourdough for both dishes in this post.)

Because the beans don't get the benefit of a long cook like they normally do in the oven, we made sure to include extra flavor by beginning our beans with a generous portion of browned onions. The results are pretty great for a dish so simple and fast to put together.

Stovetop Boston Beans over Sourdough with Seared Tofu

Print the recipe

serves 2, beans adapted from The Vegan Table

For the beans:

1 15-oz can navy beans

1 medium yellow onion, finely diced

1 TBSP olive oil

1 1/2 TBSP unsulphured molasses

1 tsp turbinado or brown sugar

1/2 tsp ground mustard

1/4 tsp ground ginger

1/2 tsp liquid smoke

2 TBSP water

1/4 tsp salt

For the tofu:

7 oz extra-firm tofu, drained

1 TBSP nutritional yeast

1/4 tsp salt

1/4 tsp thyme

1/8 tsp crushed red pepper

To serve:

2 3/4-inch slices sourdough (from an 8-inch boule)

pickled jalapenos

Drain and rinse the beans in a sieve. Set aside to drain well.

Meanwhile, heat the oil in a medium pan over medium heat. Add onions, reduce heat to medium-low and cook, stirring occasionally, until browned, about 5 minutes. Add all other bean ingredients and stir. Cover, reduce heat to low, and cook undisturbed for 15 minutes. Remove cover, increase heat to medium-low, and cook 3 minutes more, or until thick but saucy.

While the beans cook, prepare the tofu. Cut a 14-oz slab of tofu (in landscape position) in half. Reserve half for another use. Turn the other half cut-side up and slice into 4 even pieces. Heat a nonstick skillet over medium-high heat. Add tofu in a single layer. Whisk together seasoning and sprinkle evenly over the top. Cook tofu 5 minutes, undisturbed. Flip and cook another 4 minutes, until golden.

To assemble, top one slice sourdough with two pieces of tofu, half the beans and onions, and top with pickled jalapenos, to taste.

Now for the sweet stuff. Not really a bread pudding, since there's no custard to bother with, and not really a brown betty, since the bread is in whole slices rather than crumbs, this doesn't really fit any definition we have handy. What it is is totally simple, absolutely gorgeous, and a dish you're positively going to want to swim in. One look at (and whiff of) this jewel-toned beauty, and we promise you'll be hooked. And it couldn't be simpler.

As if this fruity bake weren't already heaven on a spoon, it's blissfully versatile. Not only can you serve this hot, warm, cooled, or chilled, we go easy on the sugar here--just enough to make the berries sing--so feel free to dig into this as a slightly indulgent breakfast. Or brunch, of course. Use a healthy dollop of plain nondairy yogurt with a little fresh nutmeg added (we like Whole Soy Co., and their plain--but sweetened--yogurt is pictured above) to garnish the berry bake, or use the berry bake to garnish a serving of yogurt. Either way, completely stunning.

All the pictures here were taken when the bake was still hot from the oven. For neater serving and more bread-pudding-like presentation, let cool to room temperature before cutting into slices.

And, in case you needed to be told, you can take this sucker all the way into dessert territory by adding whipped coconut cream.

Berry-Sourdough Bake

Print the recipe

serves 4-6, adapted from Luscious Berry Desserts

1 lb frozen (or fresh) blueberries

12 oz frozen (or fresh) raspberries

1/4 cup maple syrup (preferably grade B)

3 1-inch-thick slices sourdough (from an 8-inch boule), halved

1 TBSP nondairy butter, such as Earth Balance, plus extra for greasing

1/2 tsp vanilla extract

plain nondairy yogurt (sweetened with maple syrup, to taste) or whipped coconut cream (sweetened with a little powdered sugar), plus freshly grated nutmeg, to serve (optional)

Heat oven to 350.

Add the berries and maple syrup to a medium sauce pan over medium heat. Bring to a boil, reduce to a steady simmer over medium-low, and let cook, stirring occasionally, until the raspberries are breaking down and the mixture thickens just a bit, about 10 minutes.

Meanwhile, butter one side of each of the six pieces of bread (you'll use 1/2 tsp per piece). Grease and flour a 6-inch cake pan. Place three pieces of buttered bread on the bottom in a single layer (smoosh them in a little, if needed), butter-side-up.

When the berries are done, remove from heat, stir in the vanilla extract, and carefully pour half the berries into the prepared pan, spreading to distribute evenly. Add the remaining three pieces of bread, butter-side-down. Pour the other half of the berries on top and spread to distribute evenly.

Bake 20 minutes. Let cool a bit before serving, but the bake can be served hot, warm, cool, or chilled. It slices fairly neatly when cool. (If using yogurt or whipped cream, sweeten to taste and stir in a generous pinch of freshly grated nutmeg before garnishing.)

Comment

2 Comments

Marinated Beans (Make Everything Better)

Hey, welcome. Consider following us on Twitter and subscribing to our RSS feed, or sign up for email updates from the Home Page.

Beans! They have fiber, protein, and variety for days. We love them. Today is all about a dead-simple method that, with a little planning to take the slow marinating into account, takes five minutes of active prep and makes beans incredibly flavorful. Really.

A little fresh herb, garlic, and olive oil makes a bowl of beans that can be savored all alone as an easy side dish (or a simple meal paired with crusty bread or cornbread), or considered prep and used as the base of a soup. Naturally, they're always welcome in a green dinner salad. Or piled on top of rice. Depending on your mood, preference, and what else you have lying around the kitchen, they're begging to be highlighted in your mains. We have two dinners for two that might give you an idea of how to begin adding marinated beans to your meals when you're in the mood for something that goes a little beyond rice and beans.

You can put them front and center:

Or include them with lots of other elements:

Exhibit A we whipped up on a day when we had some beautiful heirloom tomatoes. We knew they would make a lovely centerpiece for a meal, but they don't provide a lot of calories. Enter marinated beans. In the morning, we combined two cans of rinsed and drained butter beans with two or three tablespoons of olive oil, a small handful of basil leaves cut into chiffonade, a sprinkle of fine sea salt, and two smashed and peeled cloves of garlic.

Stirred it all together and let that sit in the fridge all day, until about an hour before dinner time, or about the time someone with a day job might get home from work. We then brought the beans out to let them come to room temperature.

When we started to feel hungry, out came a tube of store-bought polenta, half of which we cut into chunks and broiled along with the whole tomatoes, flipping the polenta to crust both sides. (To prep whole tomatoes for broiling: trim the tops, scoop out the seedy center, and rub the interior with a little salt and pepper. Done.) Plate it all up, and there's a completely gorgeous dinner that took all of 20 minutes--mostly inactive--of the evening to prepare, and all of it unbelievably easy.

Exhibit B took a little more chopping, but makes for a wonderfully colorful meal.

For this, we marinated just one can of pinto beans with two tablespoons olive oil, one large sprig of rosemary roughly torn, and a sprinkle of salt and pepper. To go along, we cooked fluffy couscous with the juice and zest of an orange while a grated beet did its own quick marinating in a bit of lemon juice and balsamic vinegar. Meanwhile, we chopped up a poblano and toasted some sunflower seeds.

Note that we went a little heavier on the oil for the pinto beans than we did for the butter beans to keep the latter from being too oily. For the couscous bowl, we relied on the extra oil in the beans along with the acid from the marinated beets to act as an informal dressing for our bowl. Cozy and satisfying.

And of course, this is a method, not a strict recipe. Use the herbs you like in the amount you like. Play with the garlic and oil. But don't hesitate to start experimenting. This easy bit of planning ahead gives all kinds of dishes a whole new life while providing a heap of solid nutrition.

Garlic-Herb Marinated Beans

Print the recipe

cooked beans (rinsed and well drained, if using canned--1 15-oz can or 1 1/2 cups cooked serves two for most applications)

fresh herb of choice, about 1-2 tsp chopped per serving

1/2-2 TBSP olive oil per serving

1 small-medium clove garlic per serving

fine sea or kosher salt

freshly cracked black pepper, optional

Combine all ingredients in a wide, shallow bowl. Cover with a clean kitchen towel and let marinate in the refrigerator for 8-24 hours before using.

Notes:

Most tender herbs such as basil, thyme, and oregano can be chopped finely and included in the final dish. Rosemary remains rather pungent and is best left in large chunks or even whole sprigs and removed before serving (chop a few small bits in the final dish, if desired).

To use in a soup, salad, or grain bowl, use the higher recommendation of olive oil--it will carry the herb and garlic flavors through to the final dish. For a side or main dish of beans, use the lighter end to avoid an oily texture.

Likewise, for use in soup or grain bowl (or for serious garlic lovers), mince the garlic before adding it to the beans to marinate. For a main dish presentation (or for the garlic avoidant), simply smash the garlic cloves to allow their flavor to permeate the dish, but discard the cloves before serving.

2 Comments