Comment

Apricot-Elderflower Cookies

Hey, welcome. Consider following us on Twitter and subscribing to our RSS feed, or sign up for email updates from the Home Page.

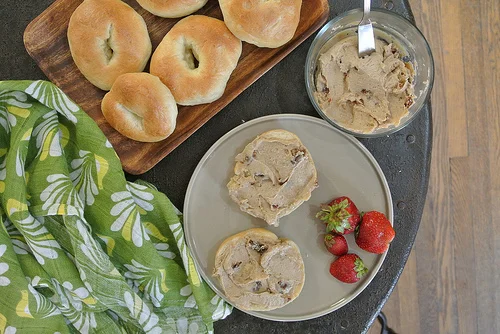
Fruity and floral, dense and rich with a fabulous exterior crunch, each one of these cookies packs the satisfaction of a full dessert serving.

Decidedly sweet without being sugary, and studded with plenty of chewy chunks of dried apricot, try savoring this cookie a little slowly with a cup of black coffee. Or if you'd like to go a step further, a little iced coffee liqueur in the evening.

Note that because these are so thick, they require a much longer baking time than your average cookie. They're worth the wait. And this makes a sizable batch (again, each cookie is pretty hefty), so once you've made it through, you'll have treats for days.

Apricot-Elderflower Cookies

Print the recipe

yields 16 cookies, adapted from Veganomicon

2 TBSP brown flax seeds, ground in a coffee grinder

1/3 cup almond or soy milk

2/3 cup natural cane sugar (evaporated cane juice)

1/2 cup peanut (or canola) oil

2 TBSP St. Germain elderflower liqueur

1 3/4 cups all-purpose flour

2 TBSP corn starch

2 tsp baking powder

1/2 tsp fine sea or kosher salt

6 oz dried apricots, chopped into small chunks (about 1 cup chopped)

Preheat oven to 350 and line a baking sheet with parchment.

Whisk together ground flax and almond milk for 30 seconds. It will become thick and a little fluffy. Whisk in sugar, oil, and liqueur until smooth. Sift in all other ingredients, except apricots. Stir. When almost all of the flour is incorporated, add the apricots. Knead them in by hand, working the dough as little as possible--aim for no more than a half-dozen folds.

Divide the dough into 16 balls (again, working the dough as little as possible) and transfer to the baking sheet. Use the bottom of a clean rocks glass (or what have you) to press the balls into a round cookie a little over 2 inches in diameter and a little less than 1 inch thick.

Bake 20 minutes. Increase heat to 375 and bake another 5 minutes, until the edges are golden. Let cool 5 minutes before transferring to a rack to cool completely.

Comment

Comment

Fresh Cherry Tomato Tartine (or Tart) with White Bean-Pignoli Puree

Hey, welcome. Consider following us on Twitter and subscribing to our RSS feed, or sign up for email updates from the Home Page.

This lovely tartine is one for your finest produce. The sweetest, ripest cherry tomatoes are the ones to highlight here, eaten absolutely fresh, entirely uncooked. The gentle acid in the tomatoes is countered with a decadent puree and a helping of aromatic herb. This wicked-fast lunch (or breakfast or dinner) is summer eating at its simplest and arguably most satisfying.

Tomatoes may be the star, but the other bits of this recipe are no slouch, either. Treat yourself to a quality bread (pictured here is a sourdough), and smear our buttery white bean-pine nut puree on top before sprinkling on your herb of choice (dill pictured here), and putting down those irresistible tomatoes.

While most bean purees, like hummus, can work as a spread or a dip, note that this one is thick, salty, and rich, falling firmly into the spread category. It gets depth of flavor and salt from umeboshi plums (available at Three Rivers), but if you can't get your hands on them, try using one or two teaspoons of red miso paste. Add a little extra lemon juice, as desired.

fresh cherry tomato tartine with white bean-pignoli puree.jpg

And naturally, if you have a little extra time, throwing together a quick tart dough will get you an elegant dish ready for an attractive dinner at home or a low-stress entertaining option. (The above was snapped at a tomato-loving pal's house.)

Fresh Cherry Tomato Tartine with White Bean-Pignoli Puree

Print the recipe

serves 1

2 thick slices sourdough (or other good-quality bread of choice), lightly toasted, if desired

2 generous TBSP White Bean-Pignoli Puree, recipe follows

finely chopped fresh herb, such as dill fronds or basil leaves

about 10 small-medium ripe cherry tomatoes, halved

Spread a generous tablespoon of puree on each slice of bread. Top with a sprinkle of herbs and arrange the cherry tomatoes on top.

White Bean-Pignoli Puree

yields about 3/4 cup

3/4 cup white beans (such as navy, Great Northern, or butter beans)

1/4 cup pignoli (pine nuts)

2 umeboshi plums, pitted

1 TBSP lemon juice

1 TBSP olive oil

1/4 tsp dijon mustard

Puree all ingredients until smooth with an immersion blender.

Comment

Comment

Fresh Peach Tart with Almond-Blueberry Puree (and a Dead Simple Shortbread Crust)

Hey, welcome. Consider following us on Twitter and subscribing to our RSS feed, or sign up for email updates from the Home Page.

Talk about color. This tart is completely gorgeous, suitable for even the newest of cooks, and, as a bonus, tastes pretty dreamy, too. Rich, crumbly--and a little crunchy--shortbread gets topped with a modest layer of thick almond butter and quick-simmered blueberries with a little silken tofu added just to lighten it up and smooth it out. Slice up a ripe peach, garnish with a bit of basil soaked in orange liqueur, and have you ever got a summer tart worth sharing. Skip the basil-liqueur bit, and it's absolutely kid-friendly. Note that we strongly suggest using raw almond butter here for its less aggressive, and totally lovely, flavor.

This tart is best enjoyed within a day or two, since the peaches get less fresh all the time. Store any leftovers tightly wrapped in the refrigerator, but let sit at room temperature for a bit before re-serving so the crust has time to loosen up--it gets rather rigid chilled.

One last note: calling for a half-cup of almond butter, this isn't the least expensive dessert in the world, but it helps that it uses an entirely reasonable amount of seasonal fruit while still tasting thoroughly of it. A quarter of a pint of berries and one good peach are all you need to serve up this stunner, which means you can buy small, or enjoy the extras all on their own (which tends to be our favorite way to dig into summer fruit, anyway).

Fresh Peach Tart with Almond-Blueberry Puree (and a Dead Simple Shortbread Crust)

Print the recipe

yields 1 9-inch tart, crust adapted from Martha Stewart Living

For the Dead Simple Shortbread crust:

3/4 cup all-purpose flour

1/4 cup cornmeal

2 TBSP natural cane sugar (evaporated cane juice)

1/2 tsp fine sea or kosher salt

1/4 cup melted unrefined coconut oil

For the Almond-Blueberry Puree:

1/2 cup fresh (or frozen) blueberries

1 TBSP maple syrup (preferably grade B)

1/2 cup smooth, raw, unsalted almond butter

6 oz silken tofu (half an aseptic package)

1/2 tsp vanilla extract

For the topping:

6 small basil leaves, cut into chiffonade (about 1 tsp chopped)

1/2 TBSP maple syrup (preferably grade B)

1/2 TBSP orange liqueur

1 medium, ripe peach, pitted

Begin with the crust: whisk together flour, cornmeal, salt, and sugar. Add melted coconut oil and stir until thoroughly combined and sandy. Transfer to a 9-inch round springform pan and use your hands to press the dough firmly into the bottom of the pan (don't forget the edges). Freeze 20 minutes.

Heat the oven to 375. Bake crust until just golden, 22-24 minutes. This crust burns quickly, so be prepared to watch it carefully after 20 minutes. Transfer the pan to a wire rack and let cool completely before removing the side piece from the base.

In a small bowl, combine the basil, 1/2 TBSP maple syrup, and liqueur. Cover with a clean kitchen towel and set aside.

Combine the blueberries and 1 TBSP maple syrup in a small saucepan over medium heat. Cook, stirring frequently, while the syrup simmers. After a minute or two, the syrup will turn dark from the blueberries beginning to give off liquid. When it does, reduce heat to medium-low and continue to cook, stirring very frequently, until the berries have begun to break down and the whole mixture is saucy and fragrant, 3-5 minutes.

Meanwhile, add the almond butter, tofu, and vanilla extract to a food processor. Carefully add the cooked berries and puree until very smooth, scraping the sides every 30 seconds, as needed. (This may take a minute or two total.) Transfer to a bowl, place plastic wrap over the surface, and chill until needed.

Aim to assemble the tart roughly half an hour before serving, to let the topping flavors mingle. To assemble, dollop the almond-blueberry puree all over the completely cooled crust and spread evenly with a frosting spatula. Slice the peach into scant 1/4-inch slices and arrange them around the perimeter. Drizzle the basil-liqueur-maple mixture evenly over the top of the peaches. Let sit at room temperature until ready to serve.

Comment

2 Comments

Nut-Crusted Summer Squash with Gremolata over Chive Grits

Hey, welcome. Consider following us on Twitter and subscribing to our RSS feed, or sign up for email updates from the Home Page.

Take all that summer squash all your friends (and neighbors and family and co-workers) keep trying to unload on you, cover it in a rich, irresistible blend of nuts, set it atop a mound of creamy, comforting grits, sprinkle on a bright relish, and you have one seriously sunny way to dig into summer produce.

Adding pecans to the almonds in the crust gives a gentle sweetness that pairs well with the crisp freshness of the gremolata, which itself is a nice foil to the grits. Everything about this plate is easy to love, and even with all the moving parts, it only takes 30-45 minutes to put together. Perfect for nearly any night, whether you're entertaining friends, or just yourself.

The recipe below feeds two quite generously, but you should have no problem multiplying the recipe. We were able to cook the squash on our small countertop electric grill in two batches, so if you do make a larger batch, consider using a two-burner griddle on the stove (or even baking it), flipping halfway, to keep the number of batches to a minimum.

Nut-Crusted Summer Squash with Gremolata over Chive Grits

Print the recipe

serves 2 generously

For the gremolata:

3/4 cup loosely packed flat-leaf parsley

1 medium clove fresh garlic

1 lemon

pinch salt

For the squash:

1/2 cup raw, unsalted almonds

1/2 cup raw, unsalted pecans

scant 1/2 tsp fine sea or kosher salt

1/2 cup chickpea flour

1/2 cup water

1 generous lb (9-10 oz) summer squash, cut into scant 1/2-inch planks

For the grits:

1 cup quick-cooking grits

3 cups water

2 TBSP extra virgin olive oil

2 TBSP finely chopped chives

salt and freshly cracked black pepper, to taste

Lay the parsley on a cutting board and top with a pinch of salt. Using a microplane zester, grate the garlic and then zest the lemon, letting the garlic and zest fall on top of the parsley. Mince the parsley--the garlic and zest should incorporate well while you do this. Transfer the whole mixture to a serving bowl and set aside.

Preheat an electric countertop grill (or griddle on the stove).

Use a coffee grinder to process the almonds and pecans into meal. Whisk together with 1/2 tsp salt in a pie plate. In a wide bowl, whisk together the chickpea flour and water. Dip the squash planks into the chickpea mixture, scrape off excess batter, and press both sides into the nut meal, shaking off excess. Cook until tender, but firm, and browned, 8-10 minutes in a closed electric grill. (If using the stove top, flip halfway through to brown on both sides.) Note that the chickpea mixture will thicken as it stands. If you're working in batches, add water by the TBSP to thin it out in between, as needed.

Finally, prepare the grits. Bring the water to a boil, add the grits, and reduce the heat to medium-low. Add oil, chives, and plenty of freshly cracked black pepper. Cook 5 minutes, or until tender and thickened. Salt very gently (the heavier salt in the nut crust should provide most of the salt for this dish), stir to incorporate, and remove from heat. Quickly divide the grits into two serving bowls. Top with squash and gremolata. Serve immediately.

2 Comments

Comment

Mixed Potato and Tofu Tacos with Cherry-Ginger Compote

Hey, welcome. Consider following us on Twitter and subscribing to our RSS feed, or sign up for email updates from the Home Page.

These aren't the fastest tacos in the world, but they're easy to make, totally satisfying, and would make a great addition to any brunch table. Buttery gold potatoes, sunny sweet potatoes, and chewy bites of tofu all get gently seasoned and roasted until tender, then tucked into warm corn tortillas.

The compote is a breeze to make, especially if you go with frozen cherries that have already been pitted. Just a little grating, and the stove does the work. It adds a beautiful fruity burst to these tacos or anything else you might have lying around the kitchen.

If you'd rather take these in more savory (and minimal) direction, skip the compote and grab a bottle of hot sauce. Dinner is served. Likewise, leftovers can be sauteed with a bunch of lamb's quarters (or spinach) and served with hot sauce for a killer breakfast hash fast enough for a weekday morning. Frankly, it's worth making just for that.

Mixed Potato and Tofu Tacos with Cherry-Ginger Compote

Print the recipe

yields about 1 dozen tacos

14 oz extra-firm tofu, drained

1 1/2 lbs Yukon Gold Potatoes (about 2 very large)

1 lb sweet potato (about 1 very large)

3 TBSP olive oil

1/2 tsp chipotle powder

1/4 tsp ground cumin

1/4 tsp ground coriander

1/4 tsp rubbed sage

salt and freshly cracked black pepper

1 lb pitted cherries, frozen or fresh

1/2-inch piece ginger, grated

1/4 cup unsweetened applesauce

1 tsp reduced-sodium tamari

soft corn tortillas, to serve

Turn the drained block of tofu on its long narrow side and slice it in half lengthwise. Place the rectangles side-by-side, wrapped in two layers of clean kitchen towel (not terry cloth), and place a dutch oven or other heavy, stable object (that can get a bit wet) on top. Set aside.

Heat oven to 400.

Meanwhile, chop both types of potato into 3/4-inch dice, then remove tofu and dice. Place potatoes, oil, chipotle powder, cumin, coriander, sage, salt (about 1/2 tsp, or to taste), and pepper to a roasting pan and toss thoroughly with your hands. Add tofu and toss gently with your hands to incorporate and coat well. Roast, tossing every 20 minutes, until tender and just beginning to brown, 70-80 minutes.

While the potatoes roast, combine the cherries, ginger, applesauce, and tamari in a small pot over medium heat. When it boils, reduce the heat a bit and let bubble until the cherries have broken down and the mixture is thickened, but still a bit saucy, about 15 minutes. Set aside.

Heat a nonstick skillet over medium heat and warm tortillas for 1 minute on each side. Serve immediately.

Comment

4 Comments

Ginger Sherbet Floats Two Ways: Utterly Breezy or Bold and Boozy

Hey, welcome. Consider following us on Twitter and subscribing to our RSS feed, or sign up for email updates from the Home Page.

Even though there's no ice cream maker in the MSV kitchen, there is a food processor. And given that, it's not tough to whip up some tasty frozen stuff, and the imperfections in texture literally melt away once you dunk a scoop of frosty, spicy-sweet, completely irresistible ginger sherbet into a glass of something fizzy and refreshing.

If you do have an ice cream maker, by all means, use it. If not, just blend, freeze in chunks using an ice cube tray, and blend it all again when ready to serve. Easy. And so, so good.

Vegan Ginger Sherbet

Print the recipes

serves 6-8

2 cups coconut milk

1 3x1-inch piece peeled fresh ginger

6 TBSP natural cane sugar (evaporated cane juice)

1 tsp vanilla extract

Place all ingredients in a quart jar and blend with an immersion blender until the sugar is completely dissolved and the mixture is very smooth, about a minute. Strain to remove the ginger hairs, pour into an ice cube tray (you'll have slightly more than one standard plastic tray will hold), and freeze.

When ready to serve, slide a thin, dull knife or spatula along the side of each cube and gently pry out--this should happen fairly readily. Add 2-3 sherbet cubes per person to a food processor and process until creamy. It will be a bit sandy and icy at first, but after half a minute or so, the whole mixture will pull away from the processor tub and cohere into a creamy, semi-firm, consistency that can be scooped easily.

Now to put that sherbet to work. But even if you have no interest in floats, pay attention, because this watermelon-basil syrup is hard to resist. It makes an addictive soda that's fruity, herbal, and unbelievably light without tasting thin. One sip leaves you wanting another. And that might go double once the ginger sherbet gets things all creamy and gently spicy.

Equal parts syrup and club soda make a delicate drink that can be enjoyed all alone over ice or spiked--go simple with vodka or go for a low-key, totally affable warm-weather whiskey drink: 2 oz Watermelon-Basil Syrup, 2 oz club soda, 1 oz rye (we used Bulleit), and 1/2 oz orange liqueur. Serve over ice, finish with a squeeze of lime.

Breezy Watermelon-Basil Soda

equal parts Watermelon-Basil Syrup, recipe follows, and club soda

Watermelon-Basil Syrup

yields 1 2/3-1 3/4 cups

1 lb watermelon (2 1/2-3 cups 1-inch cubes)

1 dozen medium-large basil leaves (about 5 grams, or 1/4 cup loosely packed leaves)

1 lime, sliced, ends discarded

1/4 cup natural cane sugar (evaporated cane juice)

1/4 cup water

Add the watermelon and basil to a pitcher and blend with an immersion blender. Add lime slices.

In a small sauce pan over medium heat, heat the sugar and water. When it comes to a boil, reduce heat to low and stir constantly until the sugar dissolves. Remove from heat immediately, let cool a minute, then carefully add to the blended watermelon. Cover with a clean kitchen towel and let sit for 1 hour. Strain (you won't press on the solids, exactly, but stir the whole thing to help it along) and discard solids. Chill until ready to use. Stir well before each use.

And now for something simpler. This is actually what got this post started. Ginger sherbet was made, and Ginger Sherbet Framboise Floats were had. And had and had.

Ginger Sherbet Framboise Floats

Print the recipes

serves 2

1 12-oz bottle Lindemans Framboise Lambic

ginger sherbet (see recipe above--use 5 frozen sherbet cubes)

Pour 6 ounces beer over 1 scoop of ice cream and serve.


4 Comments

Comment

Dead Simple Spreads: Cinnamon-Raisin Whipped Peanut Butter and Garden Tofu Spread

Hey, welcome. Consider following us on Twitter and subscribing to our RSS feed, or sign up for email updates from the Home Page.

Some weeks, we have no problem improvising, but others, the luxury of having a fridge stocked with convenience is a must. Enter these spreads. First up, this little whipped peanut butter number. It's mild, cool, creamy, studded with raisins, and begs to be sandwiched in a bagel. What's not to love?

Note that the peanut butter flavor gets toned down considerably in this condiment while still giving great texture. So even if you've never been a big fan of slathering straight peanut butter on a bagel or toast, you may want to give this one a try.

Cinnamon-Raisin Whipped Peanut Butter Spread

Print the recipes

yields a generous 1/2 cup

1/2 cup smooth peanut butter (look for one that contains nothing but peanuts)

1/4 cup unsweetened applesauce

1 TBSP coffee liqueur

1/2 tsp ground cinnamon

1/8 tsp ground cardamom

1-2 TBSP raisins, to taste

Add all ingredients except raisins to a food processor. Process, scraping as needed, until the mixture pulls away from the bottom and sides and coheres into a shaggy ball. Add raisins, pulse to incorporate, and chill until ready to use.

Next up: this has been our absolute favorite dinner lately: elegant looking, but hearty, and nothing could be simpler. We put together this spread using fresh fruit, greens dressed in our favorite hummus, store-bought multi-grain crackers, and this Garden Tofu Spread. This one owes an enormous debt to Isa Chandra Moskowitz's herb spread in Vegan Brunch. Our version tweaks her ratios a bit, trades her fresh herbs for finely chopped veg, and takes the cost down another healthy notch by using pepitas instead of cashews. (Her herb version is less expensive if you have a large herb garden, but if you're relying on a supermarket, it gets pretty frisky with your wallet.) The result is versatile and crazy-handy. And naturally, you can sandwich it in a bagel, too. Or toss it with pasta salad. Or most anything, really.

One note: the spread must sit in the refrigerator for a few hours before eating to let the flavors, and even texture, come together. If you taste it immediately after processing, you'll find the pepitas are too assertive, and everything else seems bland. But a few hours later, the seeds soften, the whole thing gets creamier, and the garden bit really begins to come through. This remains a mild spread--hence the versatility--but letting it rest before serving really makes a difference.

Garden Tofu Spread

Print the recipes

yields about 1 pound, adapted from Vegan Brunch

1/2 cup raw, unsalted, hulled pepitas

1 large carrot (about 2 oz total weight), peeled, trimmed, and roughly chopped

1 very small poblano pepper, or half a large (about 2.5 oz total weight), trimmed, seeded, and roughly chopped

2 scallions, white and tender green parts, thinly sliced

14 oz extra-firm tofu, drained

2 TBSP nutritional yeast

2 TBSP lemon juice

1 tsp dried oregano

1/2 tsp celery seed

1/2 tsp garlic powder

1/4 tsp fine sea or kosher salt

freshly cracked black pepper, to taste

Add the pepitas to a food processor and process into small crumbs. Transfer to a bowl and set aside.

Add the carrot and poblano to the processor and process until very finely chopped. Add all other ingredients, including pepita crumbs, and process for about a minute, until smooth, scraping the bowl as needed. Transfer to an airtight container and refrigerate for at least a few hours before serving.

Comment

Comment

Party Animals No. 31: Strawberry Pasta Salad for Dinner at a Pal's

Hey, welcome. Consider following us on Twitter and subscribing to our RSS feed, or sign up for email updates from the Home Page.

No need to wait for tomatoes to peak when you have a fresh, tasty pasta salad that takes advantage of spring's strawberries. Perfect for any potluck, outdoor entertaining, or an easy weeknight meal, we couldn't be happier about this salad. Fresh cucumbers, gently nutty seared zucchini, a bit of basil, and a balsamic vinaigrette are all you need, but for a one-dish meal with higher protein, cooked chickpeas, edamame, or what have you will likely feel right at home in this bowl.

Fresh is best with this one, so aim to assemble the salad only an hour or so before you want to serve it. That said, leftovers can be kept for a day or two, but the strawberries will begin to break down the longer it sits. You should have no problem cutting the recipe in half if you're afraid you won't get through a full pound of pasta before the strawberries give up the ghost. (Do note that a thorough toss with your favorite creamed herb tofu spread gives leftovers a whole new life.)

And, of course, feel free to keep this recipe on hand well into the summer, because substituting tomatoes for the strawberries once they do peak doesn't sound like a bad idea at all.

Strawberry Pasta Salad

Print the recipe

serves 8-12 (low end as a main, high end as a side)

1 medium zucchini (about 8 oz), sliced into 6 long planks

1 medium cucumber (about 10 oz)

1 lb strawberries

8 medium basil leaves (substitute half lime basil, if available)

1 lb small dried pasta of choice

salt

1/4 cup extra virgin olive oil

2 TBSP balsamic vinegar, the best you can afford [see Note]

1/2 tsp dried oregano

1/2 tsp fine sea or kosher salt

freshly cracked black pepper, to taste

Heat a countertop electric grill or ridged griddle. Cook the zucchini until striped and tender, but still firm, just a few minutes, checking occasionally to avoid overcooking. Remove from heat and set aside.

Meanwhile, seed the cucumber and slice it thinly into a serving bowl. Trim the strawberries and slice them thickly, 3-4 slices per berry for medium-large berries. Add them to the cucumbers. Slice the basil into very thin ribbons and add the chiffonade to the serving bowl. When the zucchini is cool, slice each plank lengthwise into thirds, then into 1-inch strips. Add to the serving bowl.

Heat a pot of water with a generous sprinkle of salt, and cook the pasta according to the package directions. While it cooks, whisk together the oil, vinegar, and 1/2 tsp salt.

When the pasta is ready, drain thoroughly, allow to cool for just a minute, and add to the serving bowl. Pour the dressing over, toss thoroughly to combine, and add freshly cracked black pepper and additional salt, to taste. Serve at room temperature or chilled.

[Note: if you want to use a balsamic vinegar you're not confident about, pour a little more than called for into a small saucepan and simmer until it reduces a bit and gets a little syrupy. You're now sitting pretty.]

Comment

Comment

Spiced Bean, Rice, and Veg Bowl with (Optional) Red Pepper-Chipotle Sauce

Hey, welcome. Consider following us on Twitter and subscribing to our RSS feed, or sign up for email updates from the Home Page.

Dishes like this one make it clear why rice and beans make for such a reliably satisfying meal. Earthy and hearty and comforting, we're always up for any variation, and this one is seductively fragrant.

Naturally, pretty much any vegetable with a firmer texture will work well here, and likewise, you can substitute a different bean, if you prefer. But we recommend sticking with the darker, less subtle types to stand up to the mix of chipotle, cinnamon, cayenne, and cloves.

The roasted red pepper-chipotle sauce is simple and tasty, but completely optional. If you don't feel like fooling with the extra step, no problem. Simply mince two chipotles en adobo (seeded or not, depending on your preference) and saute them along with the garlic. That gets you a fully spiced and spicy bowl without the extra appliance to wash. So much so that the recipe below is for the naked bowl, with the sauce as an optional variation.

Spiced Bean, Rice, and Veg Bowl

Print the recipe

serves 6

8 oz dried adzuki beans (or substitute black, kidney, or pinto beans), soaked 8 hours

1/2 tsp liquid smoke

1/2 tsp onion powder

1/4 tsp garlic powder

1/2 tsp fine sea or kosher salt

2 TBSP extra virgin olive oil

large handful green beans, trimmed

4 large cloves garlic, minced

2 chipotles en adobo (seeded if desired), minced

1 1/2 cups medium-grain brown rice

2 cups water

1/2 tsp ground cinnamon

1/4 tsp ground cayenne

1/8 tsp ground cloves

small handful flat-leaf parsley, chopped

salt and black pepper, to taste

Red Pepper-Chipotle Sauce, to serve, optional, recipe follows (if using, omit chipotles above)

Combine the soaked beans, liquid smoke, onion powder, and garlic powder in a large pot and add water to cover by two inches. Bring to a boil, reduce to a simmer, and cook with the lid cocked until the beans are tender, about 45 minutes. When tender, add 1/2 tsp salt and stir to combine. Pour off excess liquid, if needed. Set aside. (The beans can be prepared up to a few days in advance, but store them, refrigerated, in their cooking liquid.)

Heat oil in a dutch oven over medium heat. Add green beans and saute until crisp-tender, 3-5 minutes. Remove the beans with a slotted spoon, leaving the oil in the pot, and set aside.

Reduce heat to medium-low, add garlic and chipotles, and cook until fragrant, a couple of minutes, being careful not to burn the garlic. Add rice, stir until shiny and fragrant, and add water, cinnamon, cayenne, and cloves. Bring to boil, cover, reduce heat to low, and cook undisturbed for 30 minutes. The rice should be tender and no water should remain. Stir in the parsley, both cooked beans, and season to taste.

If using the red pepper-chipotle sauce, serve on the side at the table.

Red Pepper-Chipotle Sauce

2 large roasted red peppers

2 TBSP lemon juice

2 chipotles en adobo (seeded, if desired)

1/4 cup tahini

1/4 tsp fine sea or kosher salt

Blend all ingredients until smooth.

Comment

Comment

Party Animals No. 30: Mother's Day Brunch for Two

Hey, welcome. Consider following us on Twitter and subscribing to our RSS feed, or sign up for email updates from the Home Page.

Not only did we love celebrating Mother's Day with this wildly colorful, fresh, and flavorful intimate brunch, it was some of the easiest entertaining we've ever arranged, leaving most of our attention devoted to our guest. We whipped up ice cream and cheesecake the day before and sailed into brunch with little more than some chopping and a bit of searing required.

To start, a sparkling wine cocktail. We don't have an ice cream maker, so super-creamy homemade ice creams just can't happen. But since the purity of texture doesn't matter as much when you're making a float, we're getting into it in a pretty serious way as the weather heats up (stay tuned for another float coming in the near future). To make this drink, drop a large melon baller's worth of strawberry ice cream into a flute, pour over half an ounce of orange liqueur, top with bubbly of choice, and finish with a squeeze of fresh lemon or lime juice.

Next up, food. The salad, we winged, but it's one large peeled cucumber, seeded and diced, tossed with a small handful of chopped cilantro and, say, a couple of cups of chopped fresh pineapple. Add half a minced jalapeno, a generous pinch of salt, and lime juice to taste, a tablespoon or so. Let sit for a few minutes to let the flavors mingle before serving.

For the main event, we went with a stack, something in the neighborhood of a Tofu Benedict. Split an English muffin and toast the cut sides. Then follow our instructions here for the tofu and green beans, using only seven ounces tofu (cut into four slices--half the recipe over there) and substituting one dozen trimmed green beans for the asparagus in that post. And be sure to add a generous sprinkle of black pepper to the tofu along with the other seasonings.

To serve, top each muffin half with half a dozen green beans, two slices of tofu, and smother each in this pretty wonderful roasted red pepper-avocado sauce. This makes more sauce than needed for the brunch for two, but you'll be thrilled to have the leftovers.

Dead Simple Roasted Red Pepper-Avocado Sauce

Print the recipe

flesh of 1 ripe avocado

2 large roasted red peppers (jarred or freshly roasted)

1/2 tsp garlic powder

1/4 tsp dried dill

1 TBSP lemon juice

1 tsp dijon mustard

dash hot sauce

Blend all ingredients until very smooth. Adjust seasoning, if necessary.

We wrapped the meal with the Lemon Cheesecake recipe from The Joy of Vegan Baking, which has never failed to please any of our crowds. We whipped up a simple ginger snap cookie crust for the base and for a topping, sliced strawberries lightly marinated in equal parts orange liqueur and black walnut balsamic vinegar.

Comment

Comment

Tempeh-Broccoli Salad Pita with Stone-Ground Mustard, Walnuts, and Cornichons

Hey, welcome. Consider following us on Twitter and subscribing to our RSS feed, or sign up for email updates from the Home Page.

First off, this one's for the deli crowd. The lovers of dark mustard and pickles. This pita, stuffed with spicy stone-ground mustard, mellow cornichons, crunchy walnuts, and lightly nutty tempeh all mixed together with bits of broccoli,  makes for a fully satisfying sandwich with great texture.

And while it's common to mean heavy potatoes and pasta when we say "comfort food," there's another, subtler, workaday sort of comfort food that is no less powerful (more, possibly) for being a staple dish you turn to day after day for simple, but serious, pleasure. That's this pita.

Tempeh-Broccoli Salad Pita with Stone-Ground Mustard, Walnuts, and Cornichons

Print the recipe

serves 4

1 medium crown (about 10 oz) broccoli, torn into large florets, tough stems discarded

8 oz tempeh

3/4 cup raw, unsalted walnuts

1 dozen cornichons

1/4 cup stone-ground mustard

1/4 cup extra virgin olive oil

black pepper, to taste

2 loaves pita, cut in half

lettuce (any tender variety)

Steam the broccoli and tempeh, uncovered, for 10 minutes.

Meanwhile, chop the walnuts and cornichons. Stir together mustard, oil, and pepper in a mixing bowl.

When the tempeh and broccoli are done, carefully remove the tempeh from the steamer and set aside. Add the broccoli to a food processor and carefully pulse (watch for steam) until well chopped. Add tempeh and pulse until crumbled, but chunky.

Add walnuts, cornichons, broccoli, and tempeh to the mixing bowl and combine thoroughly. Adjust seasoning, if necessary. Tuck a couple of lettuce leaves along the bottom of a pita half, spoon salad generously on top, and serve.

Comment

Comment

Lemon-Pepper Chickpea-Artichoke Salad Sandwich

Hey, welcome. Consider following us on Twitter and subscribing to our RSS feed, or sign up for email updates from the Home Page.

Lemon and pepper and artichoke hearts, oh my. Add chickpeas, parsley, and chives, and get to munching. This light, lemony, downright breezy sandwich is elegant enough for early-day entertaining, easy enough to to make for packed lunches, and good enough to eat almost everyday. Top your sandwich with baby arugula for a nice garnish.

To make this truly a snap to put together, we use canned artichoke hearts, and to save money, we cooked our chickpeas from dried beans the day before, while we were making a different meal. To keep them firmly all-purpose, we didn't season the chickpeas at all after cooking. If you opt to use canned beans, you may need less salt than called for in the recipe.

Lemon-Pepper Chickpea-Artichoke Salad Sandwich

Print the recipe

makes enough for about 6 sandwiches

1 14-oz can quartered artichoke hearts, drained and rinsed well

3 cups cooked chickpeas (or 2 cans, drained, but not rinsed)

1/2 cup loosely packed (about 1 medium bunch) flat-leaf parsley, roughly chopped

1/2 oz (a good handful) chives, finely chopped/snipped

1/4 cup extra-virgin olive oil

2-3 tsp cracked black pepper, to taste

juice and zest of 2 lemons

1/2 tsp fine sea or kosher salt, or to taste

whole wheat or multigrain bread, for serving

baby arugula, for serving (optional)

Add the artichoke hearts to a food processor and pulse until finely chopped. Add chickpeas and parsley and pulse until chickpeas are well chopped, but still a bit chunky. In a medium bowl, stir together all other salad ingredients, add the chickpea-artichoke mix, adjust seasoning if necessary, and serve at room temperature on hearty bread.

Comment

Comment

Beachside Corn-Potato-Roasted Poblano Tacos

Hey, welcome. Consider following us on Twitter and subscribing to our RSS feed, or sign up for email updates from the Home Page.

If you're ready for sunshine and picnics but still experiencing the occasional snow-in-April event, come sit by us. Take two classic beach-boil foods--sweet corn and fluffy potatoes-- from the freezer and combine them with roasted poblanos and Old Bay seasoning to make one killer taco (or three). These tacos may remind you of the shore, but whip up nicely in any chilly spring kitchen.

With the corn and potatoes soaking up a bit of buttery coconut milk, the taco filling is a real charmer, but don't skip the garnishes, which is what brings the freshness that balances the starch. We had intended to use chives in place of the red onion, but had to make do, so feel free to make that swap. And if you're a cilantro hater, try parsley or even finely shredded romaine. But whatever you do, don't skip the squeeze of lime. Cold pilsner optional, but highly recommended.

A note on the potatoes: we use frozen hash browns for convenience, but not for the crispy surface area. Instead, simply baking them leaves them tender and fluffy, and the fine texture means they break down just a bit during mixing and provide a touch of binding. If you want to cook your potatoes from scratch, try baking and cooling (even chilling) the potatoes, then grating them.

Beachside Corn-Potato-Roasted Poblano Tacos

Print the recipe

yields 8 tacos

2 large poblano peppers, stemmed, seeded, and halved lengthwise

16 oz frozen hash browns (look for a brand that contains nothing but potatoes)

generous pinch salt

1 TBSP olive oil

2 cloves garlic, minced

12 oz frozen (or fresh) corn kernels

2 tsp Old Bay seasoning

1/4-1/2 tsp black pepper, to taste

2/3 cup full-fat canned coconut milk

8 six-inch soft corn tortillas, warmed

chopped chives (or thinly sliced red onion), for garnish

chopped cilantro, for garnish

lime wedges, for garnish

Heat oven broiler and place poblanos, cut-side down, on a baking sheet lined with aluminum foil. Place on a rack five to six inches from heat source and cook until blistered and black over most of the surface, about 10 minutes. Remove from oven, carefully gather the foil ends and wrap into a closed package. Set aside.

Heat oven to 350. Line a baking sheet with parchment, spread the hash browns out evenly, sprinkle with salt, and bake until fluffy and beginning to brown at the edges of the pan, 30-40 minutes.

Meanwhile, heat oil gently over medium heat in a large pan and saute garlic, being careful not to burn. After two minutes, add corn, Old Bay, and pepper. Stir to combine and cook for three minutes, reducing heat as necessary to avoid scorching. Add coconut milk and stir to combine. Cover, reduce heat to low, and hold until the potatoes are ready.

Meanwhile, unwrap the peppers, make sure they're cool enough to handle, and carefully remove the skins (by this time, they should come away easily). Cut each half in half lengthwise to get a total of 8 strips.

Stir the cooked potatoes into the corn mixture and adjust seasoning, if necessary.

To assemble, place a poblano strip in the bottom of a tortilla, top generously with potato-corn mix, sprinkle on chives and cilantro, and top it all with a light squeeze of lime.

Comment

Comment

Party Animals No. 29: Spiced Almonds Two Ways (from Pure Vegan) for a Birthday Gift

Hey, welcome. Consider following us on Twitter and subscribing to our RSS feed, or sign up for email updates from the Home Page.

When we received the invitation to an (obligation-free) birthday dinner for one of our loveliest friends, we knew we didn't want to come empty-handed.  So out came the cookbooks, and the spiced nuts from Pure Vegan felt like the right fit. We followed directions from the book precisely, but we'll give you the rough outline.

First up, the maple-ginger-tamari almonds. Equal parts grade B maple syrup and reduced-sodium tamari (the book does not call for R-S, but it's all we ever use) are whisked together with olive oil and a dose of powdered ginger. Bake until browned, let cool, et voila.

The vanilla-mint nut recipe is really a recipe for pistachios, but we had extra almonds and no pistachios on hand. (Pistachios do not last long in the MSV kitchen.)

Give the nuts a preliminary toast (about half the total time), and meanwhile, combine one part fine sea salt, one part vanilla extract, and three parts each olive oil and minced fresh mint. Toss together, pop back in the oven for the last half of toasting, and let cool. Or serve warm. Bliss.

Both recipes yield a beautiful nut that isn't too heavily seasoned. They make elegant snacks alone or can jazz up a salad. And don't forget to toss them on top of ice cream. Enjoy.

Comment

6 Comments

Seared Asparagus and Tofu Sandwich with Garlic-Herb Sauce

Hey, welcome. Consider following us on Twitter and subscribing to our RSS feed, or sign up for email updates from the Home Page.

Hello, spring. Crisp asparagus paired with simple seared tofu, all toasted on wheat with this completely gorgeous, dead-simple garlic sauce means meals are full of flavor and light on elbow grease. Because you've got some spring sunshine to soak in.

One of the things that makes this sandwich a breeze is the fact that we don't bother pressing the tofu here. Give it a good sear on the outside to provide an alluring golden crust, and let the inside of your tofu stay blissfully tender to contrast the crispness of the asparagus and toasted bread.

The only thing that takes time with this recipe is roasting the garlic for the sauce. To make it easy on yourself, throw a couple cloves in the oven any night while you're making something else, then you can keep the sauce in the fridge for several days, ready to go. It's a killer accompaniment to this and other vegetable sandwiches, makes exquisite garlic bread, and we can't wait to try it with summer's tomatoes.

Seared Asparagus and Tofu Sandwich with Garlic-Herb Sauce

Print the recipe

makes 4 sandwiches

about 30 asparagus spears, tough ends removed

1 tsp olive oil

generous pinch fine sea or kosher salt

14 oz extra-firm tofu, drained

2 TBSP nutritional yeast

1/2 tsp fine sea or kosher salt

8 slices wheat bread (we like Flour Head)

1/4 cup Garlic-Herb Sauce, or to taste, recipe follows

black pepper, to taste

Heat a countertop electric grill (or griddle or outdoor grill). Toss asparagus with 1 tsp oil and generous pinch salt. Spread asparagus in a single layer and grill until crisp-tender and browned in spots, 7-10 minutes, or as needed. Set aside.

Heat a large nonstick skillet over medium-high heat. Meanwhile, with the tofu in landscape position (long end toward you), cut it into 8 even slices. When the skillet is hot, carefully add the tofu in a single layer, without touching. Whisk together the nutritional yeast and 1/2 tsp salt, sprinkle over the tofu, and let cook, undisturbed, 5 minutes. Flip the tofu and cook another 4-5 minutes, until golden brown.

Reheat your countertop grill or a sandwich press. For each sandwich, top one slice of bread with two slices tofu, 7-8 asparagus spears, a generous drizzle (about 1 TBSP) Garlic-Herb Sauce, and freshly cracked black pepper to taste. Sandwich, grill until golden, and serve warm.

Garlic-Herb Sauce

yields 1 cup

2 large garlic cloves, unpeeled

1 tsp olive oil

1 cup full-fat canned coconut milk (we used Thai Kitchen brand)

1 tsp dried dill or other herb of choice, or 1 TBSP fresh herb(s) of choice

1/4 tsp fine sea or kosher salt

Heat oven to 400.

Place garlic cloves in a small piece of aluminum foil, drizzle oil over garlic, wrap up, and cook 30 minutes, until softened. Allow to cool before discarding skins.

Combine roasted garlic, coconut milk, herb(s), and salt. Blend until smooth. Chill until ready to use. Will last a few days in a small, airtight container in the refrigerator.

6 Comments

Comment

Party Animals No. 28: Big Ears 2014 Sunday Brunch ftr. Sweet & Spicy Sweet Potato-Prune-Pecan Tamales

Hey, welcome. Consider following us on Twitter and subscribing to our RSS feed, or sign up for email updates from the Home Page.

The Big Ears Festival is a big deal around the MSV house. Since it revived this year after a too-long hiatus, we decided to make it an even bigger deal by hosting brunch on the final morning of the fest. The menu:

  • sweet & spicy sweet potato-prune-pecan tamales served with maple syrup and a rich coconut-lime spread
  • refried beans served with avocado slices and habanero salsa
  • broiled grits cakes
  • jicama-grapefruit salad with sweet citrus-mint dressing
  • tortilla chips and mild tomato salsa
  • ginger-mango agua fresca
  • lime-cucumber-mint agua fresca

We cannot get over how great these tamales are. Tons of flavor, but with a fairly short list of ingredients, these little guys hit our homestyle culinary sweet spot. And since the filling is fairly firm at room temperature (it does soften upon steaming), these tamales are some of the easiest to assemble you may ever find.

And note that we had extra dough left, which we formed into plain tamales, and they rival the filled ones for our affections. Like biscuits or tortillas, tamales without fillings make wonderful meal accompaniments, and we found these particularly charming. (Plus, dead simple to form.)

Print the recipes

Sweet Potato-Prune-Pecan Tamales

yields about 30 filled tamales, plus another 6 or so plain

For the filling

3 cups chopped pecans

3 cups (about 60) prunes, roughly chopped

1 ½ tsp smoked paprika

1 ½ tsp chipotle powder

1 TBSP ground cinnamon

For the dough

24 oz sweet potato, peeled, diced, and boiled until very tender

¾ tsp ground cinnamon

¾ tsp freshly ground nutmeg

3 TBSP maple syrup

3 ¾ cups warm water

¾ cup vegetable oil

1 ½ tsp salt

1 TBSP baking powder

5 ¼ cup masa harina

To assemble:

corn husks, soaked for about an hour

Heat oven to 400 and toast pecans until darkened and fragrant, about 10 minutes, being careful not to burn. Transfer to a food processor and grind to a minced texture. Meanwhile, mash prunes with spices in a mortar and pestle (alternately, pulse in a food processor).

In the bowl of a stand mixer, combine cooked sweet potato, spices, syrup, and oil. Mix well. Add water and mix again. Sift together salt, baking powder, and masa harina. Add to the wet ingredients and mix with the paddle attachment until fluffy and smoothed out a bit. The dough will remain a little sticky.

Assemble tamales using 2-3 TBSP of dough and a generous TBSP of filling for each. Steam for 40-45 minutes.

If desired, serve with maple syrup and our Coconut-Lime Spread.

The coconut-lime spread is adapted from Saveur, but we found their version far too sweet for our liking. And that goes double when you're already offering maple syrup on the table. So we put the emphasis back on the richness of the coconut milk and ended up with a silky, totally luxuriant condiment.

Coconut-Lime Spread

yields 3/4 cup

1 can coconut milk

1 TBSP natural cane sugar (evaporated cane juice)

1/8 tsp pectin

zest of ½ lime

Simmer coconut milk and sugar until reduced to 3/4 cup, about an hour. Stir in pectin and zest. Cool and chill.

Next up, a note on our savory components. Our refried beans aren't actually refried at all, but simply well done and pulsed with an immersion blender and some added oil before serving. Many a meal has been made from them. And while the grits cakes are pretty irresistible handheld munchies, our favorite way to dig into both is to top the grits with the beans, then avocado, and a drizzle of spicy salsa.

To add a fresh element to the table, we combined crispy, juicy, earthy, gently sweet jicama with brightly colored, tart grapefruit and tossed it all in a dressing of mixed citrus and mint. Totally simple and a total winner.

Grapefruit-Jicama Salad with Sweet Citrus-Mint Dressing

2-3 large jicama, cut into matchsticks

4 grapefruit, peeled and segmented

¼ cup + 2 TBSP orange marmalade (bittersweet preferred)

¼ cup + 2 TBSP lime juice

¼ cup apple syrup

finely chopped mint leaves from about 3-4 sprigs, or to taste

Whisk together marmalade, lime juice, syrup, and mint. Pour over jicama and toss well. Add grapefruit and toss gently to distribute.

Since a pal was generous enough to offer to bring the day's cocktail--a tasty ginger-tequila-lime concoction we're bummed we didn't take a shot of--we had time to whip up a couple of refreshing and festive non-alcoholic options. The lime-cucumber-mint agua fresca seen above is total heaven alongside the habanero salsa. Highly recommended for the warm months when you find yourself with a stack of grits, beans, avocado, and salsa. Which we expect we often will.

Also on the table was a ginger-mango agua fresca (which we also failed to shoot) that can certainly be had alone, but mixes well with bubbly, which another guest was kind enough to provide. For an even lighter alcoholic drink option (because seriously, some of us have things to do after brunch), it mixes beautifully with light beer when garnished with a squeeze of lime. Summer in a glass.

Do note that both of these recipes offer guidelines when diluting the mixtures. Add as much or as little water as you like to get a light, refreshing result that you feel like you could drink all day. And finally, we really prefer turbinado sugar for these. If you choose to use white sugar, you'll likely need less than called for.

Lime-Cucumber-Mint Agua Fresca

24 oz cucumber, peeled, seeded, and sliced

1/2 cup lime juice

6 TBSP turbinado

3 cups water

3 sprigs mint

Puree all ingredients except mint. Add mint to a pitcher, pour the agua over it, and chill. Serve over ice.

Ginger-Mango Agua Fresca

20 oz thawed frozen mango

1/4 cup lime juice

2 oz ginger

1/4 cup turbinado

20 oz club soda

Puree all except sparkling water. Strain. Chill the liquefied mango and club soda separately. Add soda just before serving and mix well. Serve over ice.

And since it was also(!) another friend's birthday, we'll leave you with a little shot of a ganache tart we made using our cornmeal-bourbon shortbread recipe for the crust. Cheers!

Comment

Comment

Habanero and Roasted Red Pepper Salsa

Hey, welcome. Consider following us on Twitter and subscribing to our RSS feed, or sign up for email updates from the Home Page.

Fruity and fiery habaneros, brilliantly colored and sweet roasted red peppers, a little garlic and onion, and done. A rough chop, a few minutes under the broiler, and you have a condiment that puts the bottles in your cabinet to shame. At least for as long as the jar lasts. Which isn't as long as you might think.

Most of us don't have the time and energy to make everything from scratch everyday, nor can every plate be a production. For us, an important part of enjoying our simpler meals means having an arsenal of homemade condiment recipes that can be kept in the fridge for a week and stand by ready to make a plain block of tofu or a can of beans into a satisfying meal.

Because, seriously, tofu scrambles and chickpea pancakes are our go-to convenience meals for nights we just can't stand the thought of washing the knife and cutting board(*). If we had to chop an onion every time we went to make them, it would defeat the whole purpose. Keeping this salsa in the fridge makes sure we're always only minutes from digging in.

(*That's also why broccoli is our favorite scramble veg--the florets can be picked apart by hand. And, bonus, if your tofu is set with calcium carbonate, the combo knocks out more than a third of your minimum recommended calcium for the day. That's a pretty powerful easy meal.)

Habanero and Roasted Red Pepper Salsa

Print the recipe

yields a generous 2 1/2 cups

1 small (or 1/2 large) white onion, halved and sliced

1 clove garlic, gently crushed and peeled

2 large red bell peppers, stemmed, seeded, and halved

5 habanero peppers, stemmed and halved

1 cup water

1 1/2 TBSP lime juice (from 1 or 2 limes)

1 1/2 TBSP white vinegar

1/2 tsp fine sea or kosher salt

Heat the oven broiler and place the peppers cut-side down on a baking sheet with the other vegetables (tuck the garlic clove under the edge of a bell pepper half to shield it from the direct heat to keep it from burning). Broil until the peppers are blistered and the onions have begun to brown in spots, about 15-20 minutes.

Meanwhile, add water, lime juice, vinegar, and salt to a food processor. Add charred vegetables and puree until smooth.

Comment

Comment

Vegan Lemon Meringue French Toast

Hey, welcome. Consider following us on Twitter and subscribing to our RSS feed, or sign up for email updates from the Home Page.

lemon meringue and cinnamon french toast table.jpg

This post is actually a two-fer, because it not only contains this completely fun vegan lemon meringue french toast, but our standard, loveable, dead-simple, cinnamon-laced french toast recipe serves as the base.

We're of the mind that this recipe sells itself, so in between shots of fluffy, barely sweetened vegan meringue, we're giving credit where credit is due, and there's plenty to go around.

The meringue is made from the gel that results from boiling flax seeds, and it was Miyoko Schinner who discovered this one. (Here, it's used as a soft, unbaked garnish, but the great folks at the PPK forums have done some additional work making flax meringue heat stable.)

Speaking of stability, this is fairly delicate stuff. It whips up great, but can't be held, so make sure you have your french toast prepped so you can serve it all up right when the meringue is done.

Whipping the flax gel is straightforward and takes only minutes, but you will need to plan ahead. It whips up best frozen and thawed, which takes time. So make the flax gel right now (really, right this minute), stick it in the freezer where it can sit until you're ready, then simply transfer to the fridge the night before you want to make this dish. Then the whole thing's done in less than 15 minutes.

And full disclosure: that stuff up there isn't lemon curd. It's a mango concoction we had left over from filling doughnuts (recipe soon!) after we ran out of our batch of lemon curd. It tends to go fast. Our totally tasty chamomile lemon curd--adapted from the infinitely useful Vegan Food Gifts--is smoother than what's pictured above, and only that brilliantly colored right after cooking:

Once chilled, which is when you'll actually use the stuff, the fat solids turn it pale and opaque:

And now what we all came for:

Vegan Lemon Meringue French Toast

Note: this recipe has been updated, September 2016

Print the recipes

serves 2 generously, inspiration from here

2 TBSP chickpea flour

1/4 cup unsweetened soy milk (or other nondairy milk, or water)

1/2 tsp ground cinnamon

pinch salt

2 tsp nondairy butter or coconut oil

2 large slices bread

lemon curd, recipe follows

vegan meringue, recipe follows

Whisk together chickpea flour, water, cinnamon, and salt.

Heat fat in a skillet over medium-medium-high heat. When thoroughly heated, dip each slice bread in the chickpea mixture, coating both sides, and cook for 3 minutes on each side, checking the second side after 2 minutes.

Serve with maple syrup for plain french toast or with lemon curd and meringue for lemon meringue french toast.

Chamomile Lemon Curd

yields 1 1/2 cups, adapted from Vegan Food Gifts

6 TBSP hot water

1 TBSP dried chamomile

1 cup natural cane sugar (evaporated cane juice)

1/2 cup lemon juice (from about 3-4 lemons)

zest of 1 lemon

1/4 cup nondairy butter

1/4 cup cornstarch

Steep chamomile in hot water for 10 minutes. Strain, reserving liquid, and discard chamomile.

Bring sugar and lemon juice to a boil over high heat. As soon as it bubbles, reduce heat to medium. Stir in zest and butter. Stir until melted.

Whisk together chamomile tea and cornstarch until smooth. By now, the pot should be bubbling again. Add chamomile-cornstarch slurry to the pot and stir constantly until thickened, a few minutes. (When it's ready, the curd will begin to come away from the bottom of the pot as you stir.) Allow to cool, then chill.

Vegan Meringue

adapted from Miyoko Schinner

1/3 cup brown flax seeds

2 cups water

1/8 tsp cream of tartar

1 TBSP powdered sugar

1/8 tsp vanilla extract (optional)

Add seeds and water to a small pot. Bring to a boil over high heat, reduce heat to medium and cook, stirring occasionally. Reduce the heat as necessary to keep the pot from boiling over, but maintain a steady high simmer. Cook for 20-25 minutes, until the strained gel measures 1/3 cup when you pour the whole mixture through a fine mesh sieve and give it a few good stirs to help release the gel a bit. (More volume, and it will be too delicate to reach stiff peak stage, at least that was our experience.) Reserve the seeds for another purpose.

Cool gel thoroughly, transfer to an airtight container and store in the freezer. (It should keep well for some time.) When ready to use, transfer to the refrigerator and let sit for at least 8 hours, or overnight.

Place the thawed gel in the bowl of a stand mixer (the gel may or may not still have a bit of ice crystals in it) fitted with the whisk attachment and whip on high for a total of about 9 minutes. (An electric hand mixer will work, too.) Add the cream of tartar after the first couple of minutes, when the mixture turns opaque and begins to gain volume. Add the sugar after 7 minutes, when it should be near stiff peak. Add the vanilla extract at the very end and whip just until incorporated.

Comment

Comment

The Seriously Serious Salad with Sesame-Crusted Scallions and Peanut Dressing

Hey, welcome. Consider following us on Twitter and subscribing to our RSS feed, or sign up for email updates from the Home Page.

the seriously serious salad with sesame-crusted scallions and peanut dressing table.jpg

It's easy to make a vegetable-centric salad into a satisfying meal by adding beans, grains, nuts, or seeds. Or if you want to get really serious, all of the above. And for a special garnish, take those often discarded scallion tops, crust them in a luscious blend of sesame seeds and almonds, and bake them into crispy little strips. Add a creamy peanut dressing, and salad for dinner is something to look forward to. Good enough to serve friends, even.

the seriously serious salad with sesame-crusted scallions and peanut dressing detail pepper couscous.jpg

If you hadn't already noticed, this salad is no joke: hefty enough for those with higher calorie needs or just the thing for a nourishing, energizing dinner on those days you barely grabbed lunch. But note that if your appetite isn't quite as large, the calories are easily adjusted down by reducing the couscous by half, and you'll still have a meal-sized salad on your hands.

The dressing makes more than needed for this amount of salad, and will keep well in the refrigerator for several days. It's good on everything. And of course, feel free to blend up a batch in advance so you have one less thing to do when you go to make your meal.

the seriously serious salad with sesame-crusted scallions and peanut dressing detail green.jpg

The mix of freshly chopped and softer cooked elements, a healthy dose of herbs, a small pepper for heat--in short, the variety of colors, flavors, and textures will keep you loving this bowl to the very end.

If you're new to handling a knife, just go slowly, and don't worry too much about presentation. (Our julienne is frequently closer to baton and never less tasty for it.)

the seriously serious salad with sesame-crusted scallions and peanut dressing detail carrot.jpg

The Seriously Serious Salad with Sesame-Crusted Scallions and Peanut Dressing

Print the recipe

serves 2 generously (see note in post)

For the dressing:

3/4 cup dry roasted, unsalted peanuts

1/4 cup rice vinegar

3 TBSP reduced-sodium tamari

1 TBSP sesame oil

1 TBSP lime juice

1 TBSP mustard powder

1/2 TBSP turbinado

1/2-inch knob peeled fresh ginger, sliced

1 clove garlic, peeled

1/2 cup water

For the scallions:

2 TBSP hulled sesame seeds

2 TBSP unsalted almonds

1/4 tsp fine sea or kosher salt

3 TBSP chickpea flour

3 TBSP water

8-10 scallion tops, from 4 scallions

For the salad:

1 cup water

1/2 cup frozen shelled edamame

1 cup dried couscous

1 head romaine, halved lengthwise and cut into 1-inch strips

4 scallions, white and tender green parts (tops reserved for garnish), very thinly sliced

1 carrot, peeled and julienned

1 red bell pepper, seeded and julienned

1 cucumber, seeded and julienned (peeled, if desired)

4 large basil leaves, thinly sliced

1/4 cup loosely packed cilantro, chopped (or substitute flat-leaf parsley)

1 serrano pepper, finely chopped (or less, to taste)

1 avocado, pitted, skinned, and sliced

freshly cracked black pepper, to taste

To prepare the dressing, add all ingredients to a half-quart jar and blend with an immersion blender until smooth, a minute or two (or use a standard blender). Set aside.

Heat oven to 375.

To prepare the scallions, use a coffee grinder to grind sesame seeds and almonds into a meal. Add salt, pulse to combine, and transfer to a pie plate.

In a wide, shallow bowl, whisk together chickpea flour and water. Individually, dip the scallions into the chickpea mix, scraping each side along the edge of the bowl to release excess batter. Press both sides into the sesame-almond meal, shake off excess, and transfer to a baking sheet. Bake until crisp and toasted, being careful not to brown (read: burn) them, about 10 minutes per side.

Meanwhile, heat 1 cup water in a pot over high heat. Place edamame into a steamer basket over the water, cover, and bring to a boil. Upon boiling, remove the steamer basket, add couscous to water, and stir to combine. Replace steamer basket and cover, turn off heat, and let sit, undisturbed, for 10 minutes. (If you don't have a steamer basket that can be handled when hot, steam or blanch the edamame separately.)

In a large mixing bowl, combine all chopped vegetables, except avocado. Add the edamame, fluff the couscous with a fork, add, and toss well. Add avocado and black pepper, toss gently to incorporate, and serve, garnished with the scallions and dressing on the side.

Comment

Comment

Red Beans and Broiled Grits Squares with Roasted Okra

Hey, welcome. Consider following us on Twitter and subscribing to our RSS feed, or sign up for email updates from the Home Page.

red beans and broiled grits squares with roasted okra table.jpg

Pair easy, slow-cooked, slightly saucy plump red beans with simple slices of roasted okra and addictive, seriously peppery cakes of grits that are crusty on the outside and creamy inside, and you have one satisfying meal.

Though this dish is ready to go as-is, if you have extra time and energy, try crusting the okra before baking.

red beans and broiled grits squares with roasted okra detail.jpg

Red Beans and Broiled Grits Squares with Roasted Okra

Print the recipe

serves 4

For the beans:

8 oz dried kidney beans, soaked for 8 hours

2 cups water

1/2 tsp onion powder

1/2 tsp dried marjoram

1 dried bay leaf

1 tsp liquid smoke

1 TBSP chickpea flour

1 TBSP nutritional yeast (optional)

1 TBSP olive oil

3/4 tsp fine sea or kosher salt

For the okra:

2 cups frozen sliced okra

2 tsp olive oil

generous pinch fine sea or kosher salt

For the grits:

2 1/2 cups water

1/2 tsp fine sea or kosher salt

3/4 cup quick-cooking grits

1/4-1/2 tsp black pepper, to taste

2 TBSP olive oil

To serve:

hot sauce (optional)

Drain and rinse soaked beans and add them along with 2 cups water, onion powder, marjoram, bay leaf, and liquid smoke to a slow cooker. Cook on low until tender, about 7 hours. Drain again, reserving the cooking liquid. Set aside.

Heat the oven to 425. Toss the frozen okra with oil and salt. Cook until browned and tender, about 45 minutes, tossing occasionally.

Prepare the grits by bringing 2 1/2 cups water and salt to a boil over high heat. Add grits, reduce heat to medium, and cook, stirring very frequently, for 5 minutes. Add pepper and oil, stir until the grits have soaked up the oil, and remove from heat. Transfer to a loaf pan and chill until firm, about half an hour.

To finish the beans, heat a dry skillet over medium-high heat. Add the chickpea flour and toast, tossing, for a minute or two, until fragrant. Add the nutritional yeast and oil and whisk to form a paste. Continue to cook for another 3-4 minutes. Whisk in the reserved cooking liquid from the beans and let simmer for another 2-3 minutes--it will not thicken dramatically, but it will gain a little body. Stir in the beans, adjust seasoning, if necessary, and keep warm.

Heat the oven broiler with a rack in the second highest position. Slice the chilled grits and transfer to a baking sheet. Broil until crusty on top and golden in spots, about 15 minutes per side.

To serve, top two grits squares with a generous helping of beans and finish with okra. Serve with hot sauce, if desired.

Comment