Hey, welcome. Consider following us on Twitter and subscribing to our RSS feed, or sign up for email updates right over here.
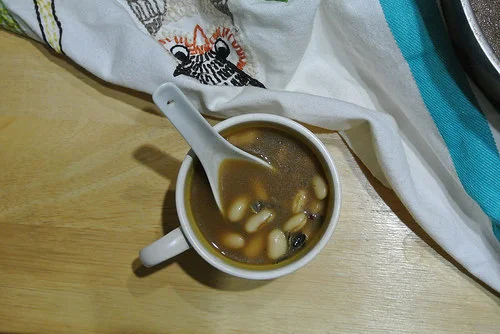
Winter's only days away now, and soup is definitely in order. This one is simple but lovely and woodsy, with plenty of gorgeously nutty wild rice and plump, tender beans for heft. A generous addition of white pepper gives the bowl an assertive but not aggressive warmth that will be welcome for months to come. (Though of course, if you're sensitive to heat, start small and season to taste.)
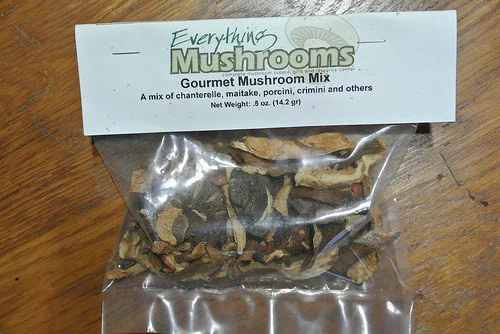
The broth gets a nice body and depth from two concentrated flavor sources: red miso and a bunch of ground dried mushrooms. Grit can always be an issue with mushrooms, but you're grinding this right down to powder to ensure every last bit of flavor makes it into your soup. The above from Everything Mushrooms have been ground into several soups and a couple gravies with no texture problems yet. Good stuff. And all that immediate flavor makes the soup nearly effortless. If you can wait for wild rice to cook, you've got this one down.
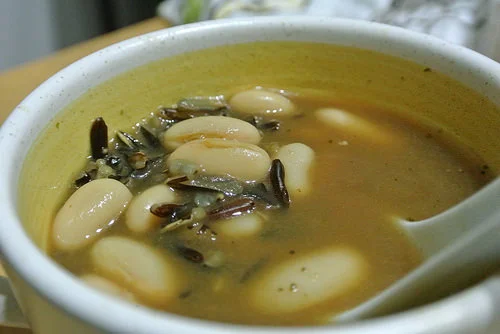
Warming Cannellini Bean and Wild Rice Soup with Mushroom Broth
serves 2-4
1/2 oz dried mushrooms of choice
6 cups water
1 no-sodium-added vegetable bouillon cube
1/2 tsp dried sage
1/2 tsp dried thyme
1 bay leaf
1/2 cup wild rice
1 15-oz can cannellini beans, drained and rinsed
1/2 tsp white pepper
1 TBSP red miso
1 tsp red wine vinegar
Grind the dried mushrooms to a powder in a coffee grinder. Add 5 cups water to a pot. Whisk mushroom powder into remaining cup of water, then whisk that into the pot. Add bouillon cube, sage, thyme, and bay leaf, cover, and bring to a boil. Add rice, cover, make sure the pot returns to a boil, and reduce heat to low. Simmer steadily without disturbing for 45 minutes. Check rice. Cook longer, if needed.
Remove bay leaf. Increase heat to medium-low. Add beans and white pepper. Let simmer gently, uncovered, until beans are warmed through, 5-7 minutes. Meanwhile, add a ladle full of soup to a small bowl and whisk in miso. Remove pot from heat, stir in miso mixture, and add vinegar. Stir, adjust salt, if needed, and serve.