Viewing entries in
recipes

Comment

BBQ Tofu-Pecan Loaf Sandwich with Pineapple and Smoky Tahini Sauce

Hey, welcome. Consider following MSV on Twitter and subscribing to the RSS feed, or sign up for email updates right over here.

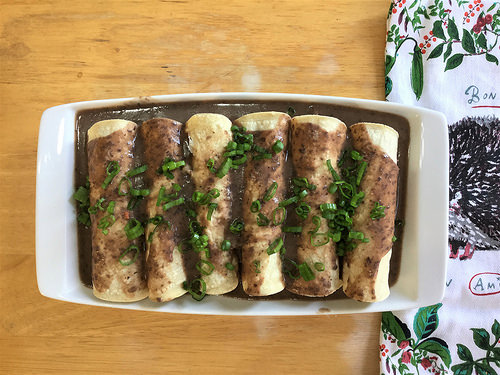
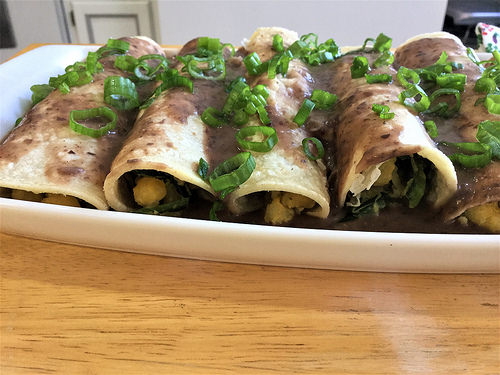
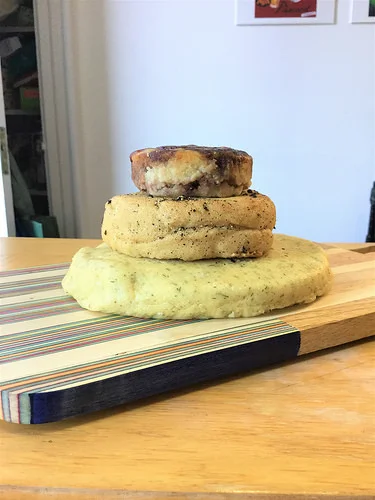
Technically, this recipe should be called BBQ-sauced tofu-pecan loaf sandwich. Now that that's out of the way, what you really need to know is that this sandwich is so much fun. Big and messy and savory and meaty and juicy, and so, so easy.

The tofu-pecan loaf looks fussy, but it really isn't. Process a few things in the food processor, stir it up with the dry ingredients, and the slow cooker takes care of the rest. Which means all you have to do for dinner is whisk together two quick sauces and grill a few rings of pineapple.

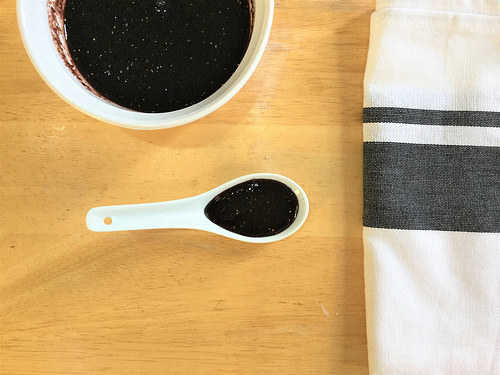
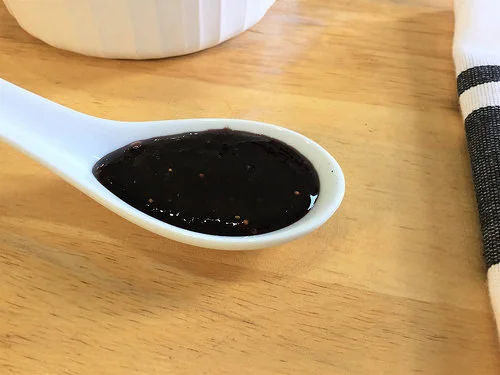
The BBQ sauce, by the way, is a total shortcut sauce from the pantry. It gains a little depth from being added to the slow cooker toward the end of cooking. The pineapple adds a welcome dose of fresh sweetness to the whole thing. Did I mention easy and fun?

BBQ Tofu-Pecan Loaf Sandwich with Pineapple and Smoky Tahini Sauce

Print the recipe

loaf adapted from The Vegan Slow Cooker

For the tofu-pecan meatloaf

1 cup water

1 cup TVP (textured vegetable protein) 

1 lb Twin Oaks brand extra-firm tofu [see Note]

1/2 cup pecans

3 sun-dried tomatoes packed in oil, roughly chopped

1/2 tsp liquid smoke

1 cup oat bran

1/4 cup nutritional yeast

1 tsp garlic powder

1 tsp dried basil

1 tsp dried oregano

1 tsp dried marjoram

1/2 tsp fine sea or kosher salt

For the BBQ sauce

1/4 cup ketchup

2 tsp turbinado (or brown sugar)

1 tsp apple cider vinegar

1 tsp reduced-sodium tamari

1 tsp molasses

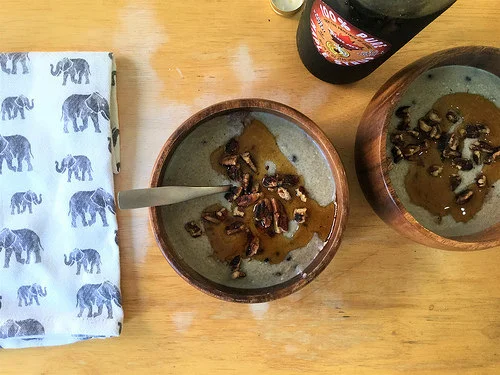
For the smoky tahini sauce:

1/4 cup tahini

1/4 cup water

2 TBSP lime juice

1/2 tsp fine sea or kosher salt

1/2 tsp smoked paprika

To assemble

sourdough

grilled pineapple rings

Boil the cup of water in a small sauce pan, remove from heat, and stir in TVP. Let sit 10 minutes.

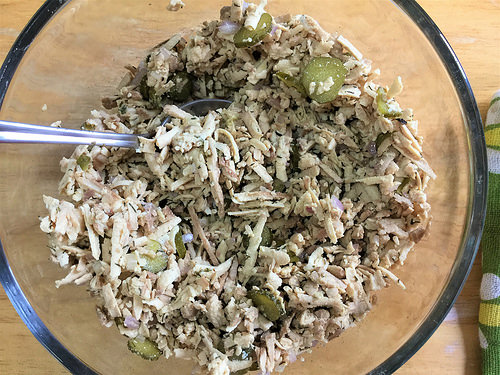
Meanwhile, roughly crumble tofu into the bowl of a food processor. Add pecans, sun-dried tomatoes, tamari, and liquid smoke. Process thoroughly.

In a large mixing bowl, combine oat bran, nutritional yeast, garlic powder, basil, oregano, marjoram, and salt. Stir to combine, add tofu-pecan mixture, and use your hands to thoroughly combine. Add rehydrated TVP and mix again until incorporated. Press mixture firmly into a lightly oiled slow cooker and cook on low for 6-7 hours.

Half an hour before serving, whisk together all BBQ sauce ingredients. Spread over top of the tofu-pecan loaf, replace lid, and let cook 30 minutes, undisturbed.

Meanwhile, whisk together all tahini sauce ingredients and set aside. Cut your pineapple into rings and grill until you have dark sear marks, but the pineapple is still firm—it will take only a few minutes. (A countertop electric grill is just fine, or sear rings just until golden on both sides in a skillet or griddle.)

When the loaf is ready, sandwich and serve.

Note on tofu: Twin Oaks brand is significantly denser than other brands of tofu. If it's not available to you, purchase two blocks of the firmest tofu you can, press them for 30 minutes, then weigh out a pound.


Comment

Comment

Polenta and Black Bean Enchiladas with Tomato Sauce and Avocado

Hey, welcome. Consider following MSV on Twitter and subscribing to the RSS feed, or sign up for email updates right over here.

All my cornmeal lovers, today is your day. Fluffy polenta, earthy black beans, a spicy tomato sauce, and creamy slices of avocado all inside a warm hug of corn tortillas: what's not to love?

These guys take just a touch longer than MSV's other easy enchiladas because, hey, that's the price you pay for tomato sauce, which needs a little extra time to cook. The bright side is that there's still very little effort. Since the sauce is blended, you roughly chop the bits for the sauce and let your food processor take it from there.

The rest is pure convenience: canned black beans join up with grated prepared polenta to warm up in a skillet. The liquid from the beans (and heat, of course) will soften the polenta, and the final result is a pillowy filling soft enough to stay fluffy, but stiff enough not to ooze out of your tortillas. It's not much to look at, and the textures aren't as varied as you'd normally expect, but it works. Brunch doesn't get much more comforting than this.

Polenta and Black Bean Enchiladas with Tomato Sauce and Avocado

Print the recipe

serves 3-4 (yields 9 enchiladas), sauce adapted from Enchiladas

For the sauce:

1 1/2 lbs Roma tomatoes, quartered

2 serrano peppers, stemmed and halved (seeded and trimmed, if desired, to reduce heat)

2 cloves garlic

1/4 cup loosely packed cilantro

4 scallions, divided

1 no-salt added vegetable bouillon cube

1 TBSP olive oil

1/2 cup water

1/4-1/2 tsp fine sea or kosher salt, to taste

For the filling:

1 TBSP olive oil

1 18-oz tube prepared polenta

1 15-oz can black beans

freshly cracked black pepper

1/2 tsp fine sea or kosher salt

To assemble:

9 six-inch corn tortillas

sliced avocado

chopped cilantro, optional

sliced scallion tops, optional

Heat oven to 350.

Begin with the sauce. Add tomatoes, peppers, garlic, cilantro, white and firm green portions of scallions (set tender dark green top aside), and bouillon cube to a food processor. Blend until smooth. Heat oil in a medium pot over medium heat and add sauce. Bring to a simmer and cook, stirring occasionally, for 10 minutes—the mixture will turn deep red. Add 1/2 cup water, reduce heat to medium-low and simmer, stirring occasionally, another 20 minutes. Salt to taste.

Meanwhile, divide tortillas into three stacks of three. Wrap each stack securely in foil and heat in oven for 20 minutes.

To prepare the filling, heat oil in a nonstick skillet over medium heat. Grate polenta into skillet and spread out. Let cook, undisturbed, for two minutes. Use a wide plastic spatula to flip polenta. Continue to let cook, flipping every couple of minutes, until fluffy and heated through, about 10 minutes.

Meanwhile, use the lid of the bean can to drain off excess liquid. Do not drain further. Add beans to skillet, add black pepper, to taste, and salt, and flip the whole thing a few times to combine. Continue to let cook, flipping every couple of minutes, until beans are hot, about five minutes. Remove from heat and keep warm.

While the tortillas and sauce finish, chop scallion tops and cilantro to garnish, if using, and slice avocado. To serve, carefully open a foil packet (leave remaining stacks wrapped until you're ready to work with them) and take a warm tortilla from the top. Place a generous spoonful of filling just off-center, fold over, and repeat with remaining tortillas, working quickly. Pour or spoon sauce over top, garnish with scallions, cilantro, and avocado, and serve at once.

Comment

Comment

Dead Simple Smoked Tofu Salad Sandwich (for Summer)

Hey, welcome. Consider following MSV on Twitter and subscribing to the RSS feed, or sign up for email updates right over here.

Granted, you don't actually have to reserve this tasty mix of smoked tofu, shallot, and cornichons for the warm months, but the salty and savory salad begs to be topped with fresh produce and served open-faced. Think sliced radishes, spicy greens, or—of course—nice big slices of tomato.

Grated smoked tofu gives great flavor and texture, and plays extremely well with finely diced shallot and briny little pickles. Dress it all up a bit further with a touch of Dijon and dill, and breezy summer lunches are no sweat at all.

Dead Simple Smoked Tofu Salad Sandwich (for Summer)

Print the recipe

serves 2-4

8 oz smoked tofu, such as Soy Boy brand

1 shallot, minced

5 cornichons, thinly sliced (about 2 TBSP)

2 tsp extra virgin olive oil

1 tsp Dijon-style mustard

1/2 tsp dried dill

1/4 tsp freshly cracked black pepper

Grate tofu into a mixing bowl. Add all other ingredients and stir to combine. Serve at once or chill until ready to use.


Comment

Comment

Espresso-Bourbon Tofu-Peanut Butter (Breakfast) Mousse

Hey, welcome. Consider following MSV on Twitter and subscribing to the RSS feed, or sign up for email updates right over here.

Tofu mousse might not sound like a great idea to a large-ish chunk of the population—especially in the post-aquafaba world—but done with care, it's a totally fabulous idea. Especially for summer breakfasts. It's cool and creamy and fluffy, pairs well with fruit or can be eaten on its own, and can be made in batches in a total snap, so it's just sitting in the fridge waiting for you on any given morning. And it's seriously satisfying, thanks to a good dose of protein from both silken tofu and peanut butter, the latter of which also adds a satiating helping of fat.

Peanut butter, vanilla, a touch of bourbon and lemon, and instant espresso powder all team up to make a flavorful, protein-packed breakfast or snack. You can easily turn this into dessert by adding a cookie (and if your sweet tooth is on the modest side, you may find it weekday dessert-ready as-is). Feel free to thin the whole thing out with coconut milk to transform it into a decadent drizzle over brandy-warmed dates for an honest-to-goodness dessert you could even serve to guests. Yep.

Espresso-Bourbon Tofu-Peanut Butter (Breakfast) Mousse

Print the recipe

yields about 2 cups

12 oz silken firm tofu (from an aseptic pack)

1/2 cup smooth peanut butter (look for a brand that contains nothing but peanuts)

1/4 cup maple syrup, grade A: dark color and robust flavor strongly recommended

2 TBSP lemon juice

1 TBSP bourbon

2 tsp instant espresso powder

1 tsp vanilla extract

1/4 tsp salt

Puree all ingredients until smooth.

Can be served immediately, but it benefits from chilling for at least 30 minutes to one hour before serving, in terms of both flavor (as the flavors mingle, the espresso will mellow) and texture (the mousse will firm up and become fluffy).

Comment

Comment

Grilled Eggplant and Onion Sandwich with Hummus and Arugula

Hey, welcome. Consider following MSV on Twitter and subscribing to the RSS feed, or sign up for email updates right over here.

This hard-working little guy is shaping up to be the official MSV sandwich of summer 2017. And for good reason. Toothsome eggplant goes for a quick swim in a simple savory marinade, yellow onions are grilled and finely chopped for a sweet contrast to the smoky eggplant, and the whole thing is finished with gently spicy baby arugula and a creamy dose of hummus for extra flavor and satiety.

It's a great easy dinner warm off the grill(*), but good news: this sandwich eats mighty fine cold, too.

(*indoor electric in the MSV kitchen, of course, but feel free to take it into the backyard, if you have one of those)

Grilled Eggplant and Onion Sandwich with Hummus and Arugula

Print the recipe

serves 4

3 TBSP plus 1 tsp olive oil, divided

2 tsp Dijon-style mustard

2 tsp balsamic vinegar

2 tsp reduced-sodium tamari

4 three-inch-wide, half-inch-thick slices eggplant, from one small globe eggplant

1 sweet onion, peeled and cut into half-inch-thick slices

fine sea or kosher salt

freshly cracked black pepper

1 tsp lemon juice

baguette

1/4 cup prepared hummus

baby arugula leaves

In a shallow dish that fits the eggplant slices snugly in one layer, whisk together 3 tablespoons oil, mustard, vinegar, and tamari. Place eggplant in marinade in a single layer. Marinate 10 minutes, flipping halfway.

Meanwhile, heat a closing countertop electric grill. Toss onion slices with remaining teaspoon oil with a generous pinch of salt and freshly cracked black pepper, to taste. Place in a single layer on the hot grill, close the lid, and grill 6-7 minutes, until fragrant, with deep golden grill marks—rotate the slices after a few minutes so that you get sear marks running in both directions across the surface of the onion. When done, carefully transfer (tongs work best) grilled onions to a food processor bowl.

Give eggplant one last turn to coat generously with marinade and carefully place on hot grill in a single layer. Close lid and cook until tender and just a bit charred, 3-4 minutes—it will cook quickly since by this time, the grill pan is quite hot. Remove from grill.

While eggplant cooks, chop onions finely in processor. Stir in lemon juice and set aside.

Cut baguette in half lengthwise and cut off four six-inch segments. Divide onions among the bottom half of loaves. Cut each eggplant round in half and place two half-moons side by side atop the onions. Add arugula. Spread each top half of loaves with a tablespoon hummus. Sandwich and serve at once.

Comment

Comment

Pesto-Swirled Polenta with Fresh Tomato and Lemon-Pepper Chickpeas

Hey, welcome. Consider following MSV on Twitter and subscribing to the RSS feed, or sign up for email updates right over here.

How to build a killer brunch in three easy steps. Step one: swirl pesto into polenta/grits.

Step two: lay a fat slice of a gorgeous, seriously ripe tomato on top.

Step three: add a final dose of seasoning—not to mention texture and protein—by adding a handful of chickpeas cooked with lemon zest and freshly cracked black pepper.

And dig in.

Pesto-Swirled Polenta with Fresh Tomato and Lemon-Pepper Chickpeas

Print the recipe

serves 2 generously

1/2 cup quick-cooking polenta (or grits)

1/4 cup blanched almond meal

1/2 tsp fine sea or kosher salt (plus additional for chickpeas)

1 1/2 cups unsweetened soy milk

1 1/2 cups water

2 tsp olive oil

1 15-oz can chickpeas, drained

1/2 tsp freshly cracked black pepper

zest from half a lemon

2 TBSP Classic Vegan Pesto Genovese, recipe follows

1 ripe good-quality tomato

Whisk together polenta, almond meal, and 1/2 tsp salt in a bowl. Combine soy milk and water in a pot over high heat. When it begins to steam, begin whisking while pouring the polenta mixture into the pot in a thin, steady stream, whisking all the while. When all is incorporated, be sure the mixture is bubbling, cover, and reduce heat to low. Cook five minutes, covered, carefully whisking the bubbling mixture once each minute.

Meanwhile, heat olive oil in a skillet over medium heat. Add drained chickpeas, pepper, lemon zest, and generous pinch salt. Cook chickpeas, stirring occasionally, until chickpeas are heated through and the flavors have melded a bit, about five minutes.

Divide grits between two serving bowls. Swirl a tablespoon of pesto into each. Top each with a half-inch-thick slice of tomato and finish with the chickpeas. Serve at once.

Classic Vegan Pesto Genovese

yields about 2/3 cup 

2 oz basil, leaves only, from two large bunches (about 1 cup of tightly packed leaves) 

1 clove garlic

2 tsp red miso paste

1/4 cup pignoli (pine nuts) 

1/4 cup good quality olive oil

Puree all ingredients until smooth.

Comment

Comment

Black Bean-Stuffed Avocado over Sweet Corn Puree

Hey, welcome. Consider following MSV on Twitter and subscribing to the RSS feed, or sign up for email updates right over here.

Avocado lovers, is this ever the composed salad for you. The warm and the room-temperature and the firm and the creamy bits all play so well together, and it's really simple to put together. Even though it's nothing terribly fancy, it's a great dish to entertain with.

So, grab some perfectly ripe avocados, pour in some earthy blacked beans spiced with cumin, coriander, and smoked paprika. Top with fresh tomatoes and chopped herbs. Now serve the whole rich, spiced, juicy, and fresh thing over a puree of corn cooked with a little shallot and good dose of coconut milk for the best summer meal ever.

Don't forget the chips and salsa on the side.

Black Bean-Stuffed Avocado over Sweet Corn Puree

Print the recipe

serves 4

2 tsp extra virgin olive oil

1 large shallot, trimmed, halved and very thinly sliced

2 cups corn kernels, frozen or fresh

fine sea or kosher salt

1/2 cup full-fat coconut milk

2 15-oz cans black beans, drained (but not rinsed)

1/2 tsp ground cumin

1/2 tsp ground coriander

1/2 tsp smoked paprika

4 ripe avocados

flaked sea salt

freshly ground black pepper

chopped cherry tomatoes, to taste

chopped fresh cilantro leaves, to taste (for variations, substitute basil, dill, or parsley)

Heat oil over medium heat in a small pot. Add shallot and cook about three minutes, until it begins to turn from white to golden. Add corn kernels and a couple of generous pinches salt. Cook, stirring frequently, two minutes. Add coconut milk and bring to a boil. Cook, stirring occasionally, until corn is tender, but not too soft, and the flavors have come together, about five minutes. Remove from heat. Use an immersion blender to carefully blend the mixture to your taste. (If the mixture is too thick after blending, add water by the tablespoon until you reach your desired consistency. Gently reheat.)

While the corn cooks, open the cans of beans and pour the liquid off the top (do not drain in a sieve). Add beans with all liquid remaining in the cans along with cumin, coriander, and smoked paprika to another pot over medium heat. Stir to combine. Cook, stirring regularly, until the beans are heated through, the flavors have melded, and the liquid is gently bubbling and has thickened into a nice sauce, five to seven minutes. (If the liquid is evaporating too quickly, or if there wasn't much to begin with, reduce heat, and add a tablespoon or three of water.) Salt to taste, if needed (generally, the liquid from the can of beans you didn't rinse off will provide enough salt).

Halve and pit the avocados. Use a spoon to gently scoop each half from its skin.

Divide the corn mixture among four plates. Top with two avocado halves. Sprinkle flaked sea salt and freshly ground black pepper over the avocado. Spoon the beans over top, and finish with tomatoes and cilantro (or other herb), to taste. Serve at once.

Comment

Comment

Tempeh Tacos with Warm Corn and Poblano Relish

Hey, welcome. Consider following MSV on Twitter and subscribing to the RSS feed, or sign up for email updates right over here.

Way easy and totally tasty, this taco recipe is going to guide you through the warm months in a snap. First, nudge your veggies (diced poblano for gentle verdant warmth, and corn—fresh or frozen, as you have it—for gentle sweetness) toward tenderness by giving them a quick saute. Then bathe them in lime juice and cilantro to brighten everything up.

Follow that up by browning the tempeh with a dead-simple mix of equal parts tamari and rice vinegar. A little turbinado helps the tempeh get nice and tender and balances out its earthier tones, all without taking the time to steam before cooking. This may become your new go-to way to prepare tempeh fast. The result is a totally fabulous protein that will play well in a variety of dishes. (If you're on the fence about tempeh, give this one a try. And let us know how it goes.)

Before you know it, your tortillas are warm and you're digging in.

Tempeh Tacos with Warm Corn and Poblano Relish

Print the recipe

serves 3-4

8 corn tortillas

3 TBSP olive oil, divided

1 cup corn kernels (fresh or frozen)

1 large poblano, trimmed and chopped into small (1/4-inch) dice

2 TBSP lime juice

1 TBSP finely chopped cilantro

pinch fine sea or kosher salt

1 lb tempeh

2 scallions, sliced, divided

3 TBSP reduced-sodium tamari

3 TBSP rice vinegar (unseasoned)

1 TBSP turbinado

1/4 tsp smoked paprika

1/4 tsp chipotle powder

Heat oven to 350. Divide tortillas into two stacks of four. Wrap each stack in foil and place directly on oven rack. Heat 20 minutes.

Heat 1 TBSP oil in a non-stick skillet over medium-high heat. When hot, add corn and diced poblano. Cook until crisp-tender, stirring frequently, about three minutes.

Meanwhile, combine lime juice and cilantro in a small-medium bowl. When the veg is done, add it to the bowl, add a pinch salt, and stir to combine. Set aside.

Reduce heat to medium. Heat remaining 2 TBSP oil in the same skillet. Carefully crumble tempeh into skillet, aiming for small bite-size crumbles. Add sliced white and firm green portions of scallions to skillet. Stir every minute or so until tempeh begins to brown in spots and turns fragrant, three to five minutes. Meanwhile, transfer sliced tender green portions of scallions to a small bowl and set aside.

Carefully add tamari, vinegar, sugar, paprika, and chipotle to hot skillet. Stir to distribute evenly. Continue to cook a few minutes longer, until the liquid in the skillet evaporates, and the tempeh is heated through and browned in spots. Remove from heat.

When tortillas are ready, assemble tacos, garnished with reserved scallion tops.

Comment

Comment

Black Bean, Strawberry, and Herb Salad

Hey, welcome. Consider following MSV on Twitter and subscribing to the RSS feed, or sign up for email updates right over here.

Strawberry season is nearly over in East Tennessee, but that means it's not quite over yet. There's still a little time to get cozy with spring's first fruits, using herbs and lime to keep everything fresh and invigorating, and black beans as a soft, earthy bed.

Here's how to work strawberries into a light dinner, lunch, or dreamy snack/appetizer for a happy hour at home: grab two cans of black beans; chop up some watercress, cilantro, and mint; add chopped strawberries; and toss the whole thing in a lime vinaigrette seasoned with a little golden rum and ground coriander seed. Just add tortilla or pita chips, and transition into summer like a champ.

Black Bean, Strawberry, and Herb Salad

Print the recipe

serves 4-6

2 15-oz cans black beans

1 pint strawberries, trimmed

1/4 cup tightly packed watercress leaves

1/4 cup tightly packed cilantro

1 TBSP finely chopped mint

juice and zest of 1 medium lime

2 TBSP olive oil

1 TBSP golden rum

1 TBSP natural cane sugar (evaporated cane juice)

1/2 tsp fine sea or kosher salt

1/2 tsp ground coriander

Drain and rinse beans in a sieve. Set aside to let drain thoroughly.

Chop strawberries into small bite-size pieces and add to a serving bowl. Chop watercress, cilantro, and mint, and add to serving bowl. Add drained beans to serving bowl.

In a small bowl, whisk together all other ingredients. Pour over salad and toss to coat. Adjust salt, if needed. Salad can be served just after mixing, but benefits from resting for half an hour, or up to two hours. Serve with tortilla or pita chips.

Comment

Comment

White Wine-Braised Chickpea, Tempeh, and Spinach Linguine from the Slow Cooker

Hey, welcome. Consider following MSV on Twitter and subscribing to the RSS feed, or sign up for email updates right over here.

Spring: some days are too hot for the oven, then you're hit with a blustery, rainy day that calls for a bowl of comfort. Either way, this recipe has you covered. Toss chickpeas, tempeh, spinach, artichoke hearts, and blissfully salty Kalamata olives into the slow cooker with a dose of herbs and white wine. Let it cook all day, and there's nothing left for you to do but boil the amount of pasta needed for the meal, and done. Repeat with leftovers, should you have them.

The whole thing depends on the garnishes to really shine, so don't skip them. A generous spoonful of chopped sun-dried tomatoes and a final squeeze of lemon over your plate are necessary ingredients to add color, intense bits of flavor, and brightness.

White Wine-Braised Chickpea, Tempeh, and Spinach Linguine from the Slow Cooker

Print the recipe

serves 4-6

For the legume-veggie mix:

8 oz frozen chopped spinach

1/4 cup chopped Kalamata olives

3 TBSP quick-cooking tapioca

1 no-salt-added vegetable bouillon cube

2 15-oz can chickpeas, drained, but not rinsed

8 oz tempeh

1 tsp dried basil

1 tsp dried oregano

1 tsp dried marjoram

1 cup dry white wine

6 oz canned (and drained) or frozen (and thawed) artichoke hearts, chopped

fine sea or kosher salt and freshly cracked black pepper

To serve:

1 lb linguine

generous 1/4-1/2 cup julienned oil-packed sun-dried tomatoes, drained well

lemon wedges, from 1-2 lemons

Layer spinach and olives into the crock of a slow cooker. Sprinkle tapioca evenly over the spinach. Place bouillon cube in the center of the crock. Pour drained chickpeas in evenly, then roughly crumble tempeh into the crock in small bite-size pieces. Sprinkle in each of the herbs, then slowly and evenly pour wine over the whole thing. Cover and cook on low seven to eight hours.

When ready to serve, stir in chopped artichoke hearts, add salt and pepper, to taste, and cover again. Cook pasta according to package directions. Divide pasta among plates and top with chickpea mixture. Add a generous tablespoon of sun-dried tomatoes to each plate and give a squeeze of lemon juice over the whole thing. Serve at once.

Comment

Comment

Smoked Tofu, Avocado, and Sage-Roasted Lemon Sandwich

Hey, welcome. Consider following MSV on Twitter and subscribing to the RSS feed, or sign up for email updates right over here.

This sandwich relies on the convenience of store-bought tofu, the convenience of nature's perfect condiment (avocado), and takes just about 15 minutes to punch up that lovable combination with seriously dreamy roasted lemons. The result is sure to brighten up any Tuesday afternoon, but feel free to serve this to pals at any casual gathering, too.

Whole-lemon anything is never to be passed up, so when this salad recipe came into view, there was no question that the sage-roasted lemons would be put to work long before tomato season. Totally worth the light effort, these dreamy little lemon slices jazz up absolutely everything. New favorite ingredient.

Smoked Tofu, Avocado, and Sage-Roasted Lemon Sandwich

Print the recipe

yields three sandwiches

1 recipe sage-roasted lemon slices

8 oz smoked tofu, such as Soy Boy brand

1 ripe avocado

6 slices whole wheat bread from a small boule

flaked salt and freshly cracked black pepper

Prepare the lemon slices as directed.

While the lemon slices roast, place each tofu square on its thin side and cut into thirds, so you have a total of six thinner squares. Halve and pit the avocado, divide into eight slices, and scoop out.

To assemble, place two slices of tofu on three slices of bread. Divide the avocado as evenly as possible and place atop the tofu. Sprinkle with flaked salt and freshly cracked black pepper. Add lemon slices, sandwich, and serve at once.


Comment

Comment

Blueberry Maple-Pecan Breakfast Polenta (or Grits)

Hey, welcome. Consider following MSV on Twitter and subscribing to the RSS feed, or sign up for email updates right over here.

This isn't a groundbreaking combination, but man, is it a good one. The heaven is in the details for this particular bowl: corn in the form of polenta (prettier) or grits (shown), plus toasted pecans—and you should really take the time to toast the pecans—and maple syrup all hug little dried blueberries. Those berries gently plump without breaking down while cooking, making for a wonderful presentation and winning texture.

With quick-cooking grits, this is a ten-minute breakfast. (Yes, you sacrifice texture, and yes, I still recommend them for incredible convenience. Feel free to use the regular sort if you have half an hour to kill.) You can use all that time you saved to linger over the eating of it.

Blueberry Maple-Pecan Breakfast Polenta (or Grits)

Print the recipe

serves 2 generously

1 1/2 cups unsweetened soy milk

1 1/2 cups water

1/2 tsp fine sea or kosher salt

1/4 tsp pure vanilla extract

1/2 cup quick-cooking polenta or grits

1/4 cup blanched almond meal

1/4 cup dried blueberries

3 TBSP chopped pecans

maple syrup, to serve, grade A: dark color and robust flavor recommended

Combine soy milk, water, salt, and vanilla in a pot over high heat. Meanwhile, in a small mixing bowl, whisk together polenta/grits and almond meal. When the liquid in the pot begins to steam, begin whisking while pouring the grits mixture into the pot in a thin, steady stream, whisking all the while. When all is incorporated, add the blueberries. Make sure the mixture is bubbling, cover, and reduce heat to low. Cook five minutes, covered, carefully whisking the bubbling mixture once each minute.

Meanwhile, heat a dry skillet over medium-high heat. Toast pecans, tossing frequently, until deeply fragrant and darkened, being careful not to burn. Transfer to a plate to let cool.

When the polenta or grits is thickened to your liking, divide between two bowls. Top with toasted pecans and maple syrup (start with one tablespoon per bowl). Serve at once.

Comment

Comment

Molasses, Oat, and Cranberry Breakfast (or Snack) Cookies

Hey, welcome. Consider following MSV on Twitter and subscribing to the RSS feed, or sign up for email updates right over here.

If you're not a molasses fan, maybe just come back next week. The rest of you now officially have a new breakfast item in rotation. These guys could not be easier to throw together, they're sweet and a little sticky without being sugary, and they make nice, big servings that will keep you satisfied until lunch (especially when paired with a glass of plain soy milk). Plus, you get a dose of iron from the generous amount of molasses in these cookies and fiber from the oats. Meanwhile, dried cranberries make the perfect sweet-tart foil to that deep, dark syrup.

You'll get nine large cookies from this recipe, which means you can nibble on one minutes from the oven and still have enough to get you through a full calendar week of breakfasts. They're tender and cakey stored at room temperature. Kept in the freezer, they become chewier, and you don't even have to thaw them before chowing down (though, naturally, you can, if you prefer a warm breakfast). Can you say cool, instant breakfasts all summer long? Yeah, you can.

Molasses, Oat, and Cranberry Breakfast (or Snack) Cookies

Print the recipe

yields nine large cookies

1 1/2 cups rolled oats

1/2 cup blanched almond meal

1 TBSP psyllium husk powder

1/2 tsp baking soda

1/2 tsp ground cinnamon

1/2 tsp fine sea salt

3/4 cup dried sweetened cranberries

1/2 cup unsweetened applesauce

1/3 cup blackstrap molasses

1/4 cup turbinado

1 tsp vanilla extract

Heat oven to 350. Line a baking sheet with parchment.

In a mixing bowl, combine all dry ingredients (oats through salt) thoroughly with a wooden spoon. Add cranberries and stir again.

In a small bowl, stir together remaining ingredients with a fork. Add wet ingredients to dry. Spoon dough into nine mounds on prepared baking sheet. Use your hands to press them down and clean up the edges.

Bake 15 minutes. Let cool five minutes (do not skip this step) before transferring to a wire rack. Let cool an additional 10-15 minutes to let fully set. Let cool completely before storing in an airtight container at room temperature for a softer, cake-like cookie or in the freezer for a chewier texture. (Cookies can be eaten straight from the freezer.)

Comment

2 Comments

Hominy, Poblano, and Potato Enchiladas with Spiced Black Bean Sauce

Hey, welcome. Consider following MSV on Twitter and subscribing to the RSS feed, or sign up for email updates right over here.

Get ready to have a new favorite meal. And for any meal—these guys can handle it.

Golden hominy and (convenient frozen) potatoes combine to make a comforting, fluffy filling seasoned with a generous dose of garlic and contrasting little strips of gently piquant poblano pepper.

Top the whole dreamy thing off with a dead-simple black bean sauce seasoned with cumin, coriander, Mexican oregano, and a touch of smoke, and a big, fat platter of dinner is ready in under half an hour. Just make sure you have some leftovers to reheat for breakfast.

Hominy, Poblano, and Potato Enchiladas with Spiced Black Bean Sauce

Print the recipe

serves 4

To assemble:

12 6-inch corn tortillas

For the sauce:

1 15-oz can black beans, undrained

1/2 cup water

1 no-salt-added vegetable bouillon cube

1/2 tsp ground cumin

1/2 tsp ground coriander

1/2 tsp Mexican oregano

1/4 tsp mild chile powder, such as ancho

1/4 tsp fine sea or kosher salt

1/4 tsp liquid smoke

1 TBSP olive oil

For the filling:

3 TBSP olive oil

6 large cloves garlic, minced

6 scallions, thinly sliced, divided

2 large poblano peppers, trimmed, seeded, and cut into thin 2-inch strips

2 15-oz cans yellow hominy

1 1/2 cups frozen hash browns (look for a brand that contains nothing but potatoes)

2 TBSP nutritional yeast (optional)

freshly cracked black pepper

salt, to taste

Heat oven to 350.

Blend all sauce ingredients, except oil, until smooth. Heat the oil in a pot over medium heat, add sauce, and cook, stirring occasionally, until slightly thickened and hot. Reduce heat to low and cover.

Meanwhile, divide tortillas into three stacks of four. Wrap each stack securely in foil and heat in oven for 20 minutes.

While the tortillas heat, prepare the filling. Heat oil in a large skillet over medium heat. Add garlic, white and firm green parts of onions (reserve tender tops for garnish), and poblano strips. Cook five minutes, stirring frequently, until pepper begins to soften.

Meanwhile, drain hominy well. Add hominy and potatoes to the skillet, top with nutritional yeast, if using, and a generous amount of freshly cracked black pepper. Continue to cook until the peppers are tender, the whole mixture is hot, and the flavors have melded, about 7 minutes. Add salt, if needed (since canned hominy is already quite salty).

When the tortillas are ready, carefully open a foil packet (leave remaining stacks wrapped until you're ready to work with them) and take a warm tortilla from the top. Add filling, roll up and place seam-side down on a serving dish. Repeat with remaining tortillas, working quickly.

Taste the black bean sauce and adjust salt, if needed. Pour bean sauce evenly over assembled tortillas. Garnish with sliced scallion tops. Serve at once.

2 Comments

Comment

Dead Simple Red Wine-Fig Syrup

Hey, welcome. Consider following MSV on Twitter and subscribing to the RSS feed, or sign up for email updates right over here.

Three ingredients and occasionally stirring a pot are all that stands between you and this dreamy condiment. Red wine and figs make a rich and complex pairing that you can use to punch up any meal of the day.

Pancakes, ice cream, and pastries would all be happy to go for a swim in this syrup, but don't hesitate to work it into salad dressings or sandwiches, too. First one to try roasting Brussels sprouts in it, let us all know how it goes.

Crackers or toast spread with Kite Hill cream cheese (which provides a nice canvas to show off the syrup's color) absolutely beg for the stuff and make for an instant treat.

If you're feeling a little more ambitious, use the red wine-fig syrup to marble a batch of gently sweetened almond pate. This small tower was a recent take-along to a pal's housewarming (more on almond pate towers at a later date if all goes as planned). Good stuff.

Dead Simple Red Wine-Fig Syrup

Print the recipe

3 cups red wine, such as Zinfandel

1/2 cup fig jam

1/2 cup natural cane sugar (evaporated cane juice)

Bring all ingredients to a boil over high heat. Reduce heat to medium-low to maintain a low, steady simmer. Let cook down, stirring occasionally, for about an hour—give or take—until the mixture is reduced by two-thirds. Let cool completely before storing in the refrigerator in an airtight container. Syrup will continue to thicken a bit when chilled.

Comment

Comment

Smoked-Tea Baba Ghanoush

Hey, welcome. Consider following MSV on Twitter and subscribing to the RSS feed, or sign up for email updates right over here.

The popular spread known in the States as baba ghanoush—that sikly puree of eggplant, tahini, garlic, lemon, and oil—has been primarily a restaurant experience for me. In Knoxville alone, there were generous bowlfuls garnished with streams and lakes of oil at Ali Baba's Time Out Deli (RIP). There were tastes stolen from a friend's order at Yassin's Falafel House (later learning, alas, there's a touch of dairy yogurt involved). Then there's the stuff from Holy Land Market.

Paprika and liquid smoke can do a lot, but maybe not everything. Having nothing but an electric broiler in the MSV kitchen to char eggplants, knowing I'll never bring myself to load in the oil the way restaurant owners will, and having known Holy Land's exquisitely smoky spread, at-home baba ghanoush has always felt pointless. Until now.

Thanks to Kathy Hester's smoke-infusing method from the deceptively humble-sounding Tea-Scented Tofu(*) recipe from The Vegan Slow Cooker, satisfying baba ghanoush can happen even in electric-only kitchens with no access to an outdoor grill. The smoke-infused eggplant, thanks to a spin in the slow cooker with a dose of Lapsang Souchong, takes on such a deep, seductive flavor that you can get away with surprisingly little added oil and still come out with a gorgeous spread.

Side note: the same method works on sun-dried tomatoes, too. Oh, yes, it does. (Calling all bagels.)

This spread may not look like much, but it's seriously worth it. The eggplant keeps everything silky, the smoke (the smoke!) infusion ensures the eggplant can stand up to the bold flavors of tahini and fresh garlic. Lemon lightens it all up. The unique flavor of the tea adds a touch of je ne sais quoi. It wouldn't hurt to make a double-batch.

Smoked-Tea Baba Ghanoush

Print the recipe

yields about 1 3/4 cups, adapted from The Vegan Slow Cooker and the kitchn

1/4 cup loose Lapsang Souchong

1/4 cup brown rice

1/4 cup turbinado

1 1/4 lbs eggplant, trimmed, and cut into large dice

2 small cloves garlic, peeled

1/4 cup tahini

3 TBSP lemon juice

2-4 TBSP olive oil (or to taste)

1/2 tsp fine sea or kosher salt

Line a slow cooker crock with foil. Add tea, rice, and sugar, and stir to combine. Place a small metal adjustable steamer basket (wrap the feet in foil, too) into the cooker. Place eggplant cubes into steamer basket. Cover and cook on high two hours. Reduce heat to low and cook two hours more.

Place all other ingredients in a food processor. Carefully add eggplant and blend, adding oil as desired to loosen. Serve at room temperature. Store leftovers in the refrigerator.

Comment

Comment

Apple-Chamomile Molasses

Hey, welcome. Consider following MSV on Twitter and subscribing to the RSS feed, or sign up for email updates right over here.

A long time ago, I made a pile of syrup made from nothing but unfiltered apple juice. This week, we improve upon it. And in a reasonable quantity.

The pure apple syrup is totally good, but there's a brunch coming up in the MSV house, and it's going to feature condiments in a big way. So to add complexity to something already yummy, look to sunny chamomile.

The result is tart, sweet, and a little floral—in short, a total dreamboat. It's a wildly handy liquid sweetener to keep on hand because (dare I say it?) sometimes you don't want what you're making to taste of maple.

To put it to work, an easy place to start is a big slice of toast topped with Kite Hill ricotta (or plain nondairy cream cheese), pear slices, and roasted and salted pistachios. Drizzle the syrup over all that goodness and buckle up for a dead-lovely breakfast. Or snack. Or whatever.

Apple-Chamomile Molasses

Print the recipe

yields 1 - 1 1/4 cups, adapted from here

1 gallon unfiltered apple juice, such as Field Day Organic brand

1/4 cup dried chamomile

1/4 tsp pure orange extract (optional)

Add chamomile to juice and let steep, refrigerated, overnight.

Strain juice and discard chamomile. Add strained juice to a pot, add orange extract, if using, and bring to a boil over high heat. Reduce heat to medium-high to maintain a steady boil. Cook about one hour, or until reduced to eight to 10 oz. Reduce heat as needed as the syrup reduces to maintain your steady boil. (To measure your reduction, pour a cup of water into the pot before beginning and mark the level on the end of a wooden spoon.)

The syrup will continue to thicken a bit as it cools, and, at this level of reduction, settles at a thick, pourable syrup consistency (it does not get as thick as molasses) when stored in the refrigerator.

Comment

Comment

Lavender and Lemon Cheesecake

Hey, welcome. Consider following MSV on Twitter and subscribing to the RSS feed, or sign up for email updates right over here.

Generally, MSV posts stick to explaining why the dish of the week works. It talks about what flavor combinations are contained within the recipe, and how that's effective, or what addition keeps your protein salad from being deadly boring (or even what makes it interesting, depending on the recipe). But this cheesecake? Well, it's totally lovely. It's a little floral, a little bright, sweet, rich, and creamy. It pretty much sells itself. It's also a special occasion kind of deal—not at all inexpensive—the kind of dessert you pause to scrape a vanilla bean for.

The only thing to note, really, is that the crust here is softer than a cookie crust, made with almond flour because it's destined to entertain a gluten-free pal. Feel free to make whatever vegan crust you like if you have a favorite and don't want to splurge on almond flour (though it's always worth having a pound or three in the pantry).

So let's depart from the formula and instead stop to appreciate how far vegan cooks have taken vegan food. After nearly two years of wishing I had some reason to go bananas over aquafaba (aside from that meringue French toast recipe that really, really needs an update and somehow never, ever gets it), I finally have one for you here. The cake part of this cheesecake is made with Kite Hill brand cream cheese and whipped aquafaba. So that means blended, strained, and cultured almonds combined with the liquid from a can of beans makes this totally delicious and elegant dessert. And it didn't even occur to me that that was strange in the slightest until it was time to write about this guy.

We've come a long way. We have a truly impressive toolbox that keeps getting better. Thanks to everyone working out there. You're the best.

And, hey, make this totally gorgeous cheesecake next time you have friends to feed.

Lavender and Lemon Cheesecake with an Almond Crust

Print the recipe

1/2 cup chickpea brine (aquafaba*)

2 TBSP dried lavender

1 1/2 cups blanched almond meal

1 cup natural cane sugar (evaporated cane juice), divided

1 tsp psyllium husk powder

pinch salt

1/3 cup canola oil

24 oz plain cream cheese, such as Kite Hill brand

1/4 cup lemon juice

contents of half a vanilla bean

Bring chickpea liquid to a boil in a small pot over high heat. Remove from heat, stir in lavender, cover with a clean kitchen towel, and steep two hours.

When your aquafaba is nearly done steeping, heat oven to 350. In a 9-inch springform pan, combine almond flour, 1/4 cup sugar, psyllium husk powder, and salt. Whisk to combine thoroughly. Add canola oil, stir with a fork until uniform, and press the crust into the bottom of the pan with your hands (be sure to press firmly around the edges, too). Bake 12 minutes.

Meanwhile, add remaining 3/4 cup sugar to the bowl of a stand mixer. Strain chickpea liquid into the bowl and discard lavender. Add whisk attachment. Turn mixer on low to combine ingredients, then turn to medium-low speed and beat one minute. Turn up to medium speed and continue to beat four minutes. The mixture should now be thick, fluffy, and hold tracks but will still flow back into the bowl from the whisk.

Meanwhile, beat together cream cheese, lemon juice, and vanilla with a wooden spoon. Add to whipped aquafaba, switch to the paddle attachment, and beat on low speed just until combined. Pour into prepared crust. Drop pan on the counter once to try to minimize air bubbles. Bake 50-53 minutes, until lightly browned on top. Cake center will be wobbly when removed from oven and will firm as it cools. Cool in the pan on a wire rack until cooled completely. Remove pan sides and chill. Best served slightly chilled.

(*I used Trader Joe's organic chickpeas. The brine is slightly thicker than in TJ's conventional canned chickpeas. One can of Trader Joe's organic chickpeas has repeatedly yielded more than 1/2 cup total brine, so you need only one can with this brand.)

Comment

Comment

Balsamic-Dressed Sweet Potato Salad with Shallot, Chives, and Coconut Bacon

Hey, welcome. Consider following MSV on Twitter and subscribing to the RSS feed, or sign up for email updates right over here.

This dead-simple side turns absolutely anything into a meal. Toss some lettuce and beans in a creamy dressing, serve this colorful, warm salad on the side, and you're all set.

The sweet potatoes take about half an hour to roast, but everything else is done in mere minutes. And when was it ever not worth waiting for a potato to cook? Meanwhile, take just a few minutes to whip up a batch of stovetop coconut bacon.

When the potatoes are finished, you'll quickly cook the shallots, season the whole lovely thing with balsamic vinegar and black pepper, and dig in.

Balsamic-Dressed Sweet Potato Salad with Shallot, Chives, and Coconut Bacon

Print the recipe

serves 2-4

For the base:

1 lb small sweet potatoes

4 tsp olive oil, divided

pinch fine sea or kosher salt

2 large shallots

1 TBSP balsamic vinegar

1/4 tsp freshly cracked black pepper

To serve:

1 recipe Coconut Bacon, recipe follows

1/4 cup chopped chives

Heat oven to 425.

Slice sweet potatoes into wedges 2-2 1/2 inches in length. Toss with 2 tsp oil and transfer to a baking sheet in a single layer. Sprinkle with a pinch of salt and cook until tender, about 30 minutes.

Meanwhile, trim and thinly slice shallots and set aside. Chop chives and set aside. Prepare coconut bacon and set aside.

When potatoes are done, heat remaining 2 tsp oil in the nonstick skillet you used to prepare the coconut. Add shallots and sauté for a few minutes, until they begin to brown. Add balsamic vinegar and black pepper. Stir to coat. Remove from heat, add sweet potatoes to skillet and toss to coat uniformly. Serve, topped with coconut bacon and chives.

Coconut Bacon

yields 1/4 cup, adapted from Colleen Patrick-Goudreau

1 tsp reduced-sodium tamari

1/2 tsp liquid smoke

1/4 tsp maple syrup, grade B preferred

1/4 cup shredded unsweetened coconut

Heat a nonstick skillet over medium heat. In the skillet, combine tamari, liquid smoke, and maple syrup. The second it begins to boil, sprinkle coconut over and stir until thoroughly mixed. Continue cooking for a few minutes—stirring every 20-30 seconds—until coconut absorbs all liquid, the skillet becomes dry, and coconut just begins to crisp in spots. Your nose is your best guide. When it smells deeply toasted and just shy of burning, quickly remove from heat and immediately transfer to a plate, spread out in a single layer. Coconut will continue to crisp as it cools.

Comment

6 Comments

Lime and Thyme Blueberry Bundt Cake

Hey, welcome. Consider following MSV on Twitter and subscribing to the RSS feed, or sign up for email updates right over here.

You must make this cake. Make it for all the special occasions, big or small.Make it for yourself to linger over. Make it for anyone and everyone you love. It's so easy and dead lovely.

The first bite will hit you with the sweet toasted wheat flour and thyme. The second bite will surely reveal one of the many berries studded throughout. Wait for it, and you'll notice how the thyme makes a blissful complement to the blueberries and brings out the depth of their flavor. All the while, the lime syrup that coats the exterior keeps flavors bright.

Those berries, by the way, are dried wild blueberries, which makes this cake even easier to make (if more expensive). And the way dried berries plump up and tenderize in baked goods is truly one of the distinct pleasures of the oven.

Now, credit where credit is due. When the seriously fabulous (and fellow Knoxvillian!) Heather Baird of SprinkleBakes posted her very-first-ever vegan cake, there was no choice but to make it as quickly as I could. But obviously not the exact cake she made because that requires time, patience, skill, candy, and fondant. None of which are things I bring to baked goods. But on the MSV shelf is a handy bit of visual inspiration called Luscious Berry Desserts. Around here, it gets used mostly as inspiration for ways to serve fresh fruit gorgeously. But it also includes a pound cake (also not something that happens in the MSV kitchen) flavored with lime, thyme, and plenty of blueberries.

Put them together, and heaven on Earth is achieved.

Lime and Thyme Blueberry Bundt Cake

Print the recipe

serves 8-10, adapted from SprinkleBakes and Luscious Berry Desserts

2 cups full-fat coconut milk

4 sprigs fresh thyme (each 4-5 inches in length)

3 cups all-purpose flour

2 tsp baking powder

1 tsp salt

4 tsp lime zest, divided

2 cups natural cane sugar (evaporated cane juice), divided

1 cup canola oil

2 tsp vanilla extract

1 cup dried wild blueberries

1/2 cup lime juice

Heat oven to 350. Oil and flour a Bundt pan.

Add thyme sprigs to coconut milk in a small pot and bring to a boil over high heat. Remove from heat and let steep 10 minutes. Discard thyme. Set coconut milk aside to let cool.

Sift together flour, baking powder, and salt.

Separately, whisk together 2 tsp lime zest, coconut milk, 1 1/2 cups sugar, oil, and vanilla.

Add wet ingredients to dry and whisk until almost mixed. Add blueberries, stir just until combined, and pour batter into prepared pan. Bake 55-60 minutes, or until a tester comes out clean. Cool 20 minutes in pan on a rack.

Meanwhile, heat remaining 1/2 cup sugar, remaining 2 tsp zest, and lime juice over high heat. Stir to dissolve sugar. Once the mixture boils, remove from heat and let stand five minutes.

Turn out cake onto your cooling rack, and place a pan underneath to catch excess syrup. Pour lime syrup slowly over the warm cake and let cool completely before cutting.

6 Comments