2 Comments

Masala Chai-Sweet Potato-Peanut Butter Spread

Hey, welcome. Consider following us on Twitter and subscribing to our RSS feed, or sign up for email updates from the Home Page.

chai sweet potato peanut butter spread table.jpg

This terrific spread makes instant, deeply satisfying breakfasts and late-night snacks. Plus, brunch. On top of that, it's simple to prepare and is based on two easy-to-find nutritional powerhouses: sweet potatoes and peanut butter. But the addition of masala chai is what makes this a recipe you'll want to keep on hand all fall (and winter and spring) long.

chai sweet potato peanut butter spread biscuit detail.jpg

Spicy and complex with sweet, comforting notes, this spice blend is downright haunting. After savoring the range of flavors once, you'll want to dive right back in. Naturally, it makes a charming accompaniment to fruit and works brilliantly on toast (not to mention buttery whole wheat biscuits), and likely perks up morning oats like a champ. We can only assume a generous addition of chocolate would transform this spread into a seductive tart filling.

chai sweet potato peanut butter spread apple table.jpg

If you've only had masala chai as a milky, aggressively sweetened beverage, try this fluffy, subtly silky spread for an elegant reintroduction. That said, if you're preparing this for children or anyone sensitive to heat, proceed cautiously with the freshly cracked black pepper and ground ginger. It won't have the same complexity, but it should still produce tasty, handy results.

chai sweet potato peanut butter spread detail.jpg

Masala Chai-Sweet Potato-Peanut Butter Spread

Print the recipe

yields about 1 cup 

10 oz sweet potato, about 1 medium potato, scrubbed and chopped into 1-inch dice

1/2 cup water

1 family-size black tea bag

1/3 cup smooth peanut butter (look for a brand that contains nothing but peanuts) 

1/2 tsp vanilla extract

pinch salt

2 tsp maple syrup

1 tsp freshly cracked black pepper

1 tsp ground ginger

1/2 tsp ground cinnamon

1/2 tsp ground cardamom

1/8 tsp freshly grated nutmeg

1/16 tsp ground cloves

Place the cubed sweet potato into a medium sauce pan and add enough water to cover. Boil for 20 minutes, until very tender. Meanwhile, heat the 1/2 cup water separately, stopping shy of boiling, and steep the tea bag five minutes. Discard the tea bag and reserve the tea. 

When the sweet potatoes are ready, drain well and add them to a food processor fitted with the S blade. Add all other ingredients except the brewed tea. Process on low until very smooth, about 30 seconds. Scrape down the sides, start the motor again, and drizzle in the tea until the desired consistency is reached (we used a little over half of the 1/2 cup, about 1/3 cup, for a thick spread). 

2 Comments

2 Comments

Chocolate Layer Cake with Mimosa Creamsicle Frosting for MSV's First Anniversary

Hey, welcome. Consider following us on Twitter and subscribing to our RSS feed, or sign up for email updates from the Home Page.

chocolate layer cake with mimosa creamsicle table with candle.jpg

To treat ourselves on this special occasion of MSV's first anniversary, we started with a decadent chocolate cake and topped it with a very nontraditional, but lavish in its own way, frosting. In order to keep the cake the star here, the mimosa creamsicle frosting is light, incredibly silky, and the sweetness is toned down from traditional icings to ensure the orange and sparkling wine flavors aren't drowned out by sugar. Rest assured, the mixture is still thick for easy frosting, and the crumb coat hardens perfectly in the freezer.

chocolate layer cake with mimosa creamsicle frosting table.jpg

Now for something extra. You may have noticed Market Street Vegan doesn't talk about the why(s) of veganism, but about the how. Or our version of it, anyway. Plants are good, and good for you, and there are so crazy-many of them, you'll never want for variety. And while it's important for us to provide context for the dishes here--food you can't smell or taste without committing to making it yourself--we avoid stories about how we come up with ideas for recipes, because zzzzz. But today we're getting indulgent. 

chocolate layer cake with mimosa creamsicle frosting slice detail.jpg

The original idea for MSV's anniversary cake was totally different from this. It was scrapped so we could do something bigger: indulge in chocolate and sparkling wine and lots of words. Week after week, without comment, the recipes on MSV never contain animal products. We're so busy appreciating plants for what they are, there's no need to mention what they aren't. But today, we explicitly say this cake doesn't include animal products. Because, of course, lots of cakes do. Most baked goods contain cows' milk and chickens' eggs, products commonly considered harmless because the animals farmed to produce them can do so for a few years before being slaughtered after their productivity drops. 

Even if these farmed animals are kept under the most generous of conditions, the farming process always involves killing, and it's easy never to think much about, or even to avoid learning at all, a few facts:

1. Cows are mammals, and like other mammals, they lactate to feed their young. To induce and sustain milk production, we impregnate them repeatedly. Therefore, lactating cows necessarily have multiple offspring that must be dealt with. While female calves can be turned into dairy cows, male calves would literally eat the profits of their mothers' milk if allowed to live. These calves are slaughtered for veal and rennet (made from the calves' digestive enzymes--we use it in cheese production). 

2. Likewise, allowing lots of roosters to live would be prohibitively expensive in producing chickens' eggs, since only hens lay eggs. Most male chicks at hatcheries are killed, sometimes ground into feed for other farmed animals. 

3. These products are harsh in other ways, too. The environmental effects of cattle in particular are terrible due to increased water use, plus waste and methane production. And that's before you get to land needs. First, the animals themselves need more ground than plants. Further, we use many times more land growing crops to feed those animals before eating them or their secretions than we would need to grow plants for us to eat directly. 

If you find any of those facts affecting but can't imagine giving up your brunch omelet or creme fraiche, then please consider making a difference where you won't even notice one: in your baked goods. Before you next reach for your old muffin recipe, check out a celebrated, reliable, free resource for alternatives.

chocolate layer cake with mimosa creamsicle frosting unfrosted layers.jpg

Baking is not an animal-dependent mystery. Protein provides structure, sugar tenderizes and sweetens, fat tenderizes and satiates, and the introduction of air leavens. A variety of nondairy milks are available in most of this town's large grocers, or if you have a few spare minutes, any device that blends stuff, and internet access, tutorials abound on how to easily make your own. The effects of buttermilk can be duplicated by adding vinegar. Your pancakes and cupcakes and cookies won't suffer. And seriously, even tofu in dessert is--promise--not weird. As with any tool or ingredient, you learn what works.  

Generally, the problem with veganism as an alternative diet isn't the "veganism" part, but the "alternative" bit. Cultures operate around and perpetuate customs, habits, and the idea of changing those routines is far more daunting than doing the actual cooking. But isn't habit a monstrous reason to take lives? 

This is ideally what MSV communicates in every post: there are options , and an abundance of them. Please consider trying some of those options, looking for those opportunities when animal products are used only out of habit. Baked goods are an easy, seriously pleasurable place to start. 

chocolate layer cake with mimosa creamsicle frosting first layer frosted.jpg

Chocolate Layer Cake with Mimosa Creamsicle Frosting

Print the recipe

makes 1 6-inch cake 

For the cake , from Vegan Cupcakes Take Over the World via Chow.com

1 cup nondairy milk (we used homemade almond-oat)

1 tsp apple cider vinegar

3/4 cup natural cane sugar (evaporated cane juice) 

1/3 cup vegetable oil

1 1/2 tsp vanilla extract

1 cup cake flour

1/3 cup cocoa powder (Equal Exchange is available at Three Rivers Market

3/4 tsp baking soda

1/2 tsp baking powder

1/4 tsp salt

Preheat oven to 350.  

Whisk together the wet ingredients (milk through vanilla). Set aside while you grease and flour two 6-inch cake pans. Set aside.

Sift together the dry ingredients (flour through salt). Whisk half the dry ingredients into the wet. Add the remaining flour mixture and whisk to create a smooth batter in as few strokes as possible. Divide the batter evenly between the prepared pans and bake until a tester comes out clean, 24-26 minutes.

Transfer the pans to a wire rack and let cool 20 minutes. Run a knife around the edge and turn the cakes out onto the rack, turn over, and let cool completely. Chill until ready to frost, if needed.  

For the Mimosa Creamsicle Frosting

1 12-oz package firm silken tofu

1/2 cup melted refined coconut oil

1/2 cup powdered sugar

1/4 tsp vanilla extract

2 TBSP sparkling wine

pinch salt

zest of 1 orange, divided

1/3 cup Mimosa Reduction, recipe follows

Reserve half of the orange zest and transfer to an airtight container. Puree all other ingredients until very smooth. Chill 8 hours or more. 

For the Mimosa Reduction :

juice of 1 orange (about 1/3 cup)

1 cup sparkling wine

Combine ingredients in a small sauce pan. Bring to a boil, reduce heat, and simmer until mixture is reduced to 1/3 cup, about 30 minutes. (To measure, pour 1/3 cup water into your sauce pan before you begin, and mark the level on a ruler or utensil handle. Remove the water and proceed with the recipe.) 

To assemble :

Level the bottom layer as needed. Spread on a thick layer of frosting, add the top layer, and spread a very thin layer of frosting over the cake. Transfer to the freezer for 15 minutes. Continue frosting and garnish with reserved orange zest.

chocolate layer cake with mimosa creamsicle frosting eaten slice detail.jpg

Thanks for reading, this and every week. We'll be back to normal next week with something shorter and lighter. 

2 Comments

Comment

Garlicky Za'atar-Spiced Carrot Greens and Roasted Pumpkin Sauce

Hey, welcome. Consider following us on Twitter and subscribing to our RSS feed, or sign up for email updates from the Home Page.

garlicky za'atar spiced pumpkin-carrot sauce pasta table.jpg

This is one hard working condiment. Essentially a bulked-up chimichurri, a pile of carrot greens are lightly steamed with cilantro and blended up with jalapeno, a bunch of garlic sauteed in olive oil, tender roasted pumpkin, and a healthy dose of fragrant za'atar. The result is a bit creamy from the pumpkin, but crisp and fresh from the lightly treated greens. It's the perfect way to clean out your fridge (because whatever's in there tastes great with garlic and za'atar) and is about as versatile as it gets.

carrot greens table.jpg

We tossed it with whole wheat orzo, but there aren't too many grains, legumes, or veggies this won't perk up. Plus, with all that green and orange, it's a great way to boost the nutrition of any meal. We've even used it as a sandwich spread and a soup base.

garlicky za'atar spiced pumpkin-carrot sauce pasta detail.jpg

This makes a big batch, just the thing to blend up and keep on hand in the fridge to pull out a serving or two at a time over the next few days.  Naturally, you can substitute the carrots from your greens for some of the pumpkin, but as you can see above, the young carrots we had were too pretty to be pureed. And of course, any winter squash should work in place of pumpkin.

roasted pumpkin table.jpg

Again, this is a great way to use up extra winter squash and greens that don't always get put to use, but there's no reason spinach and canned pumpkin or squash shouldn't produce good results if convenience is your priority. But maybe the biggest advantage of home-roasted pumpkin is that the toasted seeds make a terrific garnish on top of any grain or bean you toss this sauce with. 

toasted spiced pumpkin seeds detail.jpg

Garlicky Za'atar-Spiced Carrot Greens and Roasted Pumpkin Sauce

Print the recipe 

yields about 2 1/2 cups

greens from 8 young carrots, washed, tough stems removed

1 bunch cilantro, tough stems removed

1/4 cup extra virgin olive oil

8 cloves garlic, peeled

1/4 cup za'atar

1 large jalapeno, seeded and roughly chopped 

juice of 1 lime

2 cups roughly mashed roasted pumpkin, or other winter squash, flesh (from about 1/2 small pumpkin, about 7 inches in diameter) 

1/4 tsp fine sea or kosher salt

Bring two inches of water to a boil covered with a steamer basket. Place the carrot greens in the basket, top with the cilantro, cover, and steam for 2 minutes, until lightly wilted and bright green. Transfer to a food processor fitted with the S blade.

Heat the oil gently in a small pan.  Add the garlic and cook, without browning, until softened, 5 minutes. Remove from heat, carefully stir in the za'atar and allow to cool for a minute before adding to the food processor along with all the other ingredients.

Puree, scraping the bowl every half minute or so, for 3 to 4 minutes, until very smooth. Adjust seasoning.

Reheat leftovers on the stove top, thinning with a little vegetable broth, as needed.

Comment

Comment

Serious Grilled Vegan Sandwiches: Deli-Style Tempeh with Apples and Almond-Mustard Sauce (Plus a Tofu-Fig-Tahini Mustard Variation)

Hey, welcome. Consider subscribing to our RSS feed and following us on Twitter.

spiced tempeh-apple-almond-mustard sandwich detail.jpg

Another round of satisfying soyfood sandwiches (our earlier tofu sandwiches post is one of MSV's most popular): Here, hardy tempeh gets rubbed with the time-honored combination of freshly cracked black pepper and fragrant coriander, and is then baked until gorgeous. Topped with sweet, crisp apple slices and a dead simple, dead fabulous spread made by combining nothing more than almond butter and the best stone ground mustard you can afford, this healthy hunk of nourishment on pumpernickel is seriously good. (We grabbed a jar of Lusty Monk from Just Ripe. Totally expensive, but a jar lasts a while, and not splurging on canned beans for a week or two will make up the difference for us. Worth it if you can indulge.) 

spiced tempeh cutting board detail.jpg

The nuttiness of the tempeh really shines when paired with the spices and apples, but because it's still September, below this recipe is a variation using tofu, figs, and tahini. While both the proteins take a bit of time to prep--almost all inactive--they can easily be made in advance.

spiced tofu-fig-tahini mustard sandwich cutting board detail.jpg

A final note, about almond butter: We prefer raw, unsalted almond butter in pretty much every situation. It's milder, subtly sweet, retains more almond flavor, and generally plays extremely well with others. Roasted almond butter will surely work, but the toasted-nut flavor will be more assertive. You may want to experiment with the ratio of almond butter to mustard if you use it.

spiced tempeh-apple-almond-mustard sandwich table.jpg

Deli-Style Tempeh Sandwiches with Apples and Almond-Mustard Sauce

Print the recipe

 makes two very large sandwiches

8 oz tempeh

1 no-salt added vegetable bouillon cube

1/2 cup water

1/4 tsp fine sea or kosher salt

1/4 tsp liquid smoke

1 1/2 TBSP freshly cracked black pepper

1 tsp ground coriander

1/2 tsp smoked paprika

1/8 tsp onion powder

1/8 tsp garlic powder

1 tsp extra virgin olive oil

2 TBSP almond butter (see note above) 

4 tsp stone-ground mustard

4 huge slices dark bread (from a 2-lb boule) 

6-8 apple slices 1/4-inch thick (from about half an apple) 

Steam the tempeh for 15 minutes.  Meanwhile, place the bouillon cube in 1/2 cup water and heat until dissolved. Remove from heat. Transfer broth to a loaf pan. Stir in salt and liquid smoke.

Once the tempeh has steamed, carefully transfer it to the broth and let marinate 30 minutes, flipping halfway. 

Preheat oven to 350. 

Combine the pepper, coriander, paprika, onion powder, and garlic powder.  Remove the tempeh from the broth (reserve remaining broth) and rub the spice mix over the surface. Transfer to a pan, pat on any fallen spices, and drizzle 1 tsp oil evenly over the surface of the tempeh. Bake for 30 minutes, until golden.

Preheat a sandwich press or countertop electric grill with closing lid (or try the skillet-with-a-weight method, but you do want to press these sandwiches to toast and firm the bread and glue the whole thing together a bit.) In a small bowl, stir together the almond butter and mustard. Use the excess marinating broth to thin it to your desired consistency (we keep ours fairly thick) and divide the mixture between two slices of bread.

Slice the tempeh crosswise into 1/2-inch-thick slices and divide evenly between the two remaining naked slices of bread. Top with apples, sandwich, and press/grill.

spiced tofu-fig-tahini mustard sandwich table.jpg

Variation: Deli-Style Tofu Sandwich with Fresh Figs and Tahini-Mustard Sauce 

Replace the tempeh with one pound of tofu, pressed for an hour. Make the same broth for a marinade as above, but increase salt to 1/2 tsp. Use a container that will leave the tofu half-submerged and marinate for 1 hour, flipping halfway (30 min won't ruin anything if you're pressed for time). Double the spice rub quantities and increase the oil drizzle to 1 TBSP before baking. Bake as above. Use a quarter of the entire baked tofu slab per large sandwich, slicing about 1/8-inch thick. Replace the apple with about two small ripe sliced figs per sandwich and substitute the almond butter with tahini.

spiced tofu-fig-tahini mustard sandwich detail.jpg

Comment

Comment

Cornmeal-Bourbon Shortbread Cookies

Hey, welcome. Consider subscribing to our RSS feed and following us on Twitter.

cornmeal-bourbon shortbread cookie detail.jpg

Shortbread cookies: a portrait of simplicity framed by irresistible decadence. This cornmeal-bourbon shortbread features rich olive oil, fluffy white flour, crunchy yellow cornmeal, and under it all, whiskey notes from using a homemade bourbon syrup as the sole sweetener. (We resisted the urge to add lime zest, but certainly wouldn't judge you for going for it.) Feel free to swap out maple syrup if you prefer, but the bourbon syrup is great to have on hand if you can afford to splurge on making a batch. Drizzle it as-is over Johnnycakes, cut it with maple syrup for pancakes, or combine it with balsamic vinegar for an ice cream topping or a glaze for roasted vegetables.

A bit crisp on the outside, tender inside, rich, and flavorful, the cookies are seriously addictive. Plus, since they call for liquid fat in the form of olive oil, the dough mixing is effortless. They're easy enough to whip up on a weeknight and elegant enough to offer guests. Savor one alone, or with a cup of coffee, or pair them up with other treats. In fact, we're pretty sure this recipe will reappear more than once this autumn and winter as a tart crust.

cornmeal-bourbon shortbread cookie ice cream sandwich.jpg

A note on shaping: These can be shaped at the time of mixing by manually forming patties. This produces a more dome-shaped cookie (as seen in the ice cream sandwich photos). Alternately, the dough can be formed into a log and chilled, then sliced with a very sharp knife (we used a large bread knife) into rounds. The chilled cookies are closer to a traditional shortbread, keeping a more uniform shape and a slightly firmer exterior (see top photo). Both methods work. If you'd rather get your hands dirty or are short on time, shape immediately. If you prefer to wait for simpler shaping, chill the dough.   

cornmeal-bourbon shortbread cookie ice cream sandwich table.jpg

Cornmeal-Bourbon Shortbread Cookies

Print the recipe 

yields 1 dozen  cookies

3/4 cups cornmeal

1/2 cup all-purpose flour

1/4 tsp fine sea or kosher salt

1/2 tsp baking soda

1/3 cup olive oil

1/3 cup Bourbon Syrup, recipe follows

1/2 tsp vanilla extract

Preheat oven to 350 (if shaping immediately--see note above--if not, wait until the dough has finished chilling before heating the oven).

Whisk together the cornmeal, flour, salt, and baking soda.

In another bowl, whisk together the oil, syrup, and vanilla. Add wet ingredients to dry and stir until fully incorporated. You'll get a sandy mixture that holds together when squeezed. 

Form the cookies into 12 2-inch patties, transfer to a nonstick cookie sheet, and bake 15 minutes. Let cool on the pan 5 minutes (this ensures the cookies bind fully). Transfer to a wire rack to cool completely. 

Alternately, form the dough into a log 2 inches thick (about 7 inches long). Roll up in plastic or foil, chill for one hour, and with a very sharp knife, slice into 12 rounds. Bake as directed above.

Bourbon Syrup

yields about 1 cup

1/4 cup bourbon

1/4 cup water

1 cup natural cane sugar (evaporated cane juice)

1/4 tsp vanilla extract

Combine all ingredients in a small saucepan. Bring just to a boil, reduce heat, and cook at a low simmer for 10 minutes, until thickened and syrupy. 

Comment

Comment

White Corn Chowder

Hey, welcome. Consider subscribing to our RSS feed and following us on Twitter.

white corn chowder table.jpg

It's worth repeating that corn stock is really good. That goes double for corn chowder made with corn stock. With fresh dill, a head of cauliflower, and an armful of corn, you've got a summer dish worth lingering over. We indulged our love of heat by adding a habanero to the stock, but feel free to omit it, if you prefer.

White Corn Chowder

Print the recipe 

serves 8 

6 medium ears corn

4 large (or 6 smaller) cloves garlic

1 habanero pepper (optional) 

4 cups water

1 TBSP olive oil

1 large onion, finely chopped

generous 2 cups small cauliflower florets, from about 1 medium head

1 stalk celery, thinly sliced

1 tsp dried marjoram

1 dried bay leaf

1/2 tsp fine sea or kosher salt

2 TBSP chopped fresh dill

2 cups nondairy milk

black pepper, to taste

Remove the husks and silks from the corn. In a large mixing bowl, place the cob tip-down in the center and, holding the end, use a small knife to cut the kernels off in a downward motion so they're caught by the bowl. Repeat with remaining ears and transfer the stripped cobs to a soup pot. Set the kernels aside.

Add the garlic and habanero, if using, to the soup pot and add the water. Boil, reduce heat, and simmer, covered, for 45 minutes. Strain. This should produce about 3 cups of stock.  If you're short, add enough water to make 3 full cups. Set aside

In the now-empty soup pot, heat the TBSP of oil and saute the onion until translucent, about 10 minutes. Add the cauliflower, celery, marjoram, bay leaf, salt, and stock. Cover, reduce heat to medium-low, and cook for 5 minutes. Add the corn kernels and dill, and simmer, uncovered, another five minutes. By now, the cauliflower should be tender (if not, cover and simmer a few minutes more). Remove from heat.

Add the milk and black pepper. Pulse with an immersion blender until thickened, but still chunky. (If you don't have an immersion blender, remove a couple of cups of soup, carefully blend/process with the milk, and return it to the pot.) Adjust seasoning and reheat gently. 

Comment

Comment

Tea Sandwiches Two Ways: Tomato-Basil with Peach-Corn Creme and Cucumber-Mint with Strawberry-Balsamic Creme

Hey, welcome. Consider subscribing to our RSS feed and following us on Twitter.

cucumber-mint sandwich with strawberry-balsamic creme.jpg

These simple, refreshing sandwiches are perfect for a spread designed for casual nibbling or a light lunch paired with soup. To cram in as many of summer's flavors as possible in their freshest states, we pureed raw fruits and veggies with sweet, thick coconut cream to make two delectable spreads. Thin slices of tomato get topped with fresh basil leaves and a healthy drizzle of corn-peach creme. Pale green cucumber pairs with mint leaves and a pretty pink strawberry-balsamic creme.

If the idea of removing crusts sounds silly, it sounds less so once you realize you can use the discarded crusts to make cinnamon-sugar sticks to snack on. If that isn't convincing, feel free to leave the crusts on while you soak up late summer on wheat. 

Note: You'll need to plan to stash a couple of cans of coconut milk in the refrigerator a day or two in advance to allow time for the cream to separate. Use the thick cream for the recipe, and reserve the thinner liquid for another use.

tomato-basil tea sandwich with corn-peach creme.jpg

Tomato-Basil Tea Sandwiches with Peach-Corn Creme

Print the recipes 

For the creme

coconut cream from 1 can of full-fat coconut milk

kernels from 1 small corn cob (scant 1/2 cup) 

1 medium peach (2 1/2-inch diameter), peeled and pitted

generous pinch salt

juice of 1 small lime (generous 1 TBSP) 

Puree all ingredients until smooth. Refrigerate to thicken, or freeze for 20-30 minutes for faster results. 

To serve:  

thin tomato slices

fresh basil leaves

bread (we used Flour Head Everyday Wheat) 

Layer the tomato, basil, and creme. Sandwich, cut, if desired, and serve. 

Cucumber-Mint Tea Sandwiches with Strawberry-Balsamic Creme

For the creme

coconut cream from 1 can of full-fat coconut milk

10 medium-large trimmed and halved strawberries (about 1 cup) 

generous pinch salt

1 TBSP balsamic vinegar

Puree all ingredients until smooth. Refrigerate to thicken, or freeze for 20-30 minutes for faster results. 

To serve

thin cucumber slices

fresh mint leaves

bread (we used Flour Head Everyday Wheat) 

Layer the cucumber, mint, and creme. Sandwich, cut, if desired, and serve. 

Comment

Comment

Party Animals No. 20: Polenta Chiles Rellenos with Pineapple-Chipotle-Pepita Salsa for Grilling with Pals

Hey, welcome. Consider subscribing to our RSS feed and following us on Twitter.

polenta chiles rellenos with pineapple-chipotle-pepita salsa table.jpg

Stuffed vegetables are a great, filling grilling option. Here, creamy, savory polenta poured in tender peppers is served on a saucy-chunky blend of sweet seared pineapple, chipotles en adobo, and toasted pepitas. Brunch, dinner, whenever. Using our standard healthy skin-on, top-loaded stuffing method, along with quick-cooking yellow corn grits, makes the peppers a snap to assemble. Have a cocktail and chips with salsa to nibble while you wait for the peppers to cook. Serve with refritos and rice for a seriously satisfying and spicy meal.

And, naturally, they can be roasted in the oven, too. 

polenta chiles rellenos with pineapple-chipotle-pepita salsa messy detail.jpg

Grilled (or Roasted) Polenta Chiles Rellenos with Pineapple-Chipotle-Pepita Salsa

Print the recipe 

serves 4 

 For the peppers:

4 poblano peppers, 5-6 inches in length (2-3 inches wide) 

2 cups water

1/3 cup quick-cooking yellow corn grits / polenta

3 TBSP nutritional yeast

1/2 tsp garlic powder

1/2 tsp pimenton

1/2 tsp dried oregano

1/4 tsp dried marjoram

1/2 tsp fine sea or kosher salt

1 TBSP extra virgin olive oil (optional) 

For the salsa

1/4 cup raw pepitas

4-5 ounces large pineapple chunks (about 1/2 cup chopped) 

2 chipotles en adobo

1/4 tsp fine sea or kosher salt

Heat your grill, or heat your oven to 400 degrees.

Cut a hole around the stem of a pepper. Remove the stem, reserving, and pour all the seeds out of the pepper (shake off loose seeds, if any, from the stem, but mostly these will be anchored tight--don't worry about those). With a knife, scrape/cut out any thick membrane from the inside of the pepper, being careful not to cut through. Set aside with the top so you can match them up later and repeat with remaining peppers. 

Bring 2 cups of water to a boil. While it heats, whisk together the polenta, nutritional yeast, garlic powder, pimenton, oregano, marjoram, and salt in a bowl. When the water begins to boil, whisk in the mixture in small, steady stream. Bring back to bubbling, reduce heat to low, cover, and simmer 5 minutes, stirring occasionally. Remove the lid and cook, stirring, one additional minute. Remove from heat and stir in olive oil, if using (it adds a touch of richness, but isn't necessary). 

Spoon the polenta into the peppers, filling 1/2-3/4 inch from the top, and place the stem firmly back in place--it should create a pretty good seal. Grill until blackened and tender, about 20 minutes, flipping carefully halfway through (if you squeeze them, you'll lose filling). If roasting, transfer to a baking sheet and bake until tender and darkened, 30-40 minutes.

While the peppers cook, heat a dry skillet over medium heat and add the pepitas. Toast, tossing frequently, until they begin to pop and turn golden, 3-4 minutes. Transfer to a plate to cool a bit. Add to the hot pan the pineapple chunks and sear until lightly browned, about 2 minutes on both sides. Transfer the pineapple to a mortar and add the chipotles (remove the seeds first for a milder heat, if needed) and salt.  

Use a coffee grinder to grind the toasted pepitas to a powder. Add to the mortar and pound with the pestle until saucy, but still chunky, making sure the chipotles are well broken up. Alternately, pulse in a small food processor. 

Divide the salsa evenly among four plates and top each with a pepper. 

Comment

Comment

Dead Simple Peanut Butter Mousse

Hey, welcome. Consider subscribing to our RSS feed and following us on Twitter.

peanut butter mousse detail.jpg

Summer breakfast. Or dessert. Brunch offering, for sure. With fresh berries, or cacao nibs, maybe a drizzle of liqueur. This truly dead simple mousse takes mere minutes to put together with a food processor and disappears almost as fast.  Gently sweet, but with layers of flavor, it's as versatile as it is addictive.

peanut butter mousse spoon detail.jpg

The initial result is more of a pudding, but left to chill in the fridge, it firms up into a terrific fluffy mousse. The silken tofu gives great texture and extra protein, but its distinctive flavor is subdued (one of those no-one-would-guess dishes) once paired with rich peanut butter and seasoned with maple, vanilla, lemon, and brandy. Mmm, brandy.

A note about peanut butter: we recommend using a smooth commercial variety that contains nothing but peanuts. We use Field Day Organic Smooth Peanut Butter here, which we found at Three Rivers. While not runny, it's thinner than freshly ground peanut butter from the bulk section, and truly silky-smooth.

peanut butter mousse table.jpg

Dead Simple Peanut Butter Mousse

Print the recipe 

yields about 2 1/3 cup 

1 12-oz package firm silken tofu

1/2 cup smooth peanut butter (see note, above)

1/4 cup maple syrup (we like grade B)

2 TBSP lemon juice

1 TBSP brandy

1 tsp vanilla extract

1/4 tsp salt

Place all ingredients in a food processor fitted with the S blade. Process for 1 minute. Scrape down the sides and bottom with a rubber spatula. Process another minute. Chill for at least two hours, if you're pressed for time, or preferably overnight or from morning to late afternoon. 

Comment

Comment

Simmer-Free Savory Summer Tomato Pasta

Hey, welcome. Consider subscribing to our RSS feed and following us on Twitter.

simmer-free savory summer tomato pasta table.jpg

We're in love with summer tomatoes, and we're in love with this no-cook tomato sauce. In the time it takes to cook pasta, fresh, ripe tomatoes mingle with a few assertive ingredients (use the best quality olive oil you can afford) to produce summer eating at its easiest and most flavorful.  It works for instant dinners or unexpected casual entertaining. It just plain works. Garnish with fresh herbs, if you have some handy.

simmer-free savory summer tomato pasta detail.jpg

Simmer-Free Savory Summer Tomato Pasta

Print the recipe 

serves 2, adapted from No-Cook Pasta Sauces

3 TBSP extra virgin olive oil

1 large clove garlic

3/4 lb tomatoes, chopped

2 umeboshi, minced

1/4 tsp crushed red pepper

zest of 1 lemon

1 TBSP nutritional yeast

8 oz whole wheat penne, or pasta of choice

Combine all ingredients, except pasta, in a serving bowl, being sure to catch all the tomato juices. Stir well and set aside while you cook the pasta according to the package directions.

Drain the pasta well, add it to the serving bowl, and toss thoroughly. Serve immediately garnished with fresh herbs, if desired. 

Comment

Comment

MSV for Metro Pulse!

Hey, welcome. Consider subscribing to our RSS feed and following us on Twitter.

mp recipe story- chilies medium.jpg

Metro Pulse  has started a brand new column this week called Kitchen Tales, and we're thrilled that MSV's recipe developer (and everything else right now, too) was invited to start it up. You can check it out right here.

It's been kind of a busy month for MSV, so it seems like a good time to pause and thank all of you for reading. So thanks! 

Comment

Comment

Creamy White Bean-Broccoli Zucchini Involtini with Roasted Red Pepper Puree

Hey, welcome. Consider subscribing to our RSS feed and following us on Twitter.

zuchinni rollatini with red pepper sauce table.jpg

Equal parts fresh and convenient, this brilliantly colored zucchini involtini is as satisfying to serve to loved ones as it is to dig into on your own. Start with fat, firm zucchini, broccoli, and a pile of garlic from the freshest source you can find, then let a jar of roasted red peppers pair up with a touch of creamy tahini to produce a dead simple, eye-popping sauce. A can of white beans pureed with comforting seasonings provides a quick and substantial filling in which to suspend bright green bits of broccoli.

zuchinni rollatini with red pepper sauce produce.jpg

If you're comfortable multi-tasking, you'll find this provides an impressive presentation for not a lot of effort once the produce is chopped. If you're new to the kitchen, it's definitely do-able, but allow yourself a bit of extra time to organize the components.

As ever, we used our electric countertop grill to prep the zucchini strips before rolling. You can, of course, turn to an outdoor grill or steam the zucchini until pliable.  Note that we used a particularly fat variety of zucchini (shown above). If you can find large zucchini, the dish will be faster to make.

zuchinni rollatini with red pepper sauce detail.jpg

Creamy White Bean-Broccoli Zucchini Involtini with Roasted Red Pepper Puree

Print the recipe 

serves 3-4 

For the involtini:

1 TBSP olive oil

1 large head garlic, about 10 cloves, minced

1 medium stalk broccoli (9 oz total weight, including stalk), torn into very small florets (2 cups of florets)

1/8-1/4 tsp crushed red pepper, to taste

1 15-oz can navy beans, drained, but not rinsed

1 no-salt-added vegetable bouillon cube

1/4 tsp fine sea or kosher salt

2 TBSP nutritional yeast

freshly cracked black pepper, to taste

15 5-to-6-inch-long zucchini slices, each 1/4-inch thick and about 2 1/2 inches wide, from two very fat zucchini (1 1/2 lb total weight)

For the red pepper puree

1 16-oz jar roasted red peppers, drained (about 4 large peppers, if you prefer to freshly roast them)

1 TBSP tahini

zest of 1 lime

1/4 tsp fine sea or kosher salt

1/2 tsp dried thyme

To begin the filling, heat 1 TBSP olive oil in a small pan. Add the garlic, stir to coat, cover, reduce heat to low, and cook 10 minutes, stirring occasionally. 

Meanwhile, add all red pepper puree ingredients to a food processor and process until very smooth, about 2 minutes, stopping to scrape down the sides halfway through.  

Heat a large skillet over medium heat, add the pepper puree, and cook over medium to medium-low heat until a bit darker and fragrant, but still saucy, 5-7 minutes. Turn off heat and cover. 

When the garlic is ready, add the broccoli florets and red pepper flakes. Cook until bright green and crisp-tender, stirring frequently, about 5 minutes (again, the florets should be very small, so they cook quickly). 

Meanwhile, preheat a countertop electric grill. While it heats, quickly rinse and wipe dry the food processor and add to it the beans, bouillon cube, salt, nutritional yeast, and pepper.  Puree 30 seconds, scrape down the sides and bottom to ensure the bouillon cube isn't sticking, and puree another 30 seconds, until smooth. Stir the broccoli-garlic mixture into the bean puree.

When the grill is ready, working in batches, add the zucchini slices in a single layer, close the grill, and cook 5 minutes, undisturbed. They should be visibly seared, fragrant, and pliable, but not mushy.

Place a spoonful of filling (about 2 tsp) on one end of a zucchini strip and roll to close. Place seam-down into the pan with the red pepper puree. Repeat with remaining zucchini slices, cover the pan, turn the heat to medium-low and warm through (it won't take long). Serve immediately.

Comment

Comment

5 Fresh Mixed Drinks from the Farmers' Market: MSV for KnoxZine

Hey, welcome. Consider subscribing to our RSS feed and following us on Twitter.

msv - knoxzine - maria fresca medium.jpg

Bonus Post! Just in time for the weekend, KnoxZine has gone to press. This issue contains an article we developed for them, 5 Fresh Mixed Drinks from the Farmers' Market

A couple of notes on vegan alcohol, in case you didn't already know. Barnivore is a total treasure.  But one of our recipes calls for Vinho Verde, and Barnivore had none in its database. We contacted two companies and received correspondence indicating all Arca Nova Vinhos Verdes are vegan-friendly. Ashe's carries the white, which is what we used for our drink. (Gazela, which had been consistently stocked at Downtown Wine & Spirits, uses casein to fine their wine. Their rep was very responsive and told me he'd let me know when (not if, aw) Gazela changed to non-animal-based finings.) 

Moving on, check the rest of the drinks out:

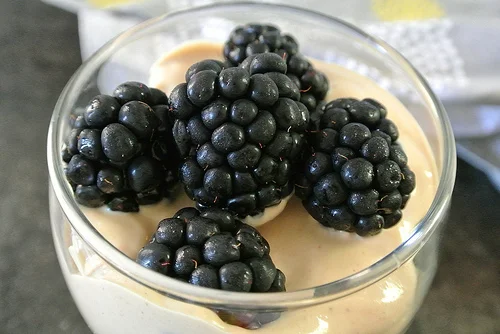
msv - knoxzine -blackberry-ginger shandy medium.jpg
msv - knoxzine - melon dash medium.jpg
msv - knoxzine - (liquid) diamonds & (cucumber) pearls medium.jpg
msv - knoxzine - peachy thai gin fizz medium.jpg

They taste as good as they look, so go get the details and the recipes on KnoxZine

Comment

4 Comments

Party Animals No. 19: Pocky

Hey, welcome. Consider subscribing to our RSS feed and following us on Twitter

pocky table.jpg

Look, pocky. Or something like it, anyway. Regardless, these pretty much sell themselves. The dough is easy to work with, they're clearly adorable, and the flavor addition options are endless. We kept our coatings light because these were not the main attraction for the party we were taking them to. In fact, it was only at our friend's generous invitation that we made these to support her spread of inspired frozen desserts.  (Did you see those? So great.) At this particular party, she offered two(!) vegan options, Aperol granita and chocolate-chile gelato. Both incredible. Do not hesitate to commission her to make your vegan frozen treats. She's incredible.

For the pocky, we made three lightly sweet drizzles/sandings/glazes:

Dark chocolate with vanilla salt

dark chocolate with vanilla salt pocky detail.jpg

Cinnamon

cinnamon pocky detail.jpg

Maple caramel with smoked salt

maple caramel with smoked salt pocky detail.jpg

Naturally, feel free to go wild with dips and glazes and serve them as the star of your own party. They won't disappoint. And if you're in the mood for something even more minimal, triple the amount of orange zest called for in the recipe and snack on them plain.

A note on kneading: Because this is such a small amount of dough, we found it pointless to fool with our stand mixer. When we tripled the recipe (it triples like a dream, by the way) for the party above, we used the mixer for convenience to free up our hands. Use your judgement, but for a single recipe, we really recommend using your paws. 

Pocky

Print the recipe 

makes 80-100 sticks , adapted from Pier via here

2 tsp active dry yeast

1/4 cup lukewarm water

3/4 cup bread flour

1/2 cup all-purpose flour

1/4 tsp salt

1 TBSP tahini

3 TBSP maple syrup

1 tsp orange zest

2 TBSP unrefined coconut oil, melted

1-2 tsp water, as needed

Combine the yeast and warm water in a small bowl and set aside to proof.

Sift the flours and salt into a mixing bowl. In another small bowl, combine the tahini and maple syrup.  

Add the yeast mixture and the maple-tahini mixture to the flours and stir to form a dough. Add the zest and melted oil and combine again. Add 1-2 tsp water as needed to get a cohesive, firm, kneadable dough. (If your dough is too wet, add a bit of flour.) Knead the dough by hand for 3-5 minutes, until smooth and elastic. Wrap in plastic and refrigerate for 1 hour.

Preheat the oven to 350. Dust a clean work surface with cornmeal.

Divide the dough in half, form one half into a ball, sprinkle a little more cornmeal on top, and roll out to 1/4-inch thickness. Slice the dough into 6x1/8-inch strips. You'll end up with 40-50 strips per half. Place the strips on a parchment-lined cookie sheet.

Bake for 5 minutes, rotate the pan 180 degrees, and bake another 5 minutes. (While the first batch bakes, roll out and cut the other half of your dough, as above.) After that, begin to watch the progress carefully as you bake them a few minutes (2-5) longer. The sticks need to be golden brown (anything less and they won't be crispy), but be careful not to let them burn. Transfer to a wire rack to cool and repeat with the other half of the dough. 

4 Comments

Comment

Seared Melon with Miso-Glazed Hericots Verts

seared melon with miso-glazed hericots verts table.jpg

If you're looking for summer on a plate, this dish has you covered. Break out your most flavorful produce, because you're really only applying gentle enhancements. The melon is prepared with a light sprinkle of sugar and orange zest while the thin green beans are seared to crisp-tender (we once again turned to our trusty electric countertop grill, but you can use a griddle on the stove top instead), then tossed in miso and olive oil for a salty-savory shot up front. Raw macadamia nuts provide a touch of richness and additional texture (which this dish really excels in). 

To round out the meal, serve an appetizer of crusty bread and a substantial, but fresh-tasting spread like the one from our white bean crostini (but pureed rather than mashed for a smooth texture that will better complement the entree).


seared melon with miso-glazed hericots verts detail.jpg

Seared Melon with Miso-Glazed Hericots Verts

Print the recipe 

serves 2  as an entree

8 slices melon (such as canary, honeydew, cantaloupe, or other meaty variety)  about 3/4-inch thick, from about half a medium melon

1 tsp natural cane sugar (evaporated cane juice) 

1 tsp orange zest

1 lb fresh hericots verts (french stringless green beans), washed, dried, and tough stem-end trimmed

2 tsp plus another 2 tsp extra virgin olive oil, divided

2 tsp red miso paste

1/2 cup raw, unsalted macadamia nuts, chopped

Heat a countertop electric grill. Meanwhile, lay the melon slices in one layer on a clean surface. Combine the sugar and orange zest and sprinkle 1/8-1/4 tsp of the mixture over each melon slice (amount of sugar will depend upon the sweetness and size of your fruit). When the grill is hot, add the melon slices in one layer--you'll likely need to do two batches--sugar-side down, close, and cook until caramelized, but still firm, about 2 minutes. Set aside. Quickly wipe down your grill plates.

Using your hands, toss the trimmed green beans with 2 tsp of oil until coated. Spread across the grill surface in no more than two layers (again, you'll need to do two or three batches), close, and cook until bright green and crisp-tender with grill marks, 7-10 minutes.

While the beans cook, whisk together the miso paste with the remaining 2 tsp olive oil in a large mixing bowl. The resulting mixture doesn't need to be smooth, you just want to loosen the paste. 

When all the beans are done, toss thoroughly with the miso-oil mix. Serve at room temperature with four slices of melon and half the green beans per plate. Top with the chopped nuts. 

Comment

2 Comments

Seriously Crowd-Pleasing Vegan Sandwiches: Tuscan Tofu Sandwich (a la Tomato Head) and Party Animals No. 18: Tofu-Pecan Meatball Sub

tofu-pecan meatball sub table.jpg

Our first approach to sandwiches is to begin loading them up with vegetables. But not today. Both of these tofu sandwiches showcase pesto and tomatoes, so it's no surprise they're both hearty and delicious. Both are  suitable for beginning cooks, but the Tuscan Tofu Sandwich is faster to prepare, especially if you have the pesto already made. The Tofu-Pecan Meatball Subs require more time, but people go insane over them. Take them to any cookout this summer, and watch them disappear. Really.

tuscan tofu sandwich a la tomato head detail.jpg

There's a lot to love on The Tomato Head menu, but we just had to veganize an old favorite using our basil pesto (TH's vegan pesto is not at all a classic basil pesto) and a simple, tender, delicately flavored braised tofu that works great on sandwiches. A real winner of a lunch, and dead simple to make. Best served, naturally, on Flour Head buns. 

Tuscan Tofu Sandwiches (a la Tomato Head)

Print the recipes 

yields 8 sandwiches 

1 lb extra firm tofu (Twin Oaks brand recommended) 

1/2 cup water

1 no-salt-added vegetable bouillon cube

8 sandwich buns

1 recipe Classic Vegan Pesto Genovese

8 sun-dried tomatoes packed in oil (about 1/2 cup), julienned

scant 3 TBSP Legumaise or other vegan mayo (optional)

Cut the tofu in half with your knife parallel to the cutting board so that you have two squares stacked on top of each other. Separate, wrap them side-by-side in a clean kitchen towel that won't leave fibers in the tofu (not terry cloth), and place a heavy object on top. Press for 20 minutes.

Take each square of tofu and cut each on both diagonals so you have a total of 8 thick triangles.

In a large, shallow skillet, combine the water and bouillon cube over high heat. Dissolve the cube and bring the broth to a boil. Add the tofu in one layer, reduce to a simmer over medium to medium-low heat, and cook, undisturbed, for 5 minutes. Flip the tofu and cook an additional 5 minutes. By this time, most of the liquid will be gone. Remove the tofu from the pan and set aside until cool enough to eat. 

While the tofu cooks, heat the oven's broiler, cut the buns in half, and toast the cut side of the buns until gently toasted.

To assemble, spread about 1 tsp of legumaise on the cut side of the bottom of the bun, if using. Place a triangle of tofu on top, and top with one julienned tomato. Spread a generous tablespoon of pesto on the cut side of the top bun and sandwich together.

tofu-pecan meatball sub detail.jpg

We owe an enormous debt to the tofu-pecan meatloaf from The Vegan Slow Cooker for this recipe (though we had to adjust the tofu recommendations, which we've had to do with several recipes in that book). The flavor is satisfyingly savory and a little nutty with an unbelievable texture. The meatballs are totally fun, and these subs are phenomenal, because pesto, but don't forget to hang onto this recipe to make wildly popular vegan burger patties. Plus, you can make them in a slow cooker, which means no oven necessary. See? Perfect for summer.

A note on tofu: All we've ever used for this recipe is unpressed Twin Oaks extra firm. We normally recommend it, because it's a great product, but the texture of these meatballs/burgers is so spot-on that we just can't vouch for the performance of other brands of tofu in its place for this recipe. If you can't get to Three Rivers to get Twin Oaks, which has a much lower water content than other tofu we've bought, try pressing a different brand of extra-firm tofu for 20 minutes, and then weigh your tofu for the recipe.

Tofu-Pecan Meatball Subs

see [Note] on yield , meatballs adapted from The Vegan Slow Cooker

For the meatballs

1 cup water

1 cup TVP (textured vegetable protein) 

1 lb Twin Oaks brand extra-firm tofu

1/2 cup pecans

3 sun-dried tomatoes packed in oil, chopped

2 TBSP low-sodium tamari

1/2 tsp liquid smoke

1 cup oat bran

1/4 cup nutritional yeast

1 tsp garlic powder

1/2 tsp fine sea or kosher salt

1 tsp dried basil

1 tsp dried oregano

1 tsp dried marjoram

For the tomatoes

1 TBSP olive oil

1 clove garlic, minced

1 28-oz can diced tomatoes, preferably fire-roasted

To assemble

12 sandwich buns [or about 6 hoagie rolls]

1 recipe Classic Vegan Pesto Genovese 

Boil the cup of water in a small sauce pan, remove from heat, stir in the TVP, and let sit 10 minutes.

Meanwhile, roughly crumble the tofu into the bowl of a food processor fitted with the S blade. Add the pecans, sun-dried tomatoes, tamari, and liquid smoke. Process well, until uniform with no large chunks of pecans. 

In a large mixing bowl, combine the oat bran, nutritional yeast, garlic powder, salt, basil, oregano, and marjoram. Stir to combine, add the tofu-pecan mixture, and stir (hands are easiest). Add the TVP and mix until incorporated. 

Note on yield: for smaller sandwich buns, form the mixture into about 40 ping-pong ball-sized meatballs for a 12-sandwich yield, with 3 meatballs per bun. (We cut these in half for a party, for a total of 24 smaller servings.) [For larger hoagie rolls, form the mixture into golf ball-sized meatballs. Yields a generous 2 dozen.]

When all meatballs are formed, place them in a lightly oiled slow cooker and cook on low for 4-5 hours [5-6 for golf-ball size]. Or bake in a 350-degree oven for 25-30 minutes, until warmed through and lightly golden. 

For the sauce, heat the oil over medium heat, add the garlic and cook for a minute, until fragrant, then add the can of tomatoes with their juices. Reduce heat and simmer until thickened, about 15 minutes.  Add the meatballs to the sauce and stir gently to coat. Keep warm.

Cut the buns and, watching carefully, toast the cut sides until golden brown under a broiler to keep the buns from getting soggy. Add 3 meatballs with sauce, spread a scant TBSP of pesto on the top of each bun and sandwich together.

With well toasted buns, these travel well wrapped in foil. They can be reheated in the foil in a hot oven for 15-20 minutes, if needed.


Finally, we'll be back next week with a fresher recipe (because seriously, summer produce is on), but the subs were one of two things we took to our first party of the summer a couple weeks ago. Part two of the party fare will be up week after next, but we'll leave you with a preview:

dark chocolate with vanilla salt pocky detail.jpg

2 Comments

Comment

Party Animals No. 17: (Birthday) Vanilla Layer Cake with Dead Simple Strawberry Chia Jam

strawberry layer cake table.jpg

  Cake. Frosting. For those with a serious sweet tooth.

Notes: Omitted the turmeric from the cake since we weren't making a yellow one.

For the frosting, we substituted refined coconut oil for both fats. After one cycle of melting and refrigerating trying to whip it on a warm day, this ended up working beautifully for the event. We also splurged by substituting the contents of one freshly scraped vanilla bean for the vanilla extract.

Because the frosting will melt at warmer room temperatures when made with coconut oil, leftovers must be refrigerated and then brought back to a warmer temperature before attempting to serve it again. But it was worth it, for us, so that we didn't have to buy additional specialty products just for this.

strawberry layer cake detail.jpg

Spreadable strawberries. Plus fat. Makes exquisite toast.

Dead Simple Strawberry Chia Jam

1/2 lb fresh strawberries, trimmed and thinly sliced

1/4 cup apple syrup  [see Note]

1 TBSP chia seeds

Bring the strawberries and apple syrup to a boil in a small sauce pan, then simmer over low to medium-low heat until the strawberries break down, about 15 minutes.

Meanwhile, grind the chia seeds to a powder in a coffee grinder.

When the berries are ready, remove the pan from heat and stir in the chia powder. Let sit at least 20 minutes, stirring occasionally, until thick. 

 [Note: If you don't have apple syrup, try using 2-3 TBSP natural cane sugar and 1 TBSP fresh lemon or lime juice.]

Comment

2 Comments

Pepita-Crusted Avocado Tacos with a Fresh Radish Relish

pepita-crusted avocado tacos with radish relish detail intro.jpg

One of the finest tacos we've ever eaten was an avocado tempura taco at a casual restaurant two blocks from the Atlantic Ocean. We'd love to have it on demand, but if there's one thing the MSV kitchen doesn't tolerate well, it's deep frying. We pretty much refuse to do it, and this little pepita-crusted avocado taco (which we prepared on the humble, but totally useful, electric countertop grill) leaves us feeling entirely vindicated.

The secret here, as with every avocado dish, is using the avocados at the right stage of ripeness: dark exterior, firm but not hard, yielding gently when pressed. Once that's achieved, get ready for a big reward in the form of perfect little tacos stuffed with plump, creamy avocado slices rolled in nutty, seasoned ground pepitas toasted to produce a stunningly aromatic golden crust. Top it off with a potent trio of cilantro, red onion, and spicy radishes (we used a particularly bold variety of black (exterior only) radishes found at the MSFM) left to mellow in lime juice. It's not the sort of blend you pile onto a tortilla chip on its own, but it balances the considerable richness of the avocado and pumpkin seeds and brightens up the whole taco beautifully. The lime juice really does mellow the flavors, but if you're sensitive to spice, try substituting a mild vegetable such as cucumber or jicama for the radishes.

pepita-crusted avocado tacos with radish relish bonus detail.jpg

Pepita-Crusted Avocado Tacos with a Fresh Radish Relish

Print the recipe 

makes about 1 1/2 dozen tacos  [see Note]

For the relish

half a medium red onion (3 oz), trimmed and very thinly sliced

2 large spicy radishes (4 oz total weight without greens), peeled and grated

1 small bunch cilantro (1/4 cup tightly packed), chopped

1/8 tsp fine sea (or kosher) salt

juice of 1 large lime (about 2 1/2 TBSP) 

For the crusted avocados:

3/4 cup raw, unsalted pepitas

1 tsp cumin

1/2 tsp pimenton (smoked paprika)

1/2 tsp fine sea (or kosher) salt

3 ripe avocados, pitted

1/4 cup chickpea flour

1 TBSP cornmeal

1/3 cup water

To serve

corn tortillas, freshly made, if possible

To make the relish, stir together all ingredients in a medium serving bowl. Cover with a towel, set aside, and let marinate for at least 1 hour.

If making fresh tortillas, prepare and cook them now before proceeding with the avocado, or heat your store-bought tortillas on a griddle. Keep them warm, covered, in a low oven.

For the avocados, heat a dry skillet over medium heat and add the pepitas. Toast, tossing frequently, until the seeds pop and begin to turn golden, a few minutes. Transfer the seeds to a plate and let cool.

Once cooled, transfer the seeds to a coffee grinder or food processor and grind well, but not to a powder.  Transfer to a pie plate and whisk in the cumin, pimenton, and salt.

Halve and pit the avocados. Cut each half lengthwise into four slices and scoop out the sliced flesh with a spoon.

Heat a countertop electric grill (alternately, heat a griddle on the stove or an outdoor grill). While it heats, whisk together the chickpea flour, cornmeal, and water. When the grill is ready, dip an avocado slice into the wet mixture, press into the ground pepitas on both sides, and place on the hot grill. Repeat with as many slices as you can fit on the grill--unless your grill is very large, you'll need to cook these in a couple of batches--before closing the lid. Cook until very fragrant and golden brown, 4-5 minutes (if using a griddle, cook one side, then flip to sear the other side).

[A note on yield: Our homemade tortillas are made with a wood press that makes thicker tortillas about five inches in diameter, whereas store-bought tortillas are six inches. Our five-inch tortillas mostly fit one avocado slice snugly, but occasionally two for smaller end pieces. Six-inch tortillas may hold more avocado slices each, resulting in a lower taco count.]


pepita-crusted avocado tacos with radish relish table.jpg

2 Comments

Comment

Red Grape and Beet Salad with Tarragon, Fresh Raspberries, and Toasted Walnuts

grape-tarragon-beet-raspberry-walnut salad table.jpg

Juicy red grapes co-star in, rather than accent, this crazy-vibrant beet salad. The grapes are paired with a pile of bold tarragon while red beetroot mellows in flavorful vinegars and a touch of sugar. The sweet and earthy combination is finished off with a handful each of fresh, sweet-tart raspberries and rich toasted walnuts. Throw together some tea sandwiches while you wait for the fruits and vegetables to marinate for a refreshing dinner or weekend lunch. 

grape-tarragon-beet-raspberry-walnut salad detail.jpg

Red Grape and Beet Salad with Tarragon, Fresh Raspberries, and Toasted Walnuts

Print the recipe 

serves 3-4 

2 large beets (11 oz total weight, root only), peeled and grated (about 2 loose cups grated beetroot) 

2 tsp red wine vinegar

1 TBSP balsamic vinegar

1 tsp natural cane sugar (evaporated cane juice) 

3 cups red seedless grapes (from 2 large bunches), halved

10 sprigs tarragon (2/3 oz total weight), leaves reserved and stems discarded

1 tsp grape seed oil

generous pinch salt

1/2 cup shelled, unsalted walnuts, roughly chopped

generous 1/2 cup fresh raspberries, washed and dried

Stir together the grated beet, both vinegars, and sugar. Set aside. In another bowl, combine the halved grapes, tarragon leaves, grape seed oil, and salt. Let both sit for an hour, stirring occasionally. 

After an hour is up, transfer the beets to a serving bowl. Heat a dry skillet over medium heat and toast the chopped walnuts until fragrant, about 3 minutes. Add to the serving bowl.

Pour the grape-tarragon mixture into the hot skillet and saute over medium-low heat until the tarragon is wilted, but still vibrant green, about 3 minutes. Add the grapes and tarragon to the serving bowl and toss very well. Add the raspberries and toss gently to distribute. Serve immediately. 

Comment